5Maintenance and Inspection
5.5.1 Jig method
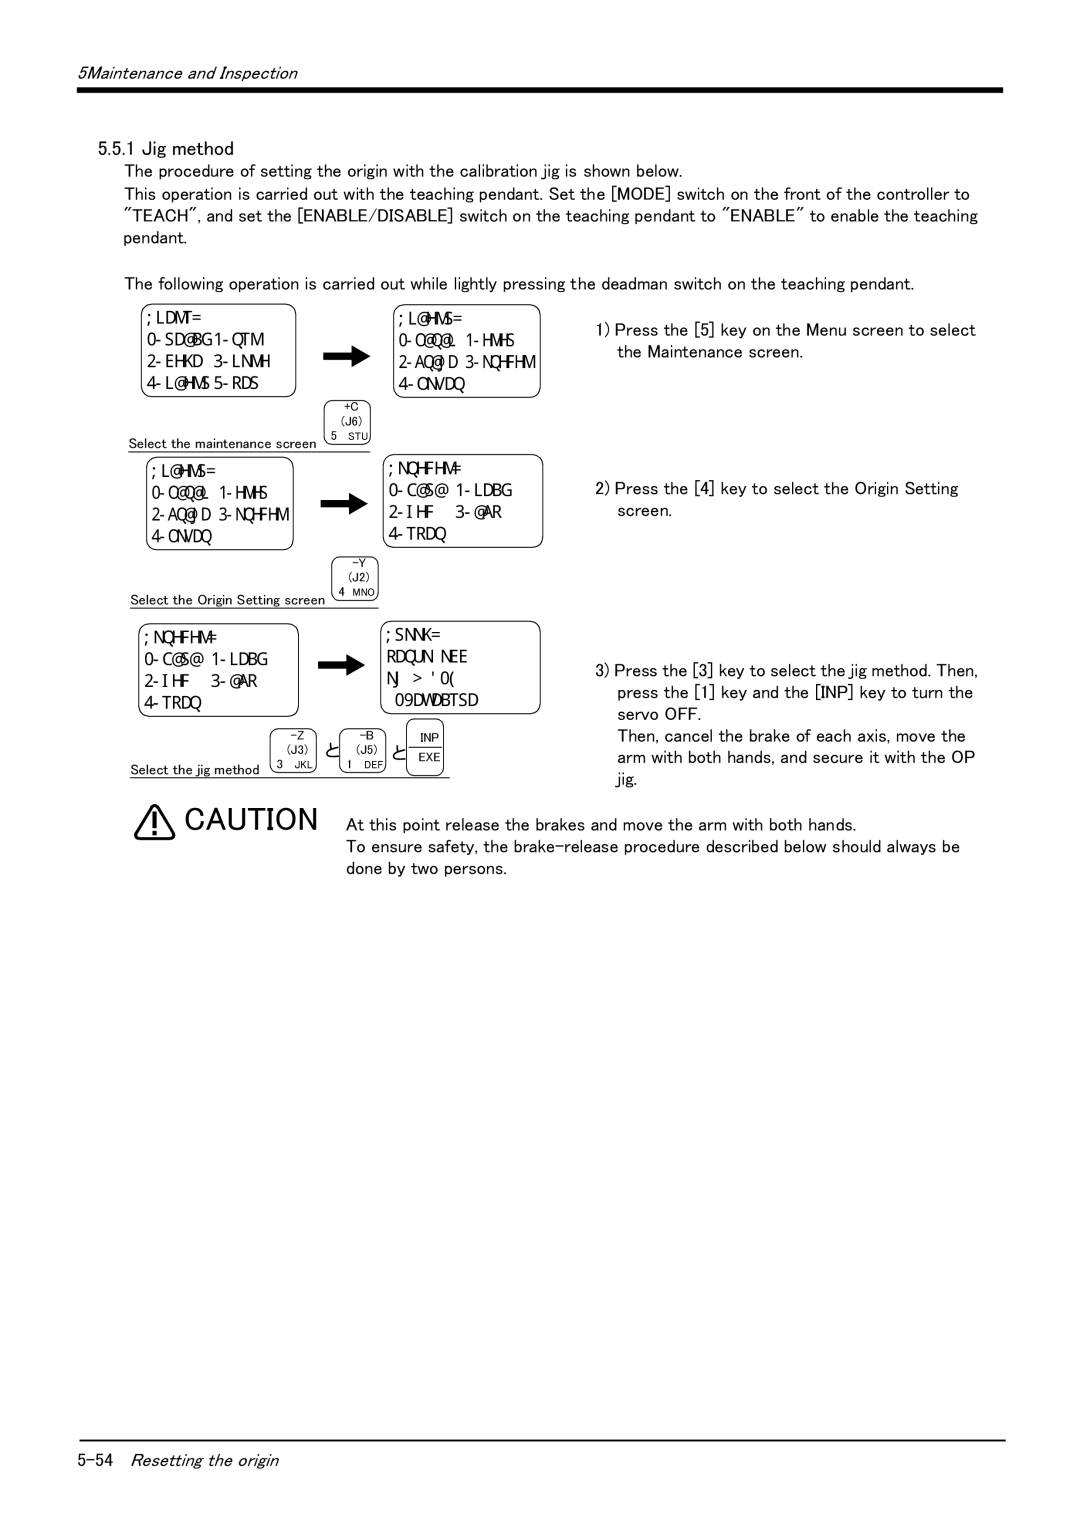
The procedure of setting the origin with the calibration jig is shown below.
This operation is carried out with the teaching pendant. Set the [MODE] switch on the front of the controller to "TEACH", and set the [ENABLE/DISABLE] switch on the teaching pendant to "ENABLE" to enable the teaching pendant.
The following operation is carried out while lightly pressing the deadman switch on the teaching pendant.
<MENU> |
|
|
|
|
| <MAINT> |
| |
1.TEACH 2.RUN |
|
|
| 1.PARAM | 2.INIT | |||
3.FILE | 4.MONI |
|
|
| 3.BRAKE | 4.ORIGIN | ||
|
|
| ||||||
|
|
| ||||||
|
| |||||||
5.MAINT 6.SET |
|
|
| 5.POWER |
| |||
|
|
| +C |
|
| |||
|
|
| (J6) |
|
| |||
Select the maintenance screen | 5 | STU |
|
| ||||
<MAINT> |
|
|
| <ORIGIN> |
| |||
1.PARAM | 2.INIT |
|
|
| 1.DATA | 2.MECH | ||
3.BRAKE | 4.ORIGIN |
|
|
|
| 3.JIG | 4.ABS | |
|
|
|
| |||||
|
|
| ||||||
5.POWER |
|
|
|
|
| 5.USER |
|
|
|
|
|
|
|
|
| ||
|
|
|
| (J2) |
|
| ||
Select the Origin Setting screen | 4 |
| MNO |
|
| |||
1)Press the [5] key on the Menu screen to select the Maintenance screen.
2)Press the [4] key to select the Origin Setting screen.
<ORIGIN> |
|
|
|
| <TOOL> | ||||
1.DATA | 2.MECH |
|
|
|
| SERVO OFF | |||
|
|
|
| ||||||
3.JIG | 4.ABS |
|
|
|
| OK ? (1) | |||
5.USER |
|
|
|
|
| 1:EXECUTE | |||
|
|
|
|
| INP | ||||
|
|
| (J3) | → (J5) | → |
|
| ||
|
| 3 | EXE | ||||||
Select the jig method | JKL | 1 DEF |
|
|
|
| |||
|
|
|
|
|
|
|
| ||
3)Press the [3] key to select the jig method. Then, press the [1] key and the [INP] key to turn the servo OFF.
Then, cancel the brake of each axis, move the arm with both hands, and secure it with the OP jig.
![]()
![]() CAUTION At this point release the brakes and move the arm with both hands.
CAUTION At this point release the brakes and move the arm with both hands.
To ensure safety, the