UTILITY SOFTWARE
■Network Setup
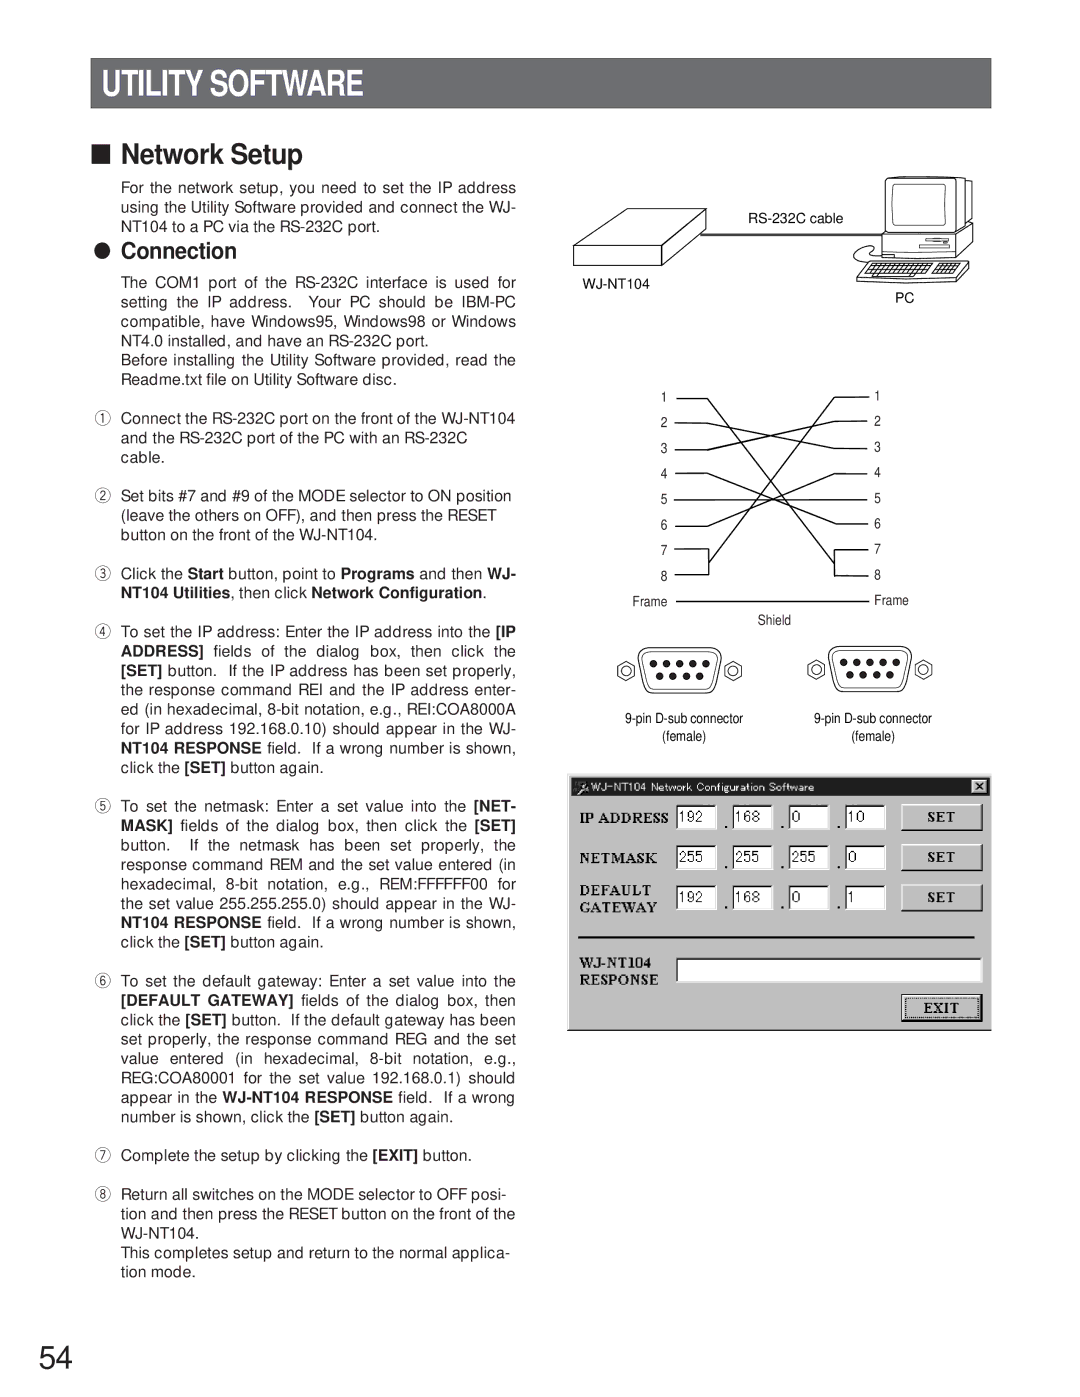
For the network setup, you need to set the IP address using the Utility Software provided and connect the WJ- NT104 to a PC via the
●Connection
The COM1 port of the
Before installing the Utility Software provided, read the Readme.txt file on Utility Software disc.
qConnect the
wSet bits #7 and #9 of the MODE selector to ON position (leave the others on OFF), and then press the RESET button on the front of the
eClick the Start button, point to Programs and then WJ- NT104 Utilities, then click Network Configuration.
rTo set the IP address: Enter the IP address into the [IP ADDRESS] fields of the dialog box, then click the [SET] button. If the IP address has been set properly, the response command REI and the IP address enter- ed (in hexadecimal,
tTo set the netmask: Enter a set value into the [NET- MASK] fields of the dialog box, then click the [SET] button. If the netmask has been set properly, the response command REM and the set value entered (in hexadecimal,
yTo set the default gateway: Enter a set value into the [DEFAULT GATEWAY] fields of the dialog box, then click the [SET] button. If the default gateway has been set properly, the response command REG and the set value entered (in hexadecimal,
uComplete the setup by clicking the [EXIT] button.
iReturn all switches on the MODE selector to OFF posi- tion and then press the RESET button on the front of the
This completes setup and return to the normal applica- tion mode.
PC
1 | 1 |
2 | 2 |
3 | 3 |
4 | 4 |
5 | 5 |
6 | 6 |
7 | 7 |
8 | 8 |
Frame | Frame |
| Shield |
(female) | (female) |
54