LOADING PAPER
Method of setting paper size and type
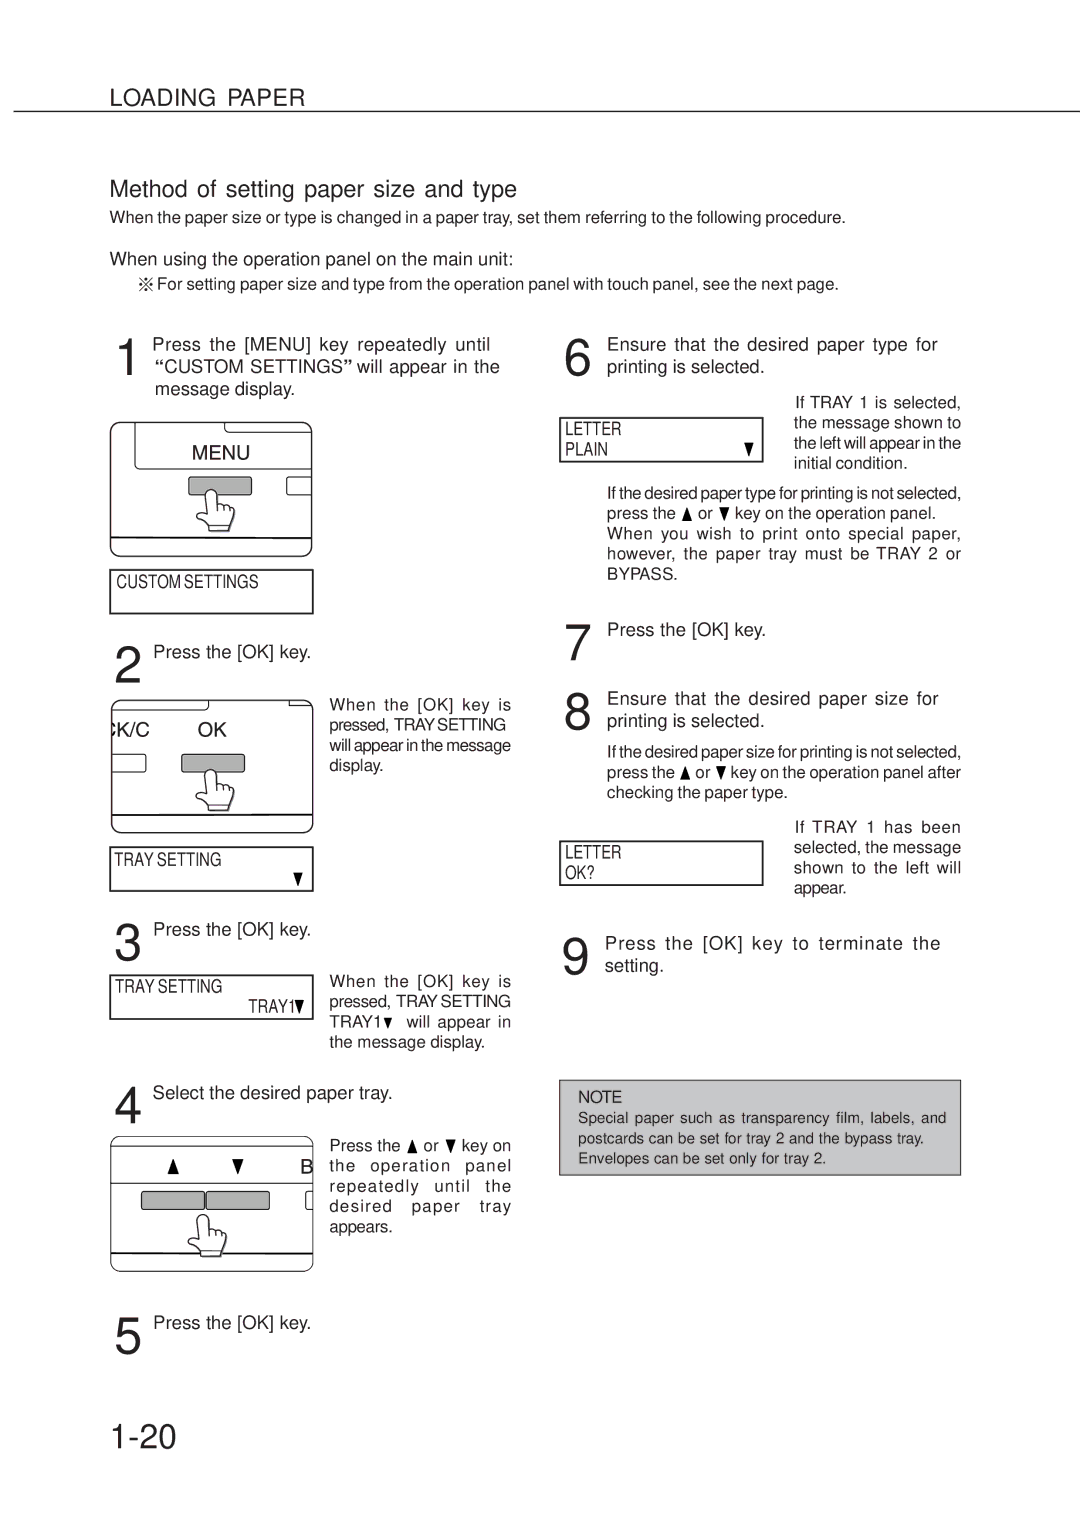
When the paper size or type is changed in a paper tray, set them referring to the following procedure.
When using the operation panel on the main unit:
![]() For setting paper size and type from the operation panel with touch panel, see the next page.
For setting paper size and type from the operation panel with touch panel, see the next page.
Press the [MENU] key repeatedly until
1 “CUSTOM SETTINGS” will appear in the message display.
CUSTOM SETTINGS
2 Press the [OK] key.
When the [OK] key is pressed,“TRAY SETTING” will appear in the message display.
TRAY SETTING
3 Press the [OK] key.
TRAY SETTING |
| When the [OK] key is |
| pressed,“TRAY SETTING | |
| TRAY1 | |
| TRAY1 ” will appear in | |
|
| |
|
| the message display. |
4 Select the desired paper tray.
Press the ![]() or
or ![]() key on the operation panel repeatedly until the desired paper tray appears.
key on the operation panel repeatedly until the desired paper tray appears.
Ensure that the desired paper type for
6 printing is selected.
| ● If TRAY 1 is selected, | |
| the message shown to | |
LETTER | ||
the left will appear in the | ||
PLAIN | ||
initial condition. | ||
|
If the desired paper type for printing is not selected, press the ![]() or
or ![]() key on the operation panel. When you wish to print onto special paper, however, the paper tray must be TRAY 2 or
key on the operation panel. When you wish to print onto special paper, however, the paper tray must be TRAY 2 or
BYPASS.
7 Press the [OK] key.
Ensure that the desired paper size for
8 printing is selected.
If the desired paper size for printing is not selected, press the ![]() or
or ![]() key on the operation panel after checking the paper type.
key on the operation panel after checking the paper type.
| ● If TRAY 1 has been | |
| selected, the message | |
LETTER | ||
shown to the left will | ||
OK? | ||
appear. | ||
|
Press the [OK] key to terminate the
9 setting.
NOTE
Special paper such as transparency film, labels, and postcards can be set for tray 2 and the bypass tray. Envelopes can be set only for tray 2.
5 Press the [OK] key.