Chapter 3 | Printing |
3.4.2Intensity
Note:
The Intensity setting has nothing to do with controlling
3.4.3Color
Note:
The setting made in this section can be saved in the file as a preferred setting for a particular print job.
See Section 3.3.4 for more detail.
Slide the lever from side to side or click either side of the arrows to control the darkness and lightness of shaded bitmap images. However the Intensity setting does not change the darkness of pure black images, or
Click the Color Control down arrow to specify whether to print in Monochrome or Color without image color matching. When printing in color, select Color without image color matching.
3.4.4Color Registration
Note:
Alignment of colors may vary due to differences in thickness or type of media.
Notes:
∙You can skip this step, and proceed with Step 4.
∙The “Error Writing to LPT1” message appears when performing the Print Alignment Test without connecting the printer to the computer.
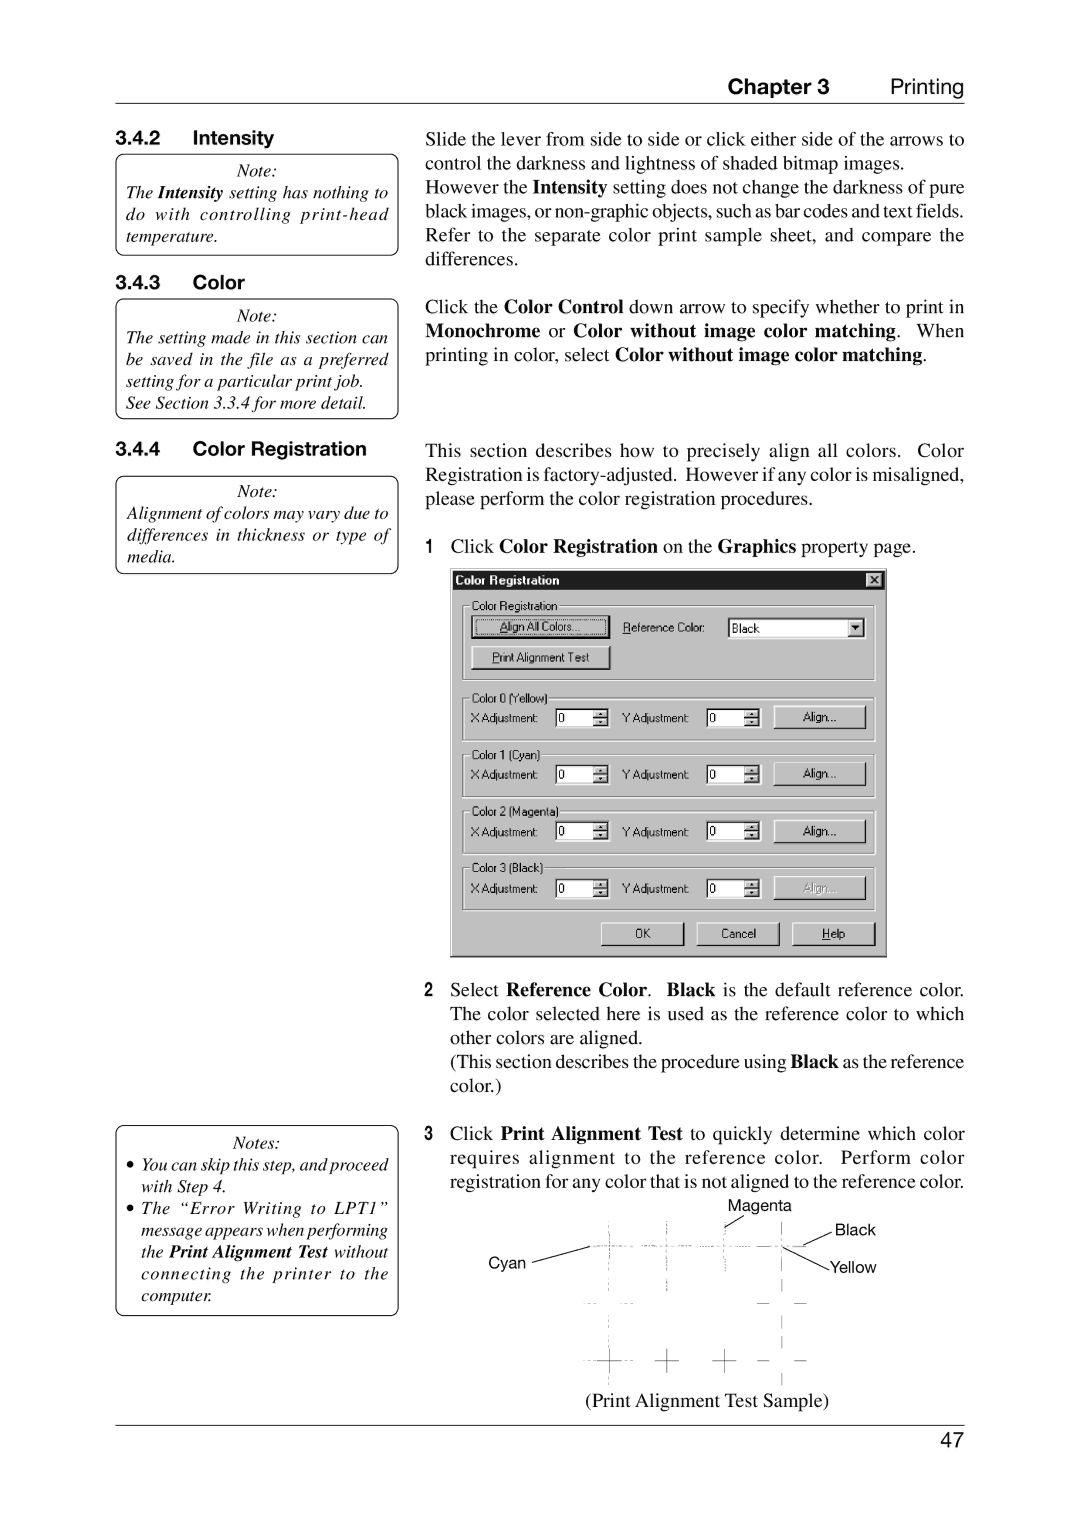
This section describes how to precisely align all colors. Color Registration is
1Click Color Registration on the Graphics property page.
2Select Reference Color. Black is the default reference color. The color selected here is used as the reference color to which other colors are aligned.
(This section describes the procedure using Black as the reference color.)
3Click Print Alignment Test to quickly determine which color requires alignment to the reference color. Perform color registration for any color that is not aligned to the reference color.
| Magenta |
| Black |
Cyan | Yellow |
(Print Alignment Test Sample)
47