Chapter 3 | Printing |
3.4.4Color Registration (Cont.)
Note:
If precise adjustment cannot be made any more, this option will be grayed
9Click More precise adjustment is necessary. Click OK, and test printing starts automatically. Repeat Step 4 to 6 until the yellow bars in X and Y are aligned close enough to black.
Yellow
out.
Black |
Y1 |
Black |
Yellow |
X1 |
Y2 | Y3 | Y4 | Y5 | Y6 | Y7 | Y8 |
X2 | X3 | X4 | X5 | X6 | X7 | X8 |
(Color 0 - Yellow Sample after Calibration)
Y9
X9
3.4.5Spot Color Setup
Note:
Click Help for a detailed explanation of the differences between Process and Spot.
10 Click Print this set of figures again. Testing will start automatically.
This section describes spot color printing. In Spot Color Setup, up to four colors can be selected. Generally, spot color printing is used for printing applications that require exact color matching. Spot color printing has the following advantages:
∙Special colors available.
∙Cost efficiency (since four ribbons are not required to produce one color).
∙Colors and text printing are sharper.
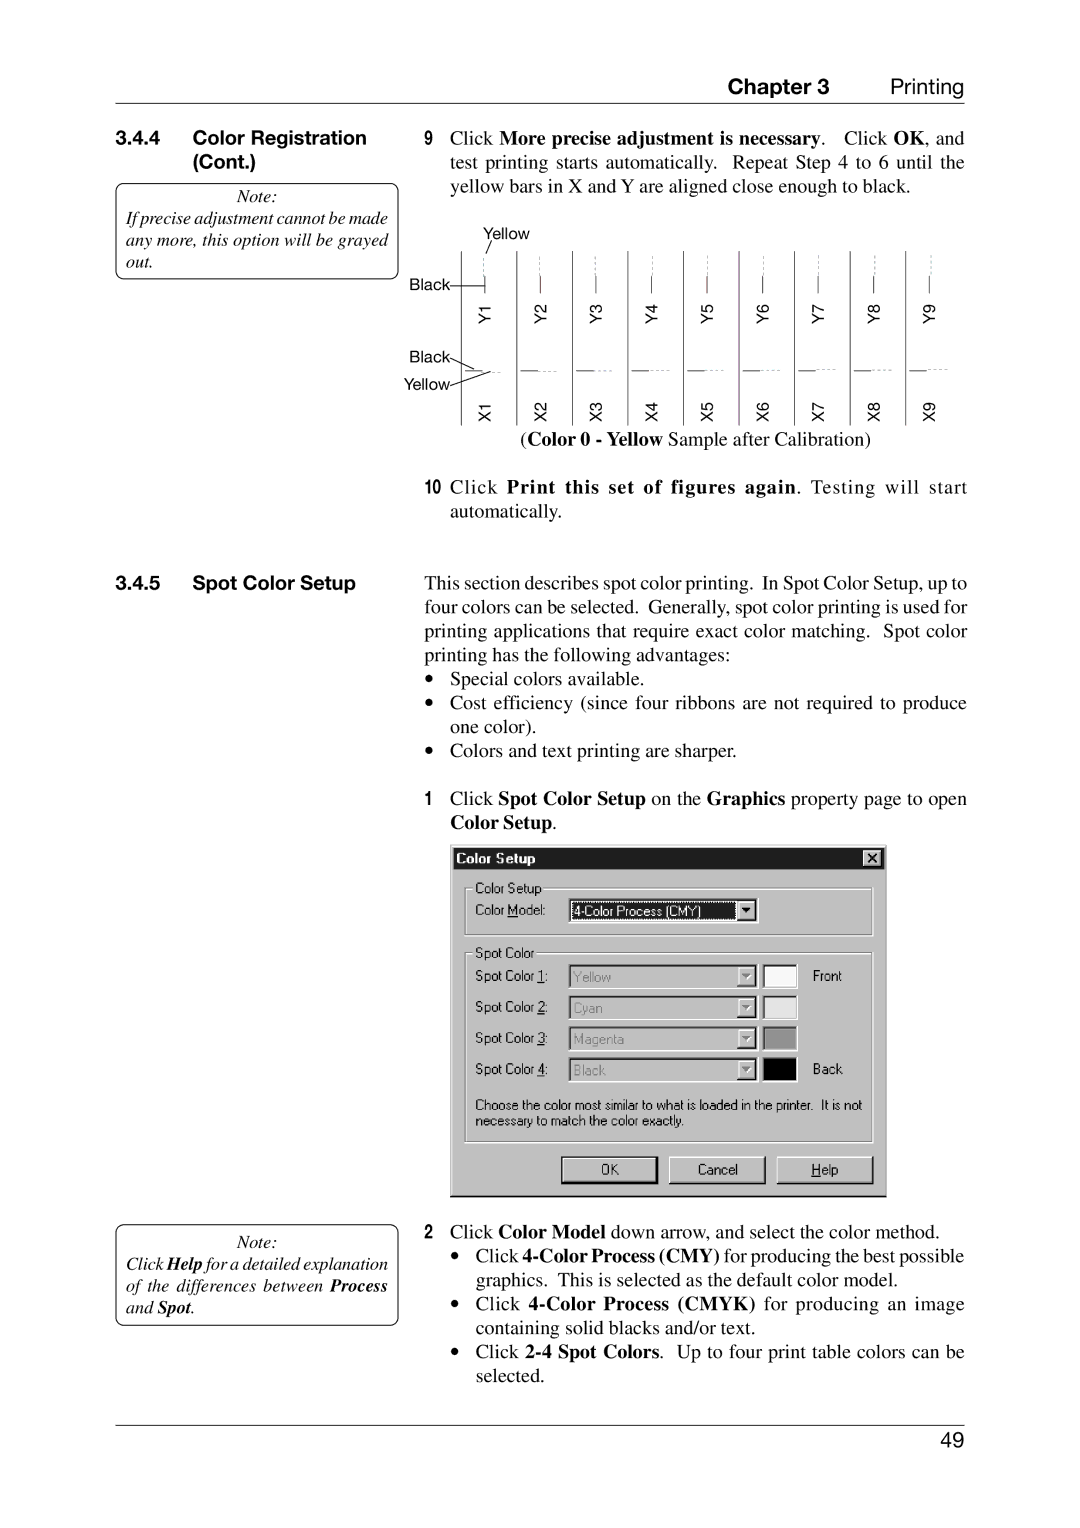
1Click Spot Color Setup on the Graphics property page to open Color Setup.
2Click Color Model down arrow, and select the color method.
∙Click
∙Click
∙Click
49
