This control complies with NFPA requirements for temporal pulse sounding of fire notification appliances.
Temporal pulse sounding for a fire alarm consists of the following:
3 pulses – pause – 3 pulses – pause – 3 pulses. . . repeated.
Sounder Connections
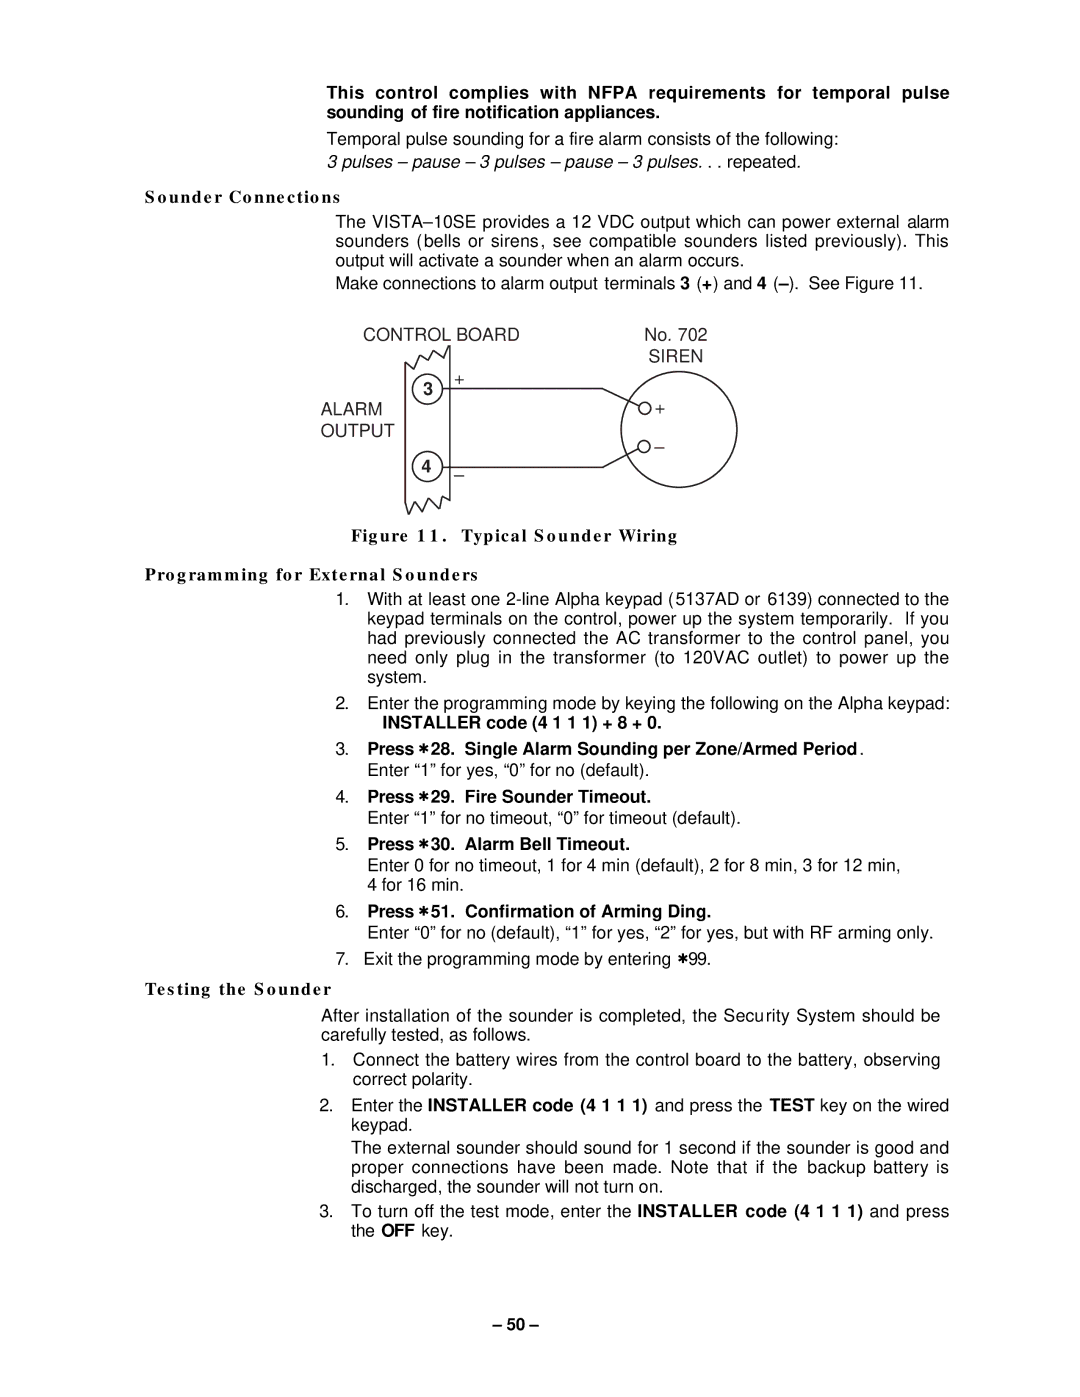
The
Make connections to alarm output terminals 3 (+) and 4
CONTROL BOARD | No. 702 | |
|
| SIREN |
3 | + |
|
| + | |
ALARM |
| |
OUTPUT |
| – |
|
| |
4–
Figure 11. Typical Sounder Wiring
Programming for External Sounders
1.With at least one
2.Enter the programming mode by keying the following on the Alpha keypad:
INSTALLER code (4 1 1 1) + 8 + 0.
3.Press ✱28. Single Alarm Sounding per Zone/Armed Period . Enter “1” for yes, “0” for no (default).
4.Press ✱29. Fire Sounder Timeout.
Enter “1” for no timeout, “0” for timeout (default).
5.Press ✱30. Alarm Bell Timeout.
Enter 0 for no timeout, 1 for 4 min (default), 2 for 8 min, 3 for 12 min, 4 for 16 min.
6.Press ✱51. Confirmation of Arming Ding.
Enter “0” for no (default), “1” for yes, “2” for yes, but with RF arming only.
7.Exit the programming mode by entering ✱99.
Testing the Sounder
After installation of the sounder is completed, the Security System should be carefully tested, as follows.
1.Connect the battery wires from the control board to the battery, observing correct polarity.
2.Enter the INSTALLER code (4 1 1 1) and press the TEST key on the wired keypad.
The external sounder should sound for 1 second if the sounder is good and proper connections have been made. Note that if the backup battery is discharged, the sounder will not turn on.
3.To turn off the test mode, enter the INSTALLER code (4 1 1 1) and press the OFF key.
– 50 –
