Compatible System Sensor
1412 | |
2412 | |
2412TH | |
| detector. |
EOL relay module (supervisory module for wired | |
| zone). |
2112/24T | |
| (57°C) heat detector. |
|
|
Programming Hard-Wired Zones
1.With at least one
2.Enter the programming mode by keying the following on the Alpha keypad:
INSTALLER code (4 1 1 1) + 8 + 0.
Data fields ✱22 RF SYSTEM, and ✱25 OUTPUT RELAY MODULE must be programmed as required before continuing.
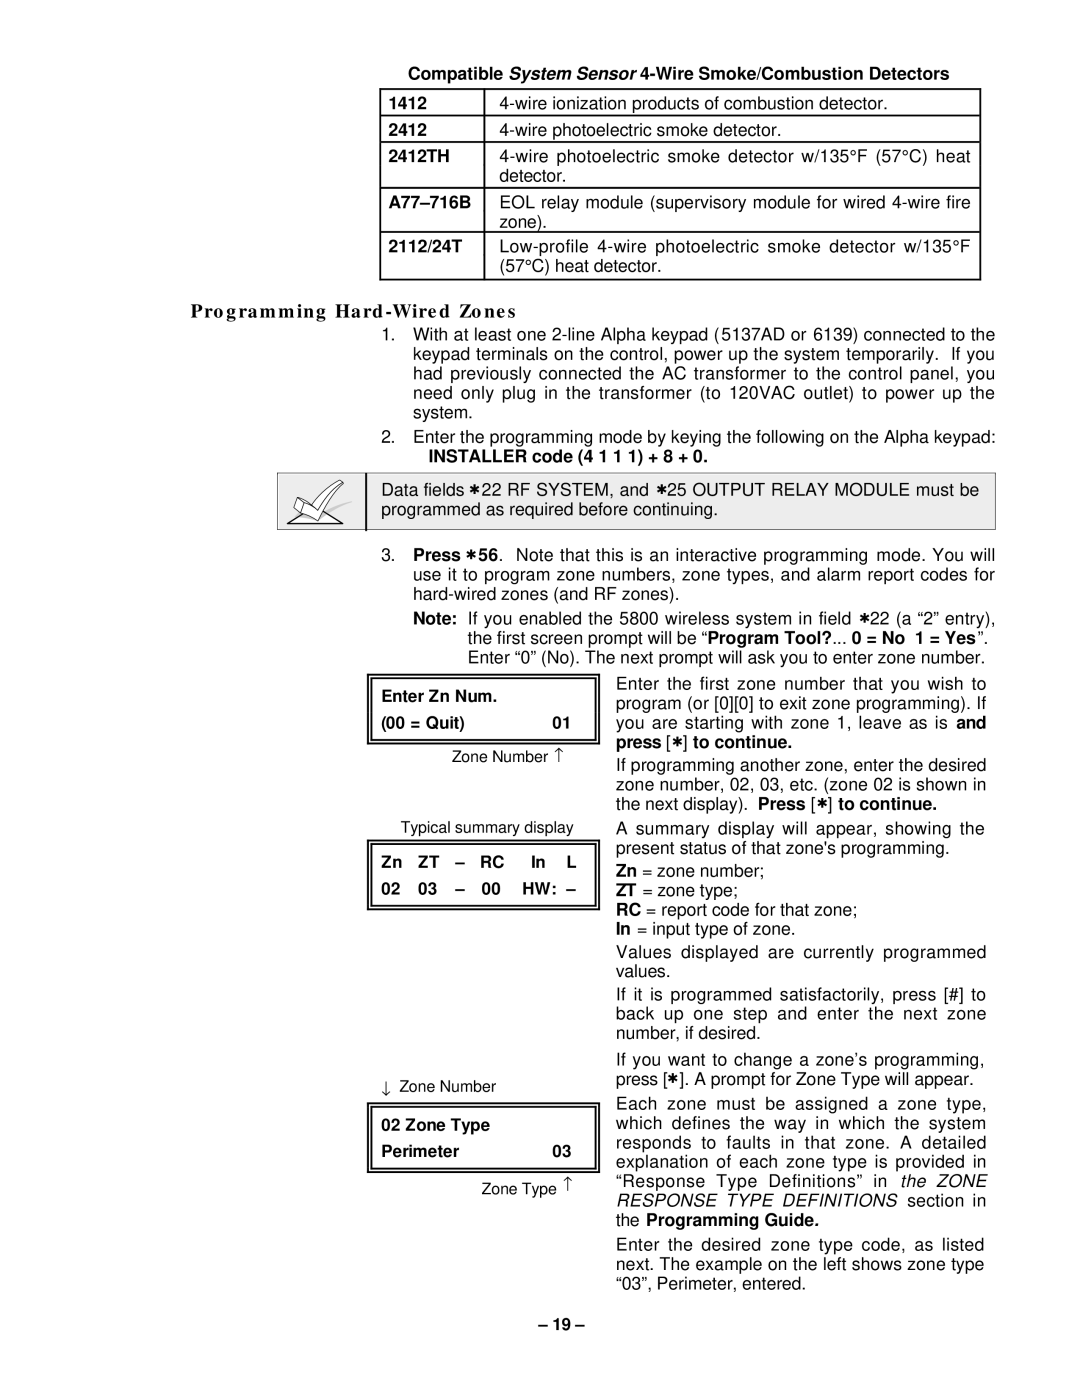
3.Press ✱56. Note that this is an interactive programming mode. You will use it to program zone numbers, zone types, and alarm report codes for
Note: If you enabled the 5800 wireless system in field ✱22 (a “2” entry), the first screen prompt will be “Program Tool?... 0 = No 1 = Yes ”. Enter “0” (No). The next prompt will ask you to enter zone number.
Enter Zn Num.
(00 = Quit) | 01 |
Zone Number ↑
Typical summary display
|
|
|
|
|
|
|
|
| Zn | ZT | – | RC | In | L |
|
| 02 | 03 | – | 00 | HW: | – |
|
|
|
|
|
|
|
|
|
|
|
|
|
|
|
|
|
↓Zone Number
02 Zone Type
Perimeter 03
Zone Type ↑
Enter the first zone number that you wish to program (or [0][0] to exit zone programming). If you are starting with zone 1, leave as is and press [✱] to continue.
If programming another zone, enter the desired zone number, 02, 03, etc. (zone 02 is shown in the next display). Press [✱] to continue.
A summary display will appear, showing the present status of that zone's programming.
Zn = zone number; ZT = zone type;
RC = report code for that zone; In = input type of zone.
Values displayed are currently programmed values.
If it is programmed satisfactorily, press [#] to back up one step and enter the next zone number, if desired.
If you want to change a zone’s programming, press [✱]. A prompt for Zone Type will appear.
Each zone must be assigned a zone type, which defines the way in which the system responds to faults in that zone. A detailed explanation of each zone type is provided in “Response Type Definitions” inthe ZONE RESPONSE TYPE DEFINITIONS section in the Programming Guide.
Enter the desired zone type code, as listed next. The example on the left shows zone type “03”, Perimeter, entered.
– 19 –
