AT-CV5000 Media Converter Chassis Installation Guide
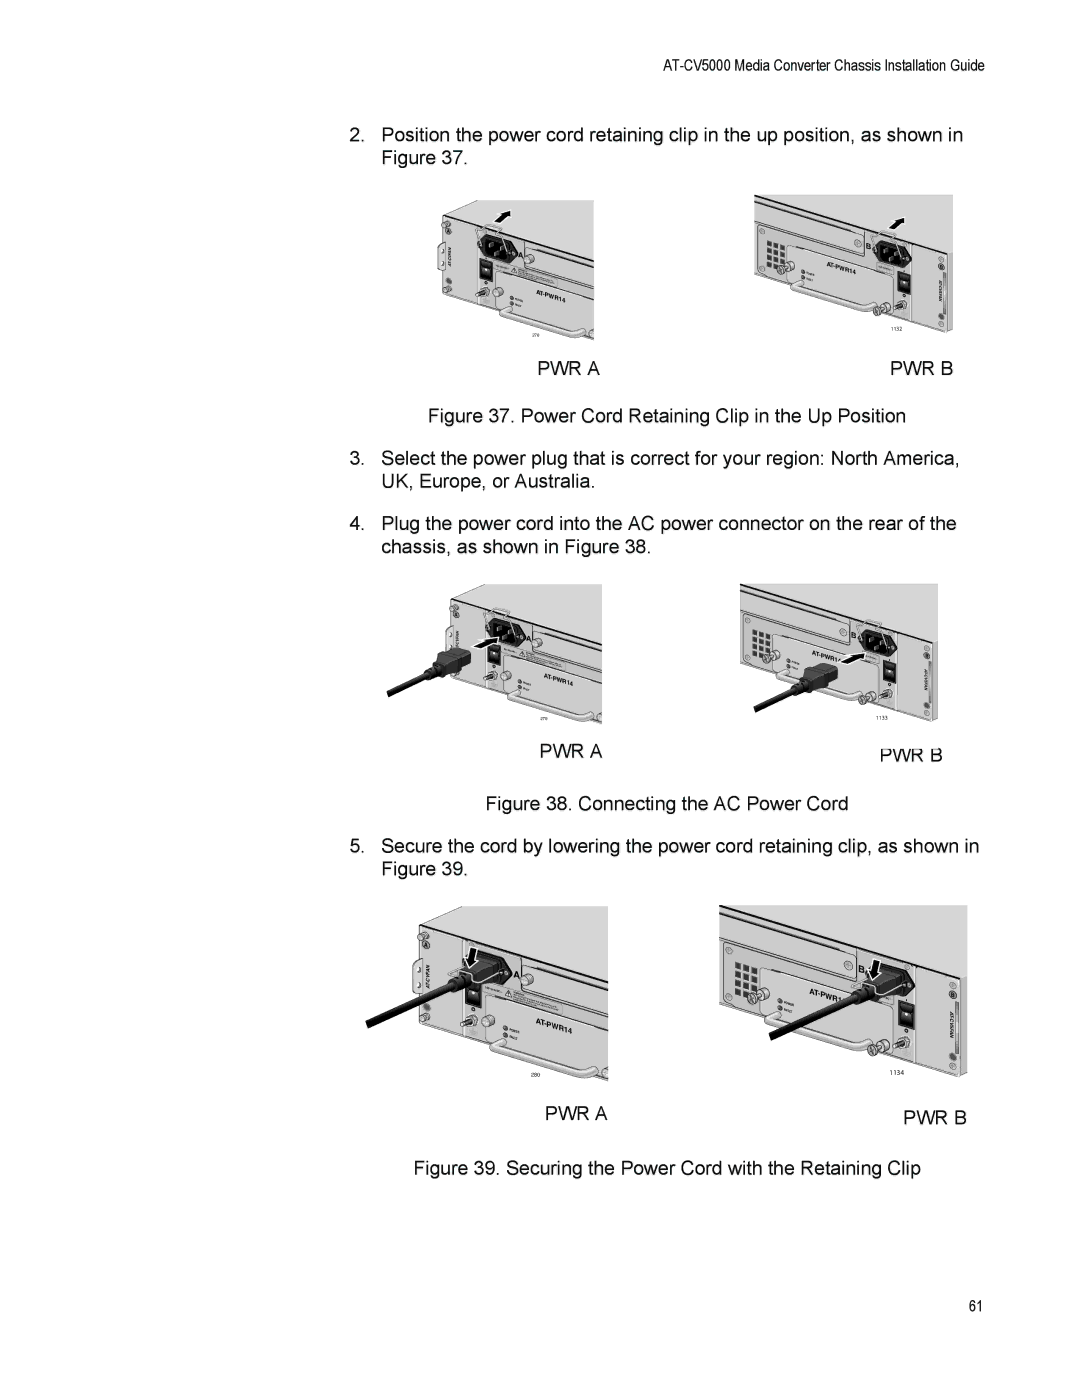
2.Position the power cord retaining clip in the up position, as shown in Figure 37.
A ![]()
|
| A |
|
|
| B |
|
|
|
|
|
|
| PWR14 |
|
| |
100- |
| inrWARNINGTehpdisuutcuentithme rigishkt have m |
|
| POWER |
|
| |
240VAC | ~ |
|
|
| AT- | 100- | 240VAC~ | B |
|
| s before seorvf eicleincgtoruircensitthh. oacnko, ndeispcoownneercint paulltp. Toower | FAULT |
|
| |||
| P | OWER | AT- | PWR14 |
|
|
| |
|
|
|
|
|
|
|
| |
| FAULT |
|
|
|
|
|
| |
|
|
|
|
|
|
| 1132 |
|
278
PWR A | PWR B |
Figure 37. Power Cord Retaining Clip in the Up Position
3.Select the power plug that is correct for your region: North America, UK, Europe, or Australia.
4.Plug the power cord into the AC power connector on the rear of the chassis, as shown in Figure 38.
A ![]()
| A |
|
|
|
| B |
|
|
|
|
|
|
|
| |
inrWARNINGTehpdisuutcusenbtitehfmeorirgieshksteohrvfaveiceleinmcgtoruircensitthh. oacnko, ndeispcoownneercint paulltp. Toower | POWER |
| B | ||||
| VAC~ |
|
|
|
|
|
|
|
|
|
| FAULT |
|
| AT- |
|
| AT- |
|
|
|
| |
| FAULT | PWR14 |
|
|
| CV5FAN | |
| WER |
|
|
|
|
| |
| PO |
|
|
|
|
|
|
|
| 279 |
|
|
| 1133 |
|
PWR A | PWR B |
Figure 38. Connecting the AC Power Cord
5.Secure the cord by lowering the power cord retaining clip, as shown in Figure 39.
A ![]()
| A |
|
|
|
|
|
|
|
|
|
|
| |
VAC~ | WARNING |
|
|
|
|
|
| This unit |
|
|
|
|
|
| reduce themight have | more than |
|
| ||
| inputs beforerisk of |
| one po |
| ||
| se | electric |
|
| ||
|
| rvicing unit.shock, | wer |
| ||
|
|
|
|
| disconnectinput. To |
|
|
|
|
|
| all power |
|
|
|
|
| AT- |
| |
| POWER |
|
|
| PW | R14 |
| F |
|
|
|
|
|
| AULT |
|
|
|
|
|
280
![]() POWER FAULT
POWER FAULT
| B |
|
B | ||
| R14 |
|
|
|
1134
PWR A | PWR B |
Figure 39. Securing the Power Cord with the Retaining Clip
61
