Using your Avaya 1120E IP Deskphone
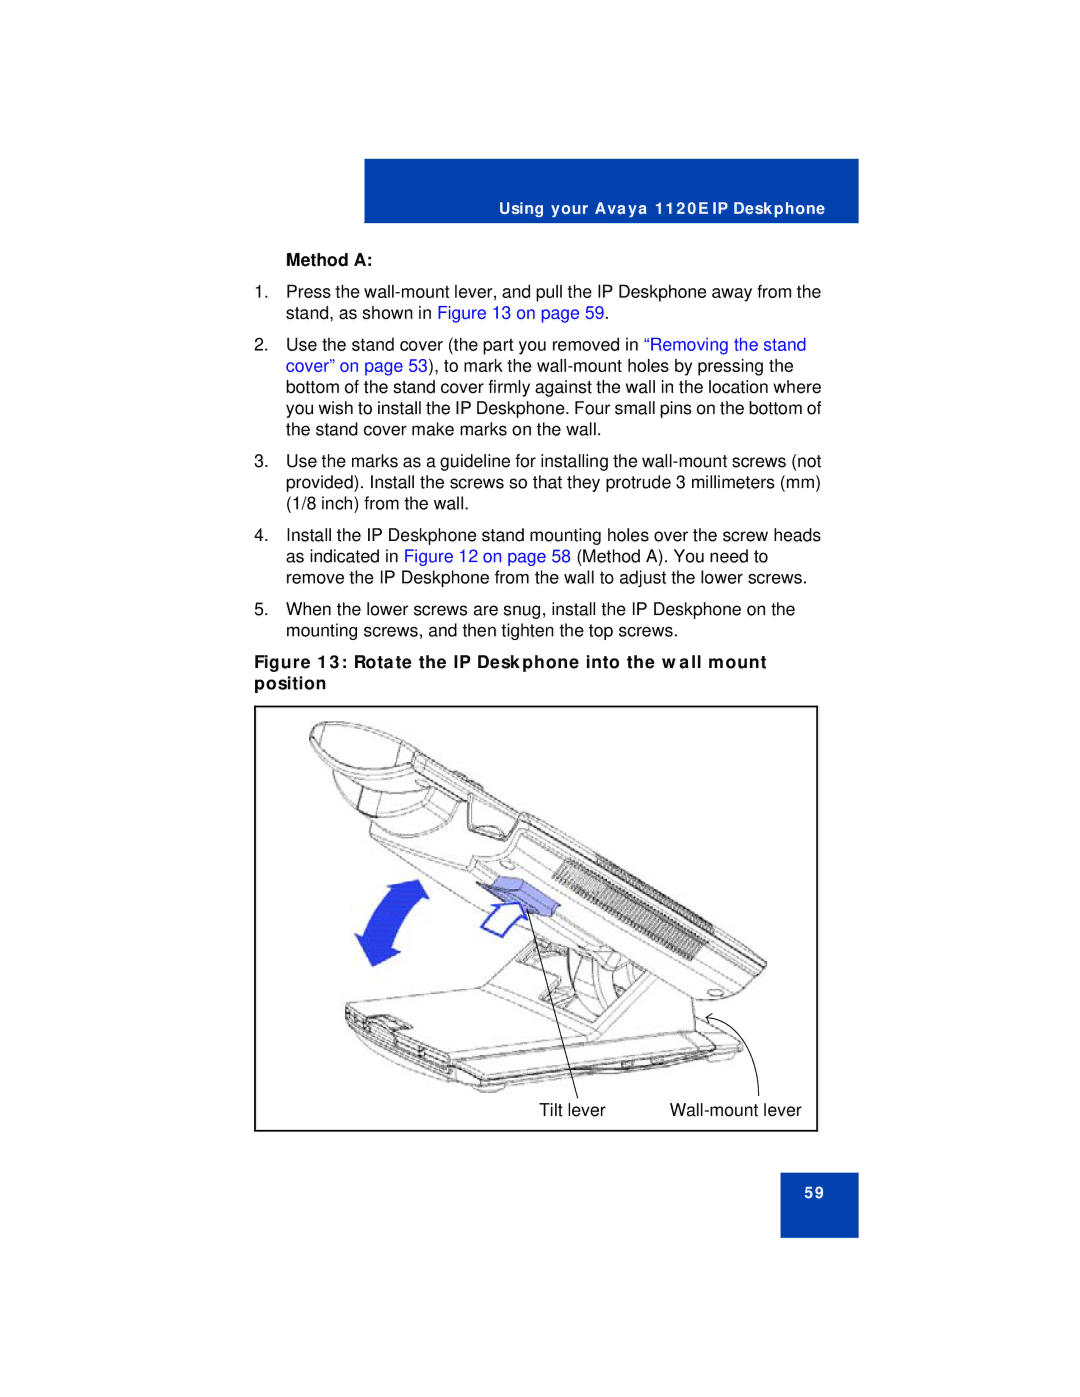
Method A:
1.Press the
2.Use the stand cover (the part you removed in “Removing the stand cover” on page 53), to mark the
3.Use the marks as a guideline for installing the
4.Install the IP Deskphone stand mounting holes over the screw heads as indicated in Figure 12 on page 58 (Method A). You need to remove the IP Deskphone from the wall to adjust the lower screws.
5.When the lower screws are snug, install the IP Deskphone on the mounting screws, and then tighten the top screws.
Figure 13: Rotate the IP Deskphone into the wall mount position
Tilt lever | |
|
|
59