CHAPTER 5 PERIODIC MAINTENANCE
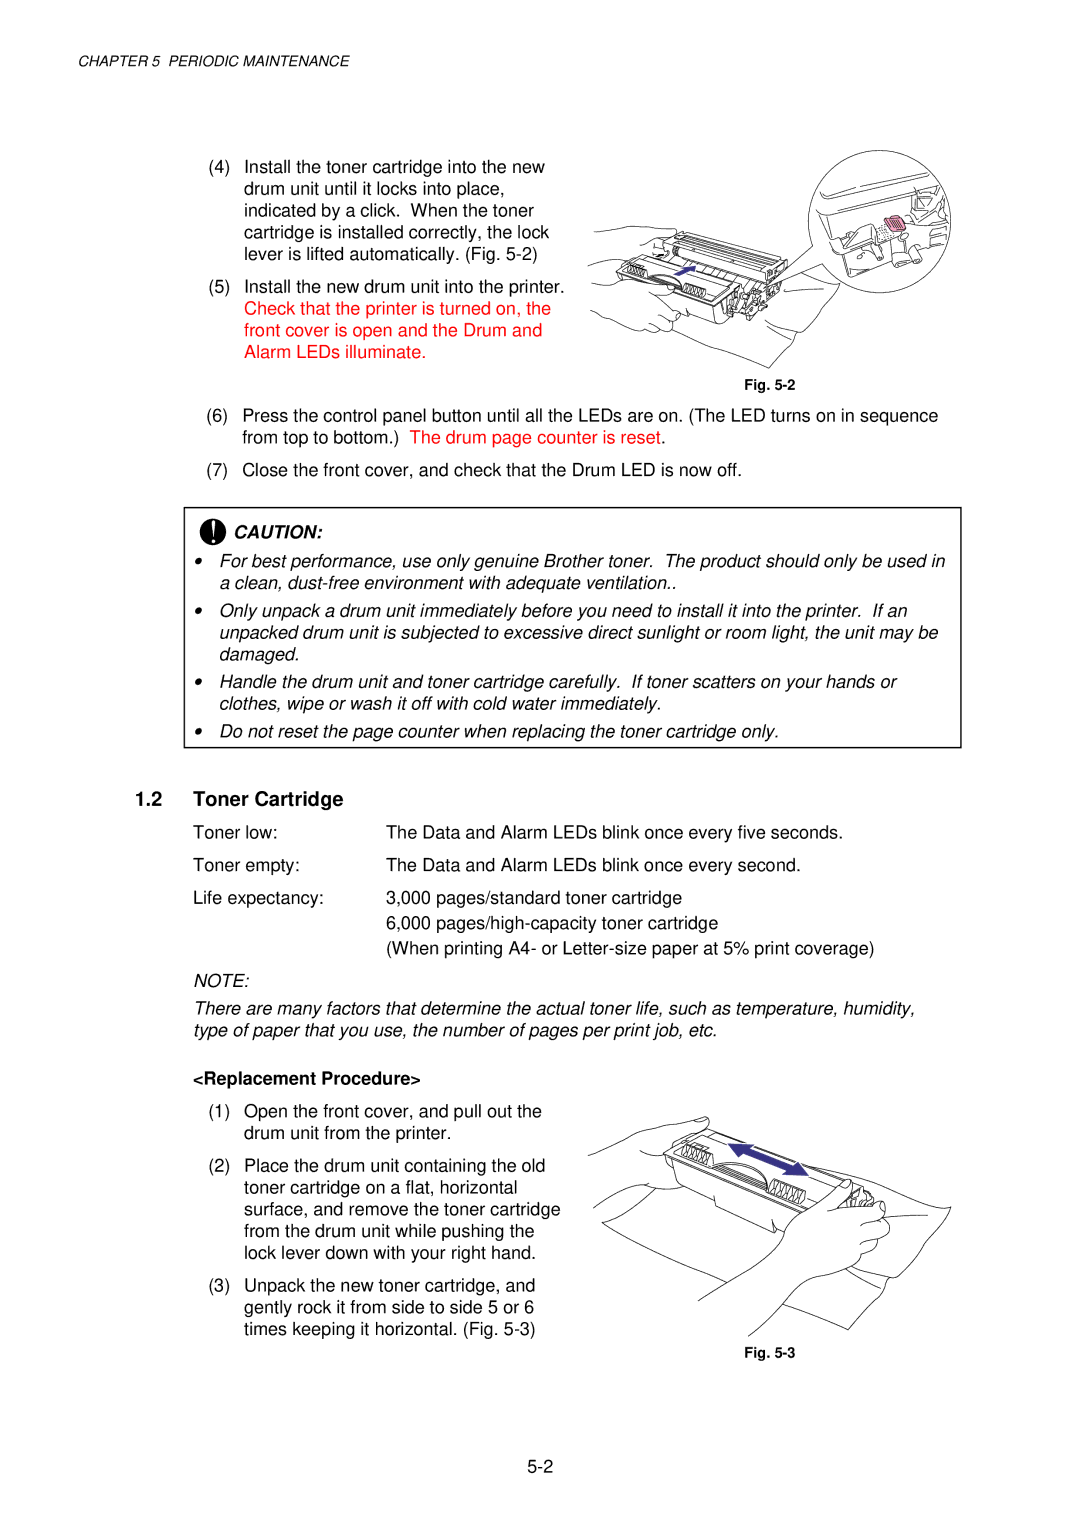
(4) Install the toner cartridge into the new drum unit until it locks into place, indicated by a click. When the toner cartridge is installed correctly, the lock lever is lifted automatically. (Fig.
(5) Install the new drum unit into the printer. Check that the printer is turned on, the front cover is open and the Drum and Alarm LEDs illuminate.
Fig.
(6)Press the control panel button until all the LEDs are on. (The LED turns on in sequence from top to bottom.) The drum page counter is reset.
(7)Close the front cover, and check that the Drum LED is now off.
!CAUTION:
•For best performance, use only genuine Brother toner. The product should only be used in a clean,
•Only unpack a drum unit immediately before you need to install it into the printer. If an unpacked drum unit is subjected to excessive direct sunlight or room light, the unit may be damaged.
•Handle the drum unit and toner cartridge carefully. If toner scatters on your hands or clothes, wipe or wash it off with cold water immediately.
•Do not reset the page counter when replacing the toner cartridge only.
1.2Toner Cartridge
Toner low: | The Data and Alarm LEDs blink once every five seconds. |
Toner empty: | The Data and Alarm LEDs blink once every second. |
Life expectancy: | 3,000 pages/standard toner cartridge |
| 6,000 |
| (When printing A4- or |
NOTE:
There are many factors that determine the actual toner life, such as temperature, humidity, type of paper that you use, the number of pages per print job, etc.
<Replacement Procedure>
(1)Open the front cover, and pull out the drum unit from the printer.
(2) Place the drum unit containing the old toner cartridge on a flat, horizontal surface, and remove the toner cartridge from the drum unit while pushing the lock lever down with your right hand.
(3)Unpack the new toner cartridge, and gently rock it from side to side 5 or 6 times keeping it horizontal. (Fig.
Fig.
