Unpacking Your Hardware Option
When you remove an option from its shipping carton, you may find it wrapped in antistatic packing material designed to protect it from electrostatic damage. Do not remove the packing material until you are ready to install the option.
CAUTION: See “Protecting Against Electrostatic Discharge” in the safety instructions at the front of this guide.
Removing the Computer Cover
Use the following procedure to remove the computer cover:
1.Turn off your computer and peripherals, and observe the Warning for Your Personal Safety and Protection of Your Equipment described earlier in this chapter. Also observe the safety instructions at the front of this guide.
2.If you have installed a padlock through the padlock ring on the back panel (see Figure
padlock ![]() ring
ring
Figure 5-1. Padlock Installed
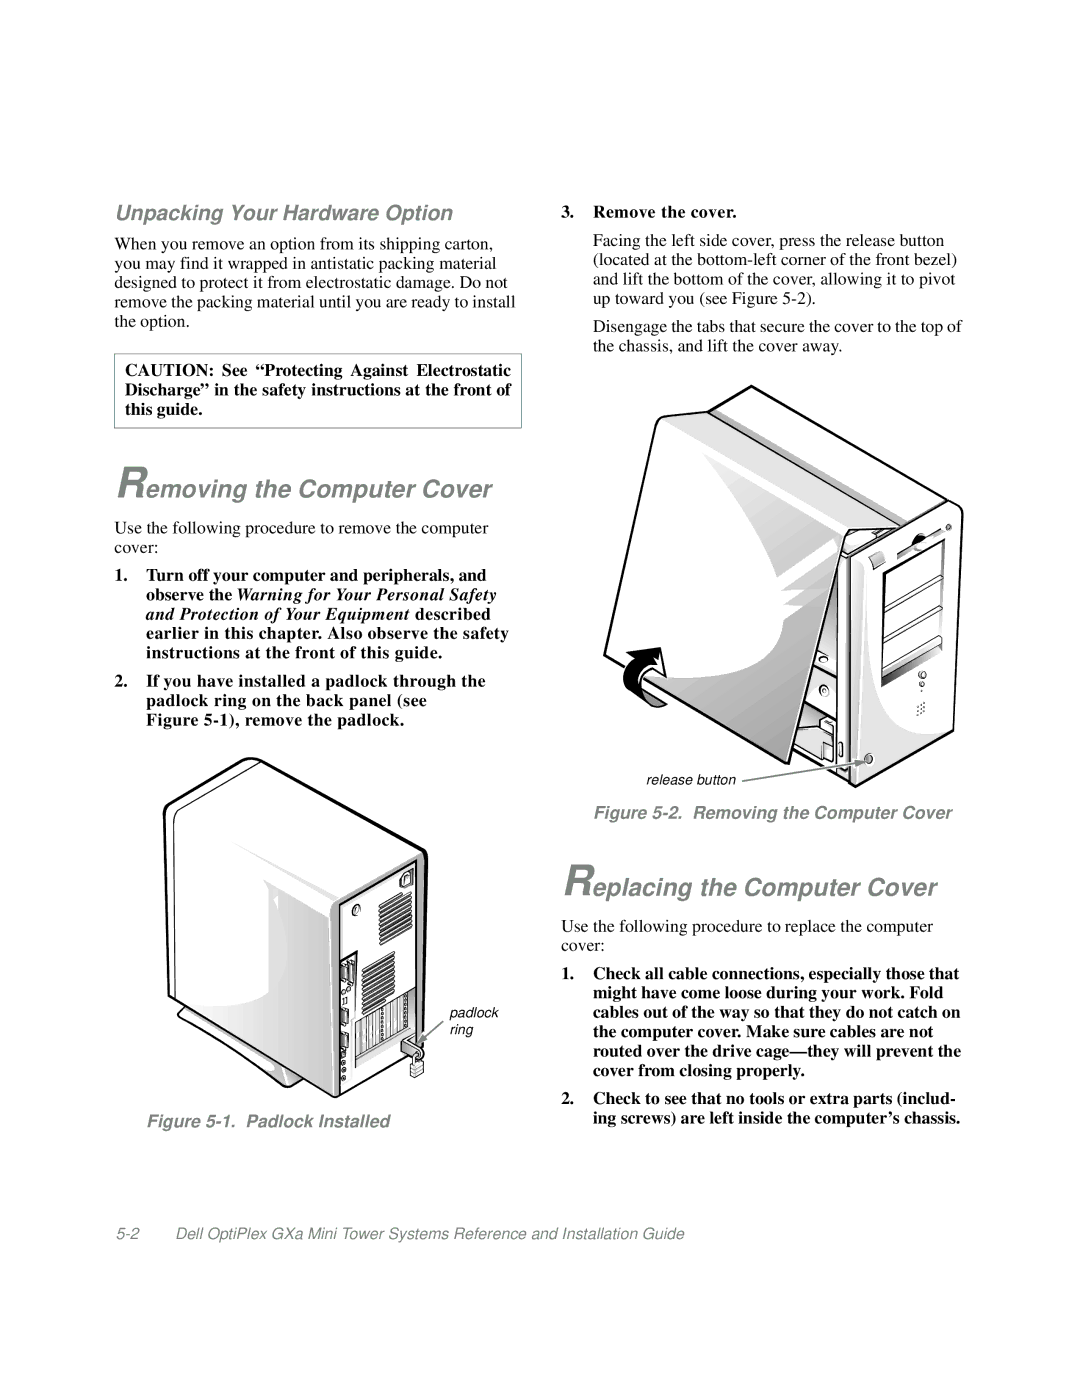
3.Remove the cover.
Facing the left side cover, press the release button (located at the
Disengage the tabs that secure the cover to the top of the chassis, and lift the cover away.
release button ![]()
![]()
![]()
Figure 5-2. Removing the Computer Cover
Replacing the Computer Cover
Use the following procedure to replace the computer cover:
1.Check all cable connections, especially those that might have come loose during your work. Fold cables out of the way so that they do not catch on the computer cover. Make sure cables are not routed over the drive
2.Check to see that no tools or extra parts (includ- ing screws) are left inside the computer’s chassis.