Removing the Expansion-Card Cage
Use the following procedure to remove the expansion- card cage:
1.Remove the computer cover as instructed in “Removing the Computer Cover” found earlier in this chapter.
2.Check any cables connected to expansion cards through the
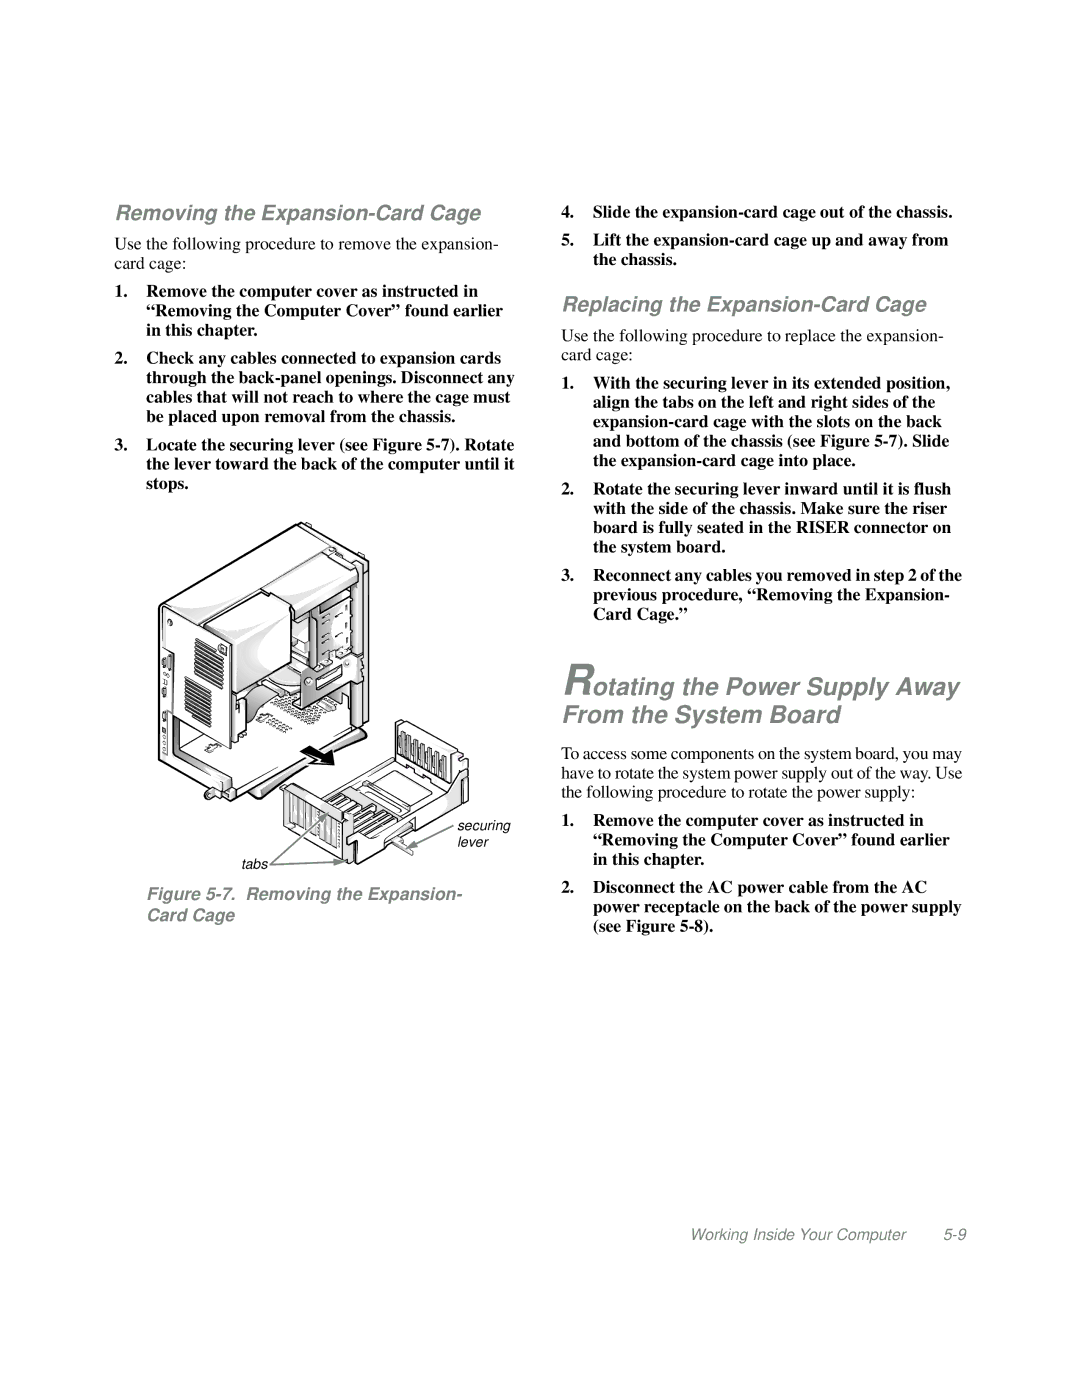
3.Locate the securing lever (see Figure
![]() securing
securing
lever
tabs ![]()
![]()
![]()
![]()
Figure 5-7. Removing the Expansion- Card Cage
4.Slide the
5.Lift the
Replacing the Expansion-Card Cage
Use the following procedure to replace the expansion- card cage:
1.With the securing lever in its extended position, align the tabs on the left and right sides of the
2.Rotate the securing lever inward until it is flush with the side of the chassis. Make sure the riser board is fully seated in the RISER connector on the system board.
3.Reconnect any cables you removed in step 2 of the previous procedure, “Removing the Expansion- Card Cage.”
Rotating the Power Supply Away From the System Board
To access some components on the system board, you may have to rotate the system power supply out of the way. Use the following procedure to rotate the power supply:
1.Remove the computer cover as instructed in “Removing the Computer Cover” found earlier in this chapter.
2.Disconnect the AC power cable from the AC power receptacle on the back of the power supply (see Figure
Working Inside Your Computer |