ISDN Line Termination
In Australia, if you are installing a DIVA T/A with an S/T interface, you must correctly set up ISDN line termination to ensure the proper operation of your equipment.
To determine your termination requirements, see page 130.
About Setting ISDN Line Termination
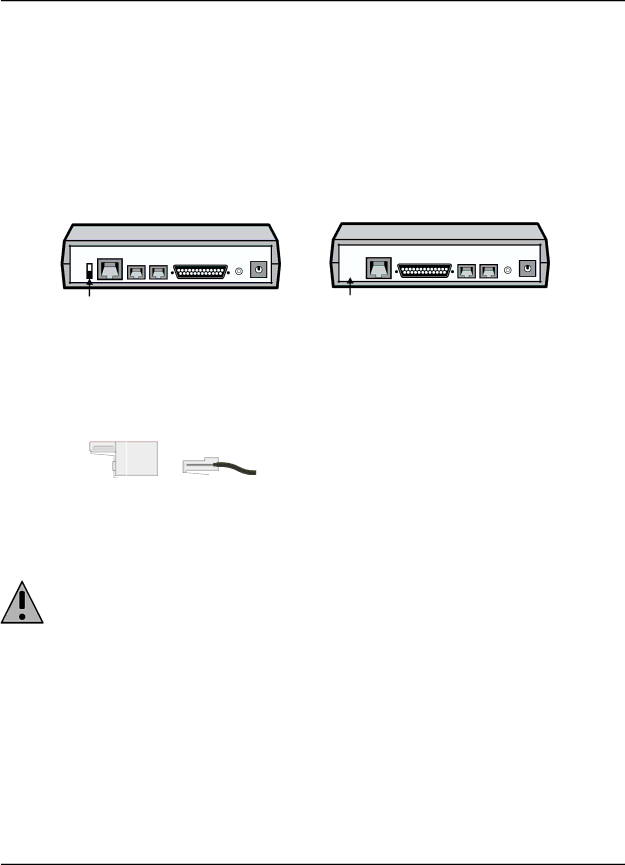
To set ISDN line termination, you may have to install a terminating resistor or set a switch on the back of the DIVA T/A, depending on the model. To learn how to set ISDN line termination for your particular device, refer to the diagram below.
100 | ISDN | Phone 2 | Serial | ISDN | Phone 1 | Phone 2 |
Phone 1 | Serial | |||||
On |
|
| Reset |
|
| Reset |
|
|
|
|
|
| |
Off |
|
|
|
|
|
|
100 ohm ISDN Line Termination Switch (external terminating resistor not needed)
No ISDN Line Termination Switch (external terminating resistor provided)
Installing the resistor
If termination is required and your DIVA T/A does not have a 100 ohm ISDN Line Termination Switch, install the 100 ohm terminating resistor that is included in your package as follows:
1Insert the
Terminating ISDN
Resistor Cable
2Insert the resistor into the ISDN port on the back of your DIV AT/A.
3Insert the other end of your ISDN cable into your NT1.
Note: The terminating resistor can also be plugged into the other end of the ISDN cable, then plugged into the NT1 (instead of into the back of the DIVA T/A). The resistor will work as long as it is between the DIVA T/A and the NT1; do not place the resistor between the NT1 and the U interface.
