Updating Firmware
Other Operating Systems
Procedure for updating the firmware using Windows 3.x, Windows for Workgroups 3.11, DOS, OS/2, Macintosh (prior to System 7), and Others
When you update your DIVA T/A firmware, the current profile configurations might get erased. It is recommended, therefore, that you record your current settings and SPID numbers before updating (use the AT command AT&V or AT@MENU with any terminal emulation program to view the current settings).
To update your DIVA T/A:
1Start a
2Configure the terminal to talk to the DIVA T/A ISDN Modem.
3Type AT$Z.
4Type at@load (this command is case sensitive).
5Start the
6Select the firmware file required by your model of DIVA T/A from wherever it is located (your \TEMP directory, for example). Firmware files can also be found in the \FIRMWARE directory of your DIVA T/A CD.
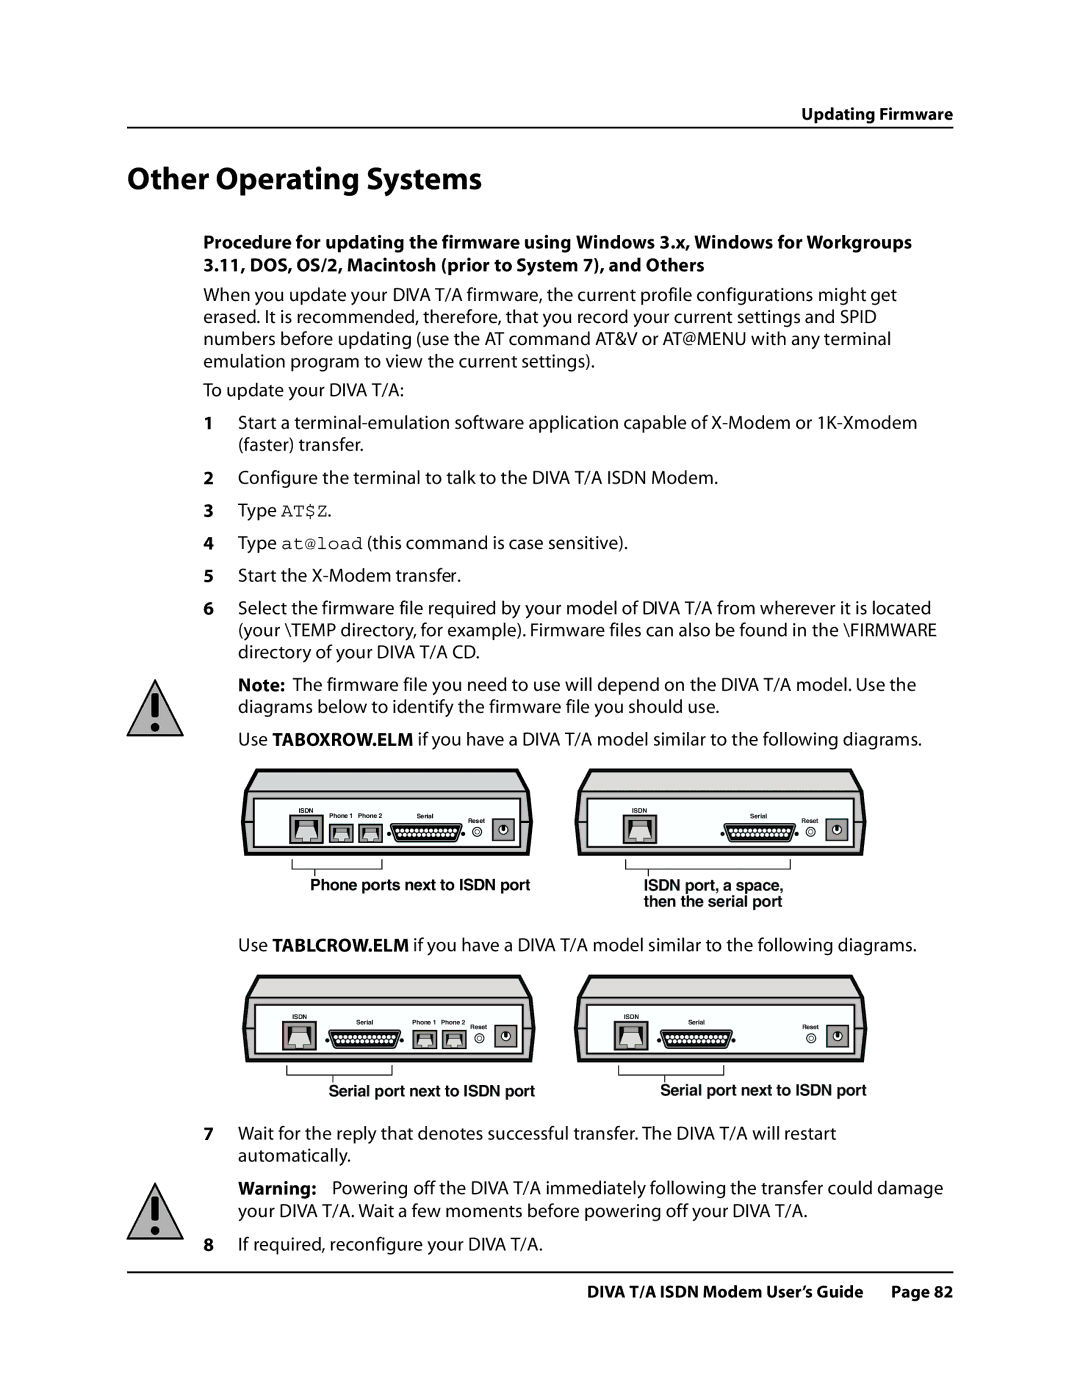
Note: The firmware file you need to use will depend on the DIVA T/A model. Use the diagrams below to identify the firmware file you should use.
Use TABOXROW.ELM if you have a DIVA T/A model similar to the following diagrams.
ISDN
|
|
|
| Phone 1 Phone 2 | Serial | ||
|
|
|
|
|
|
|
|
|
|
|
|
|
|
|
|
|
|
|
|
|
|
|
|
|
|
|
|
|
|
|
|
|
|
|
|
|
|
|
|
| ISDN |
Reset | Serial |
Reset |
Phone ports next to ISDN port | ISDN port, a space, |
| then the serial port |
Use TABLCROW.ELM if you have a DIVA T/A model similar to the following diagrams.
ISDN
Serial | Phone 1 Phone 2 |
Reset
ISDN
Serial
Reset
Serial port next to ISDN port | Serial port next to ISDN port |
7Wait for the reply that denotes successful transfer. The DIVA T/A will restart automatically.
Warning: Powering off the DIVA T/A immediately following the transfer could damage your DIVA T/A. Wait a few moments before powering off your DIVA T/A.
8If required, reconfigure your DIVA T/A.