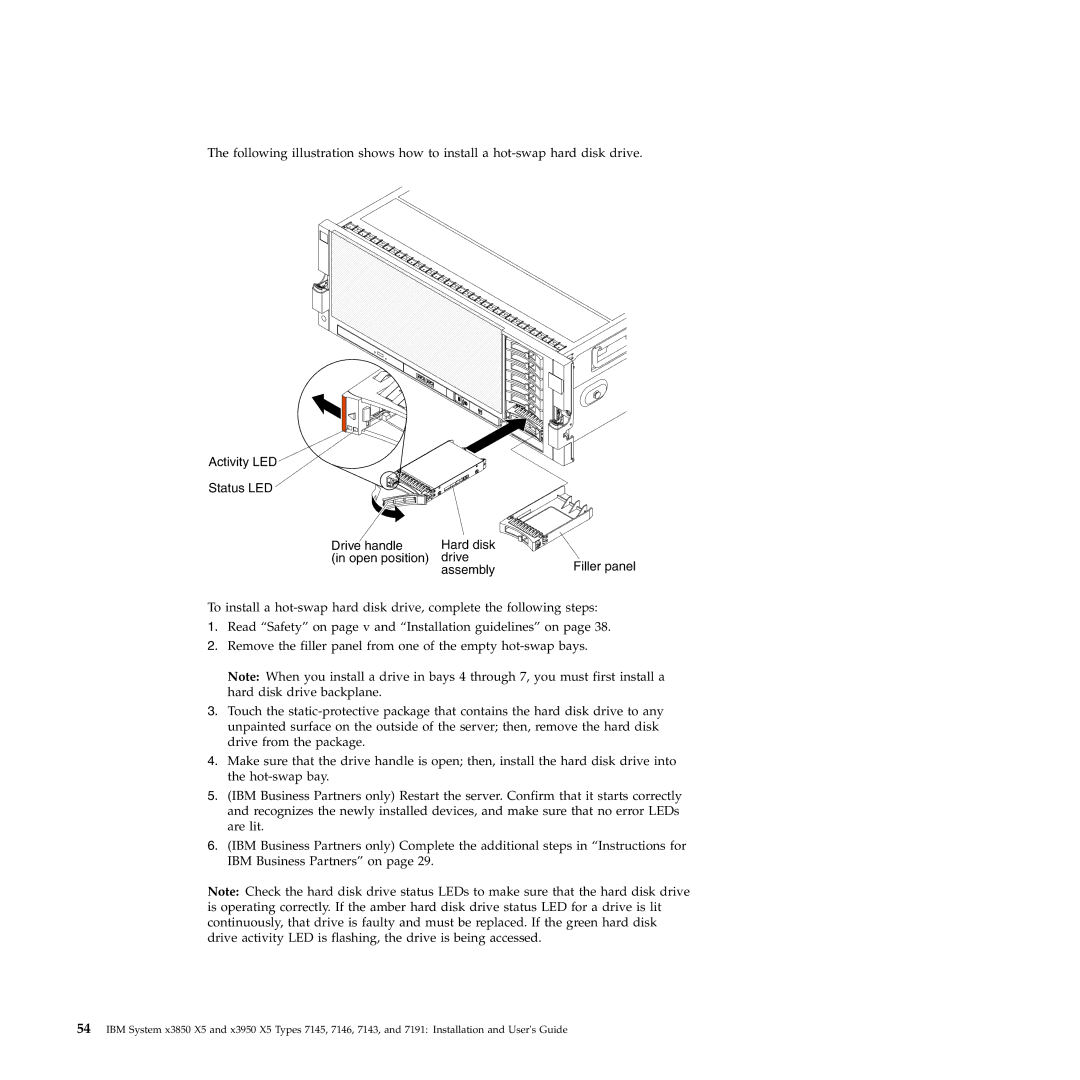
The following illustration shows how to install a
Activity LED
Status LED
Drive handle | Hard disk |
|
(in open position) | drive | Filler panel |
| assembly |
To install a
1.Read “Safety” on page v and “Installation guidelines” on page 38.
2.Remove the filler panel from one of the empty
Note: When you install a drive in bays 4 through 7, you must first install a hard disk drive backplane.
3.Touch the
4.Make sure that the drive handle is open; then, install the hard disk drive into the
5.(IBM Business Partners only) Restart the server. Confirm that it starts correctly and recognizes the newly installed devices, and make sure that no error LEDs are lit.
6.(IBM Business Partners only) Complete the additional steps in “Instructions for IBM Business Partners” on page 29.
Note: Check the hard disk drive status LEDs to make sure that the hard disk drive is operating correctly. If the amber hard disk drive status LED for a drive is lit continuously, that drive is faulty and must be replaced. If the green hard disk drive activity LED is flashing, the drive is being accessed.
54IBM System x3850 X5 and x3950 X5 Types 7145, 7146, 7143, and 7191: Installation and User's Guide