Installing a hot-swap power supply
Statement 5
CAUTION:
The power control button on the device and the power switch on the power supply do not turn off the electrical current supplied to the device. The device also might have more than one power cord. To remove all electrical current from the device, ensure that all power cords are disconnected from the power source.
|
| ||
|
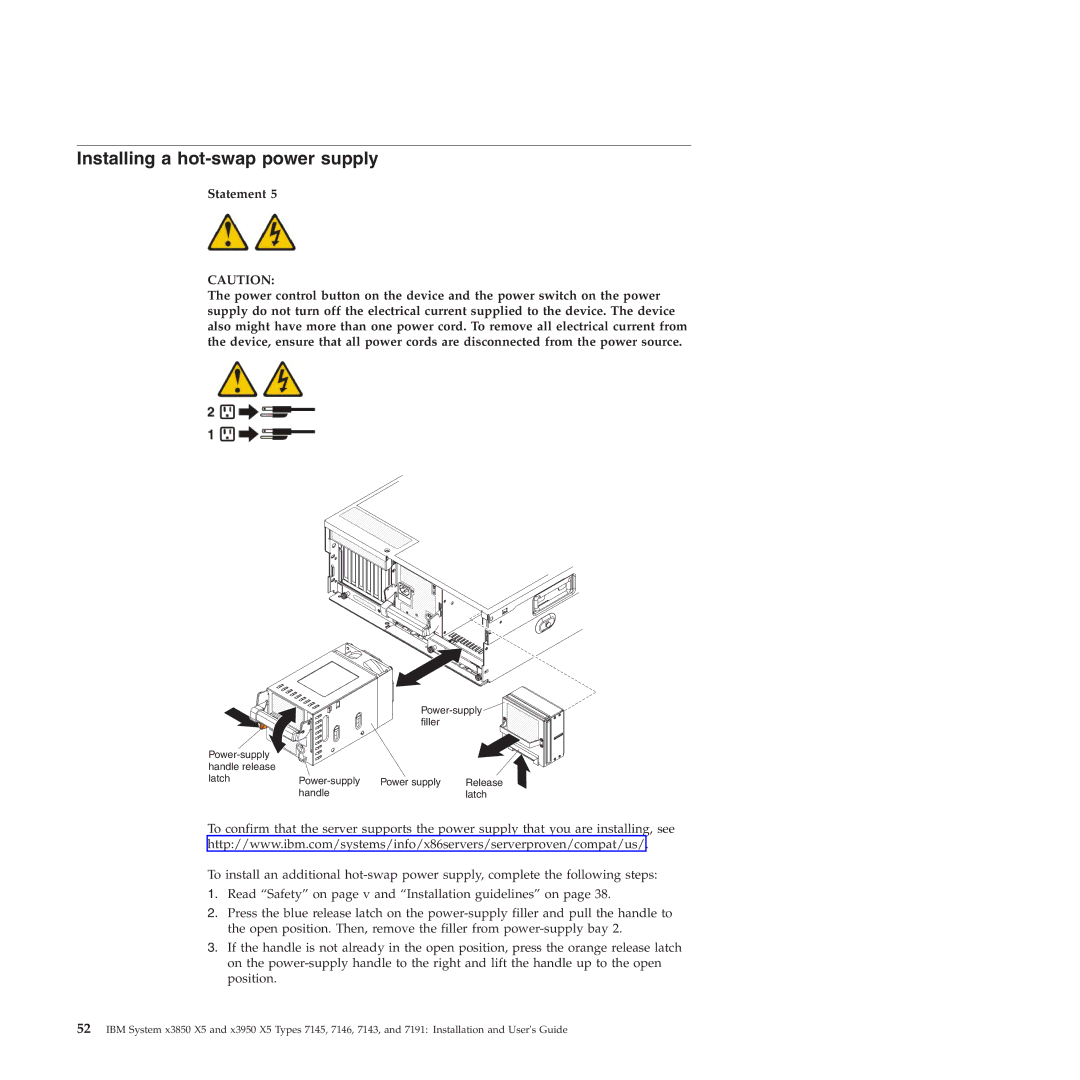
| filler |
|
|
|
| |
handle release |
|
|
|
latch | Power supply | Release | |
| handle |
| latch |
To confirm that the server supports the power supply that you are installing, see http://www.ibm.com/systems/info/x86servers/serverproven/compat/us/.
To install an additional
1.Read “Safety” on page v and “Installation guidelines” on page 38.
2.Press the blue release latch on the
3.If the handle is not already in the open position, press the orange release latch on the
52IBM System x3850 X5 and x3950 X5 Types 7145, 7146, 7143, and 7191: Installation and User's Guide