14.Connect the two SAS signal cables to the ServeRAID adapter (such as a ServeRAID B5015 SSD Controller or a 6Gb SSD HBA). Connect the cable from the bottom backplane to port 0 and the cable from the new top backplane to port 1.
15.To install a ServeRAID adapter in one of the PCI connectors, see “Installing a ServeRAID adapter for use with eXFlash drives” on page 49 for installation and cabling information.
16.Install the top cover.
17.To install the solid state drives, see “Installing a
18.Connect the cables and power cords (see “Connecting the cables” on page 79).
19.Turn on all attached devices and the server.
20.(IBM Business Partners only) Complete the additional steps in “Instructions for IBM Business Partners” on page 29.
Installing a 1.8-inch solid state drive
To confirm that the server supports the solid state drive that you are installing, see http://www.ibm.com/systems/info/x86servers/serverproven/compat/us/.
To install a
1.Read “Safety” on page v and “Installation guidelines” on page 38.
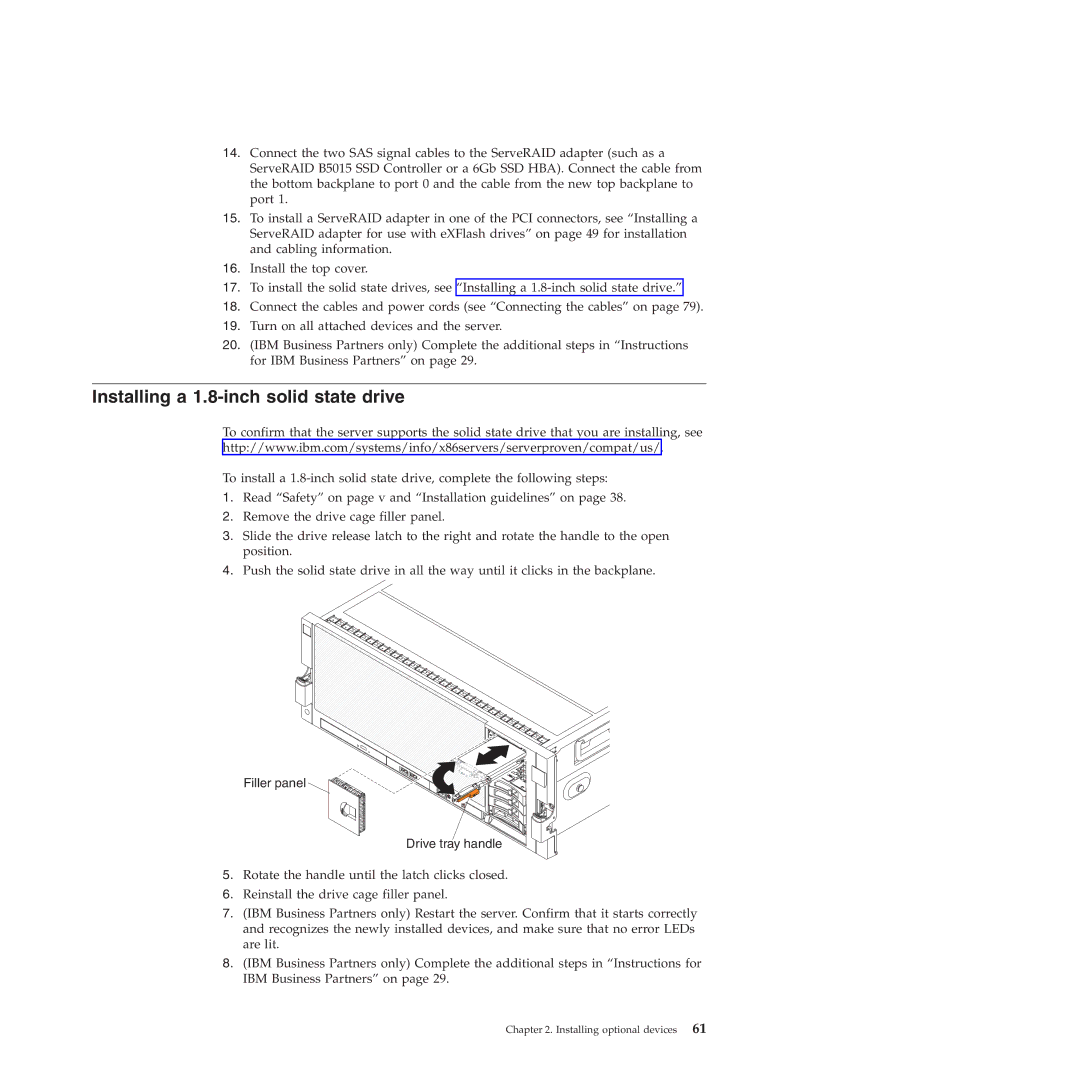
2.Remove the drive cage filler panel.
3.Slide the drive release latch to the right and rotate the handle to the open position.
4.Push the solid state drive in all the way until it clicks in the backplane.
Filler panel
Drive tray handle
5.Rotate the handle until the latch clicks closed.
6.Reinstall the drive cage filler panel.
7.(IBM Business Partners only) Restart the server. Confirm that it starts correctly and recognizes the newly installed devices, and make sure that no error LEDs are lit.
8.(IBM Business Partners only) Complete the additional steps in “Instructions for IBM Business Partners” on page 29.