SECTION 11—CONTROLLER AND JOYSTICK
Installing
1.If necessary, reposition the mounting bracket on the opposite armrest plate.
2.Position the threaded hole half clamp and opened hole half clamp on the arm tube. Make sure threaded hole half clamp is on the inside of arm tube.
3.While holding the two half clamps, install the front hex screw into the two half clamps. Securely tighten.
4.Align the mounting holes of the joystick mounting bracket with the mounting holes in the two half clamps.
5.Secure the joystick mounting bracket to the two half clamps with the remaining two hex screws.
6.Slide tube through the bracket to the desired position.
7.Slide adjustment lock over end of tube and secure adjustment lock to tube by turning lever on adjustment lock.
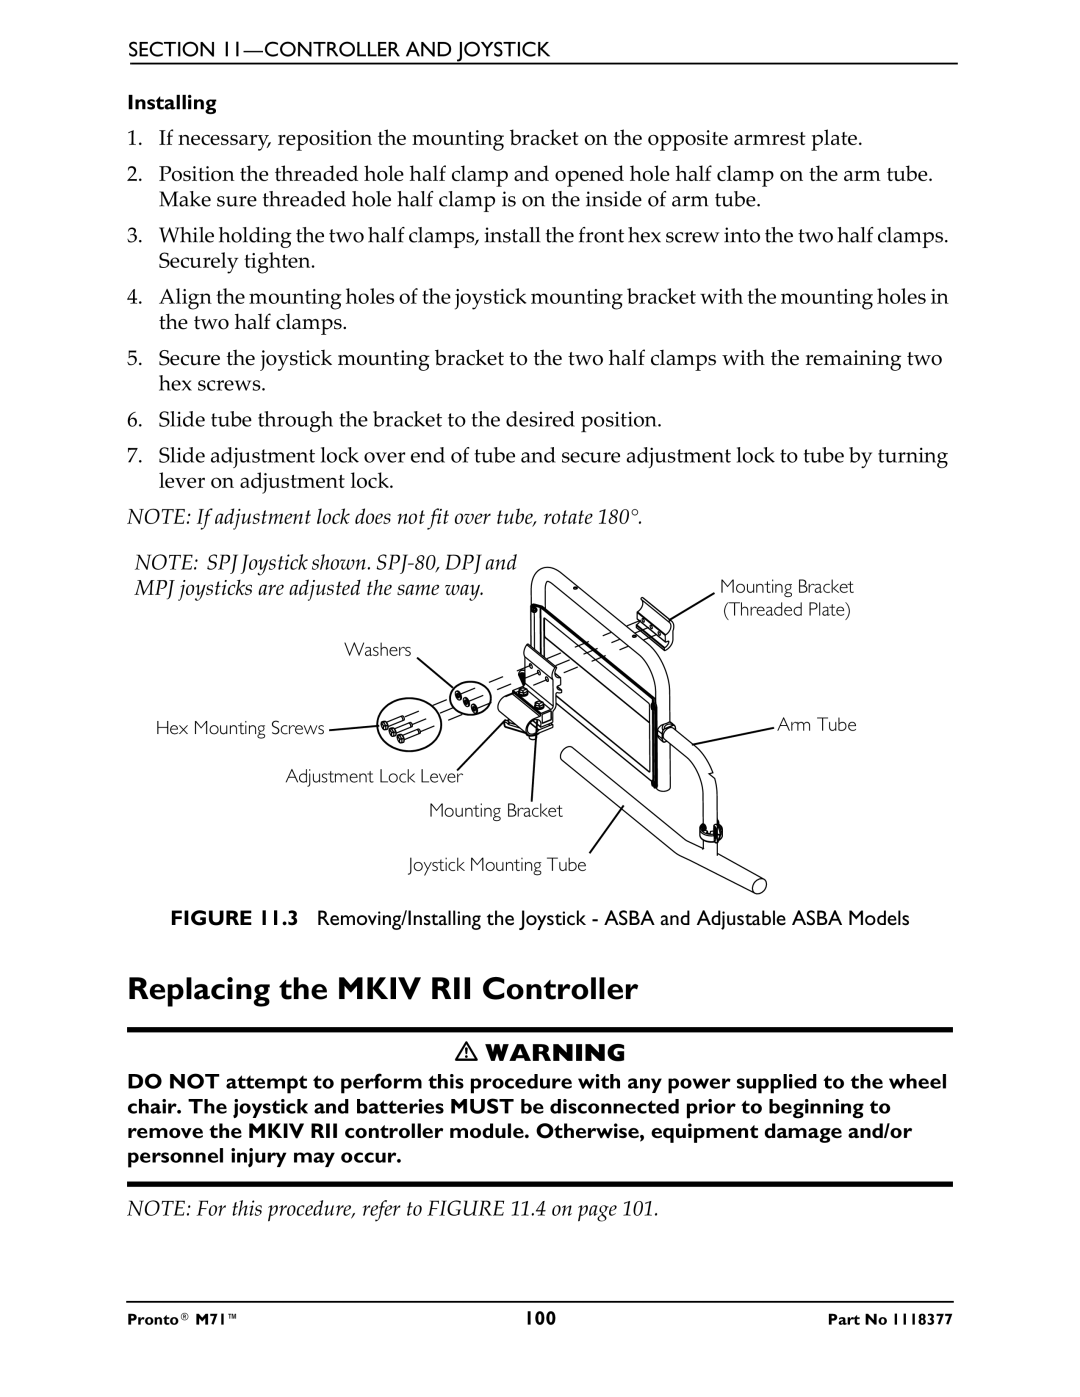
NOTE: If adjustment lock does not fit over tube, rotate 180°.
NOTE: SPJ Joystick shown.
MPJ joysticks are adjusted the same way.
Washers
Hex Mounting Screws ![]()
![]()
![]()
![]()
Adjustment Lock Lever
Mounting Bracket
Mounting Bracket ![]() (Threaded Plate)
(Threaded Plate)
Arm Tube
Joystick Mounting Tube
FIGURE 11.3 Removing/Installing the Joystick - ASBA and Adjustable ASBA Models
Replacing the MKIV RII Controller
WARNING
DO NOT attempt to perform this procedure with any power supplied to the wheel chair. The joystick and batteries MUST be disconnected prior to beginning to remove the MKIV RII controller module. Otherwise, equipment damage and/or personnel injury may occur.
NOTE: For this procedure, refer to FIGURE 11.4 on page 101.
Pronto® M71™ | 100 | Part No 1118377 |