SECTION 7—FRONT RIGGINGS/FOOTBOARD
ASBA Seat
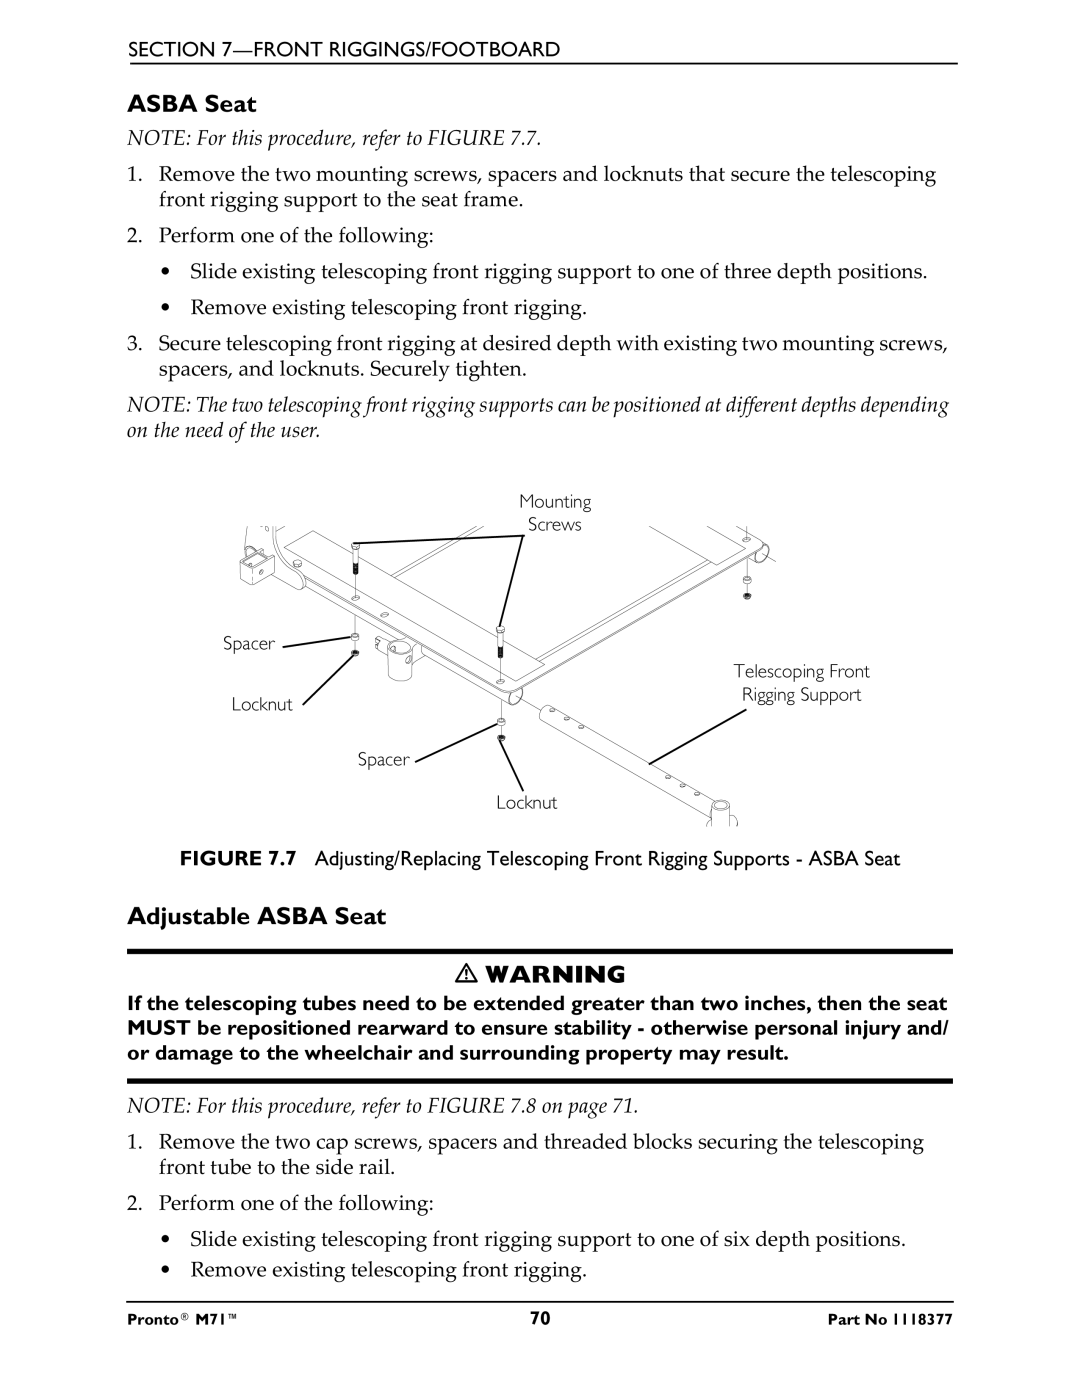
NOTE: For this procedure, refer to FIGURE 7.7.
1.Remove the two mounting screws, spacers and locknuts that secure the telescoping front rigging support to the seat frame.
2.Perform one of the following:
•Slide existing telescoping front rigging support to one of three depth positions.
•Remove existing telescoping front rigging.
3.Secure telescoping front rigging at desired depth with existing two mounting screws, spacers, and locknuts. Securely tighten.
NOTE: The two telescoping front rigging supports can be positioned at different depths depending on the need of the user.
Mounting
Screws
Spacer |
|
| Telescoping Front |
Locknut | Rigging Support |
|
Spacer ![]()
Locknut
FIGURE 7.7 Adjusting/Replacing Telescoping Front Rigging Supports - ASBA Seat
Adjustable ASBA Seat
WARNING
If the telescoping tubes need to be extended greater than two inches, then the seat MUST be repositioned rearward to ensure stability - otherwise personal injury and/ or damage to the wheelchair and surrounding property may result.
NOTE: For this procedure, refer to FIGURE 7.8 on page 71.
1.Remove the two cap screws, spacers and threaded blocks securing the telescoping front tube to the side rail.
2.Perform one of the following:
•Slide existing telescoping front rigging support to one of six depth positions.
•Remove existing telescoping front rigging.
Pronto® M71™ | 70 | Part No 1118377 |