SECTION 6—WHEELS
Removing/Installing the Front/Rear Caster Assemblies
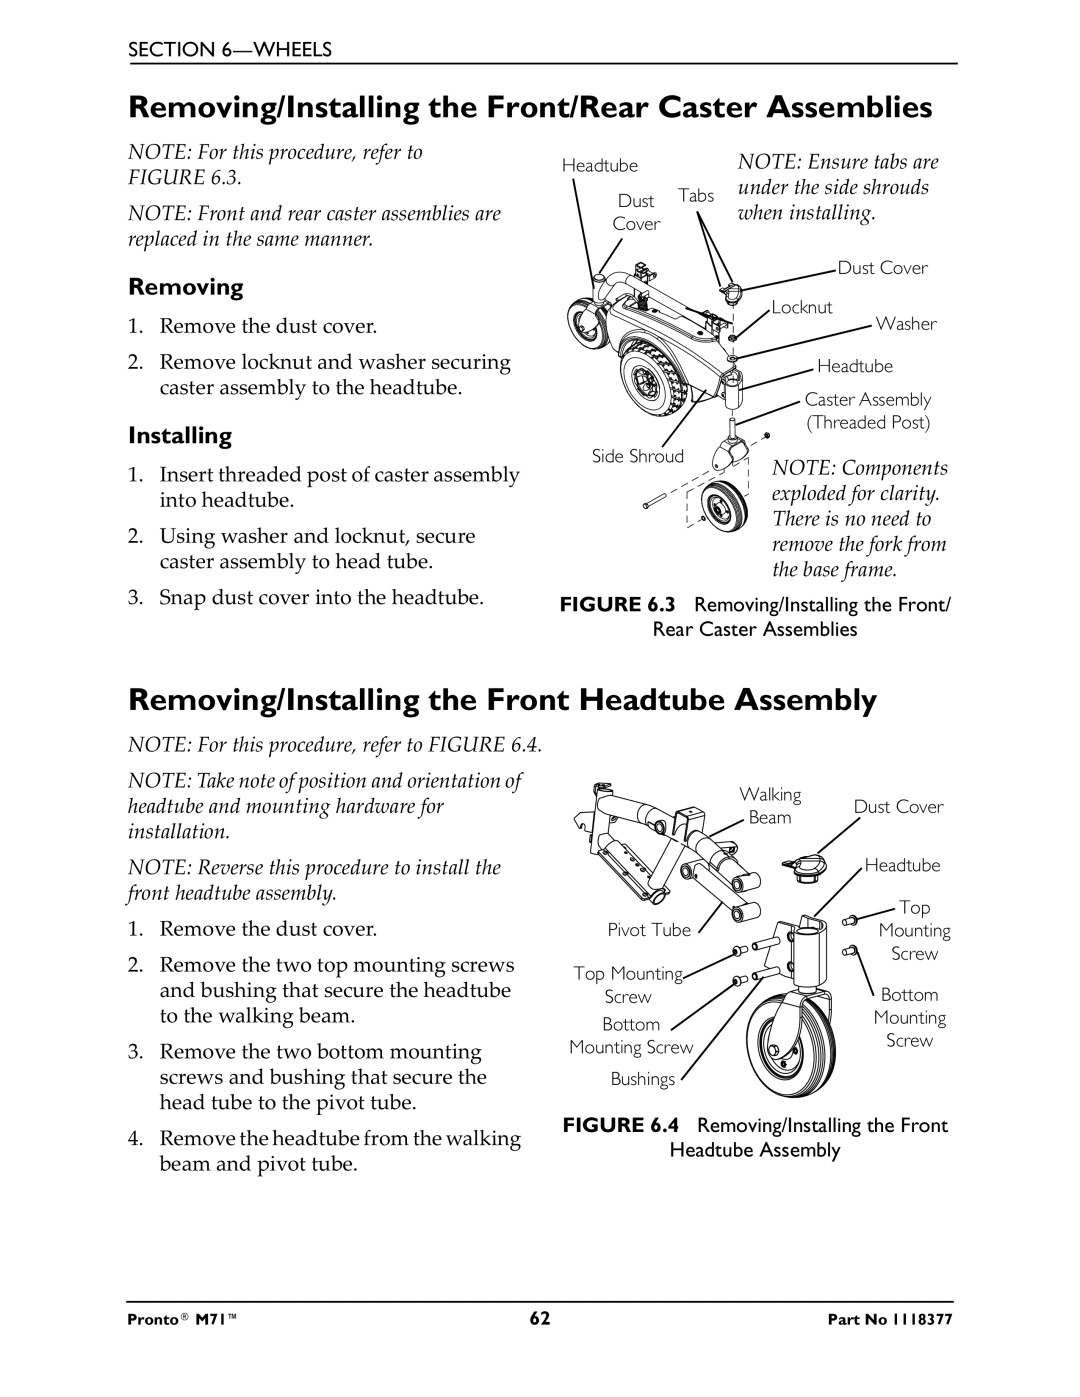
NOTE: For this procedure, refer to FIGURE 6.3.
NOTE: Front and rear caster assemblies are replaced in the same manner.
Removing
1.Remove the dust cover.
2.Remove locknut and washer securing caster assembly to the headtube.
Installing
1. | Insert threaded post of caster assembly |
| into headtube. |
2. | Using washer and locknut, secure |
| caster assembly to head tube. |
Headtube
Dust Tabs
Cover
Side Shroud
NOTE: Ensure tabs are under the side shrouds when installing.
Dust Cover
Locknut
Washer
Headtube
Caster Assembly
(Threaded Post)
NOTE: Components exploded for clarity. There is no need to remove the fork from the base frame.
3. Snap dust cover into the headtube. |
Removing/Installing the Front Headtube Assembly
NOTE: For this procedure, refer to FIGURE 6.4.
NOTE: Take note of position and orientation of
Walking
headtube and mounting hardware for installation.
Beam
Dust Cover
NOTE: Reverse this procedure to install the front headtube assembly.
1.Remove the dust cover.
2.Remove the two top mounting screws and bushing that secure the headtube to the walking beam.
3.Remove the two bottom mounting screws and bushing that secure the head tube to the pivot tube.
4.Remove the headtube from the walking beam and pivot tube.
| Headtube | |
| Top | |
Pivot Tube | Mounting | |
| Screw | |
Top Mounting |
| |
Screw | Bottom | |
Bottom | Mounting | |
Screw | ||
Mounting Screw | ||
| ||
Bushings |
|
FIGURE 6.4 Removing/Installing the Front
Headtube Assembly
Pronto® M71™ | 62 | Part No 1118377 |