SECTION 7—FRONT RIGGINGS/FOOTBOARD
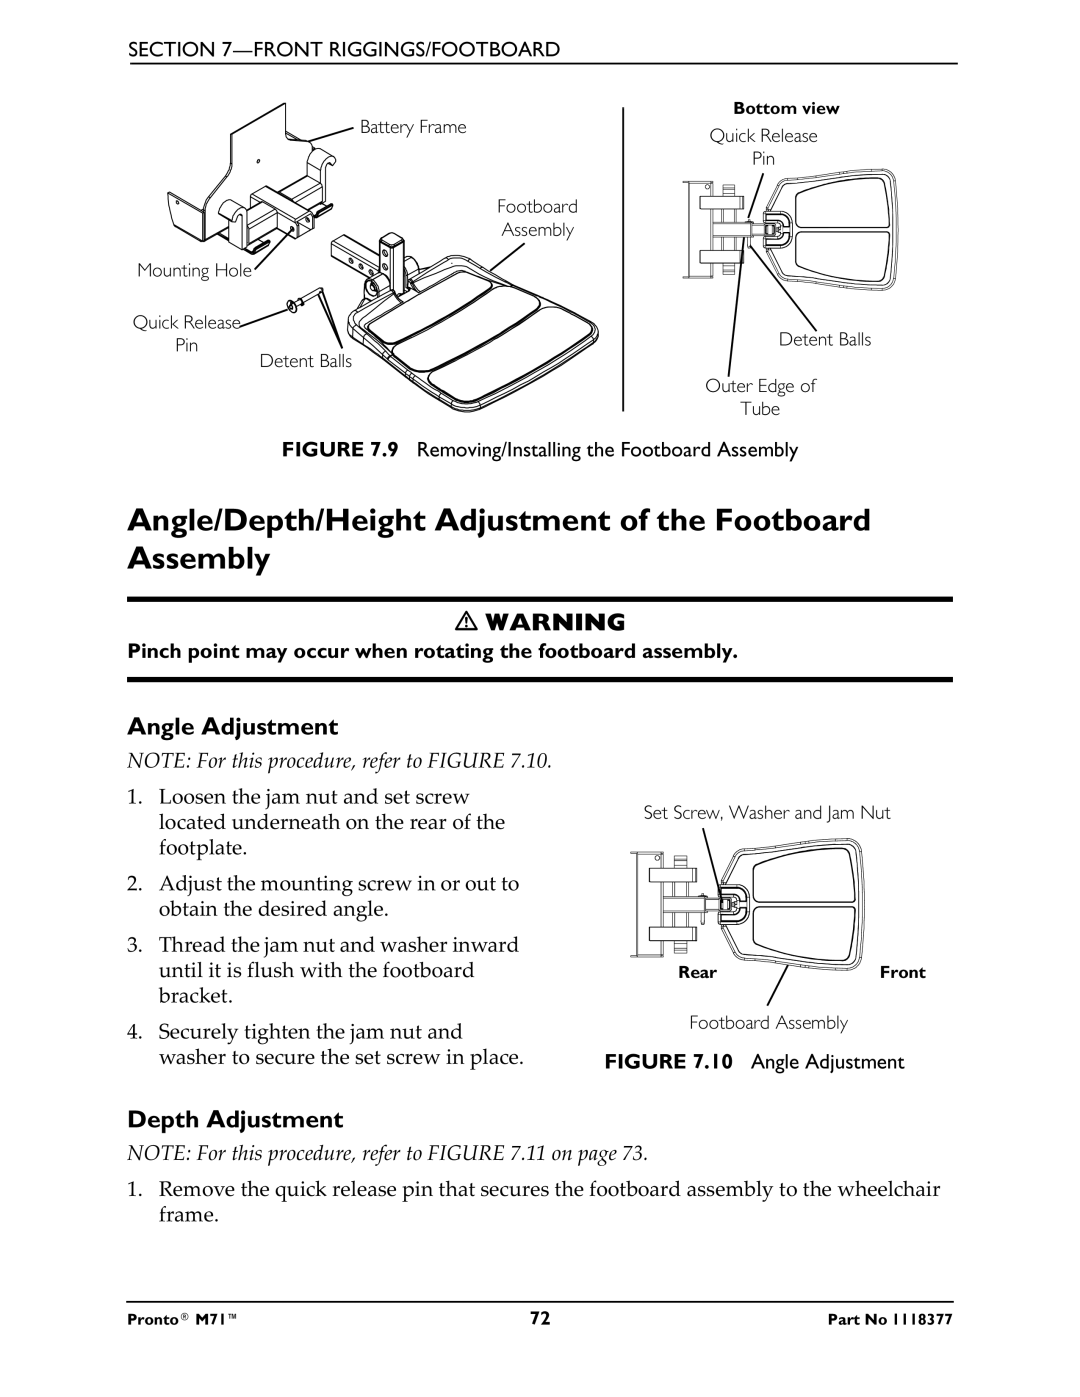
Battery Frame
Bottom view
Quick Release
Pin
Mounting Hole![]()
Quick Release![]() Pin
Pin
Footboard Assembly
Detent Balls
Detent Balls
Outer Edge of
Tube
FIGURE 7.9 Removing/Installing the Footboard Assembly
Angle/Depth/Height Adjustment of the Footboard Assembly
WARNING
Pinch point may occur when rotating the footboard assembly.
Angle Adjustment
NOTE: For this procedure, refer to FIGURE 7.10.
1.Loosen the jam nut and set screw located underneath on the rear of the footplate.
2.Adjust the mounting screw in or out to obtain the desired angle.
3.Thread the jam nut and washer inward until it is flush with the footboard bracket.
Set Screw, Washer and Jam Nut
RearFront
4. Securely tighten the jam nut and | Footboard Assembly |
| |
washer to secure the set screw in place. | FIGURE 7.10 Angle Adjustment |
Depth Adjustment
NOTE: For this procedure, refer to FIGURE 7.11 on page 73.
1.Remove the quick release pin that secures the footboard assembly to the wheelchair frame.
Pronto® M71™ | 72 | Part No 1118377 |