SECTION 4—SEAT ASSEMBLY
Adjusting the Back Angle
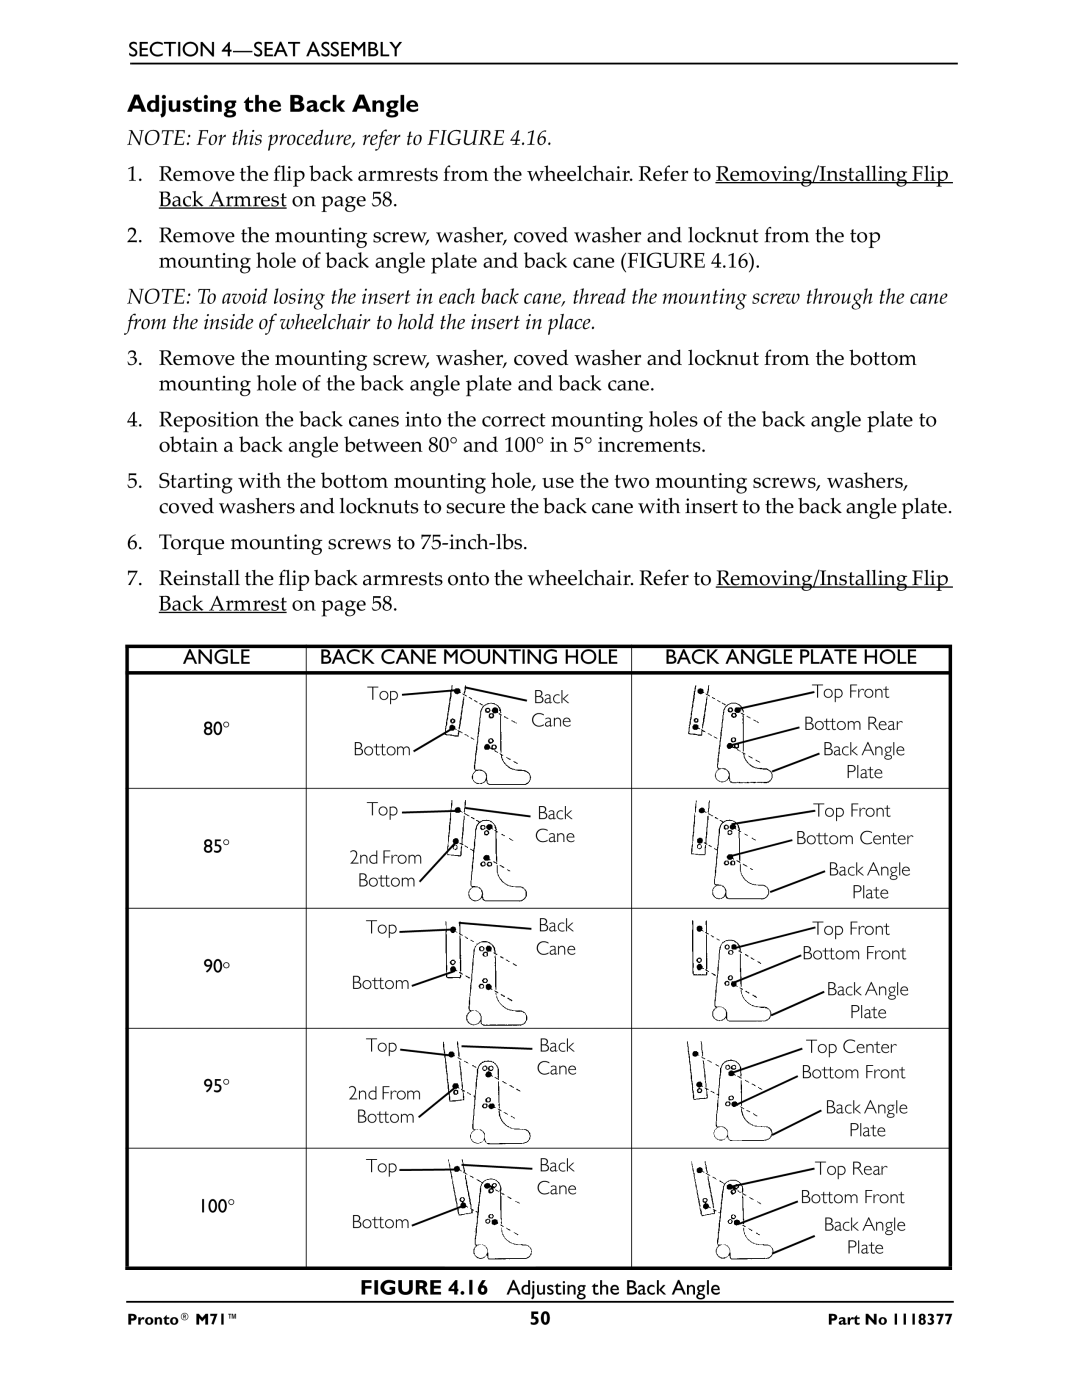
NOTE: For this procedure, refer to FIGURE 4.16.
1.Remove the flip back armrests from the wheelchair. Refer to Removing/Installing Flip Back Armrest on page 58.
2.Remove the mounting screw, washer, coved washer and locknut from the top mounting hole of back angle plate and back cane (FIGURE 4.16).
NOTE: To avoid losing the insert in each back cane, thread the mounting screw through the cane from the inside of wheelchair to hold the insert in place.
3.Remove the mounting screw, washer, coved washer and locknut from the bottom mounting hole of the back angle plate and back cane.
4.Reposition the back canes into the correct mounting holes of the back angle plate to obtain a back angle between 80° and 100° in 5° increments.
5.Starting with the bottom mounting hole, use the two mounting screws, washers, coved washers and locknuts to secure the back cane with insert to the back angle plate.
6.Torque mounting screws to
7.Reinstall the flip back armrests onto the wheelchair. Refer to Removing/Installing Flip Back Armrest on page 58.
ANGLE | BACK CANE MOUNTING HOLE | BACK ANGLE PLATE HOLE | |
| Top | Back | Top Front |
80° |
| Cane | Bottom Rear |
| Bottom |
| Back Angle |
|
|
| Plate |
|
|
|
|
| Top | Back | Top Front |
85° |
| Cane | Bottom Center |
2nd From |
|
| |
|
| Back Angle | |
| Bottom |
| |
|
| Plate | |
|
|
| |
|
|
|
|
| Top | Back | Top Front |
|
| Cane | Bottom Front |
90O |
|
| |
|
|
| |
| Bottom |
| Back Angle |
|
|
| |
|
|
| Plate |
|
|
|
|
| Top | Back | Top Center |
95° |
| Cane | Bottom Front |
2nd From |
|
| |
|
| Back Angle | |
| Bottom |
| |
|
| Plate | |
|
|
| |
|
|
|
|
| Top | Back | Top Rear |
|
| Cane | Bottom Front |
100° |
|
| |
|
|
| |
| Bottom |
| Back Angle |
|
|
| Plate |
|
|
|
|
FIGURE 4.16 Adjusting the Back Angle
Pronto® M71™ | 50 | Part No 1118377 |