SECTION 4—SEAT ASSEMBLY
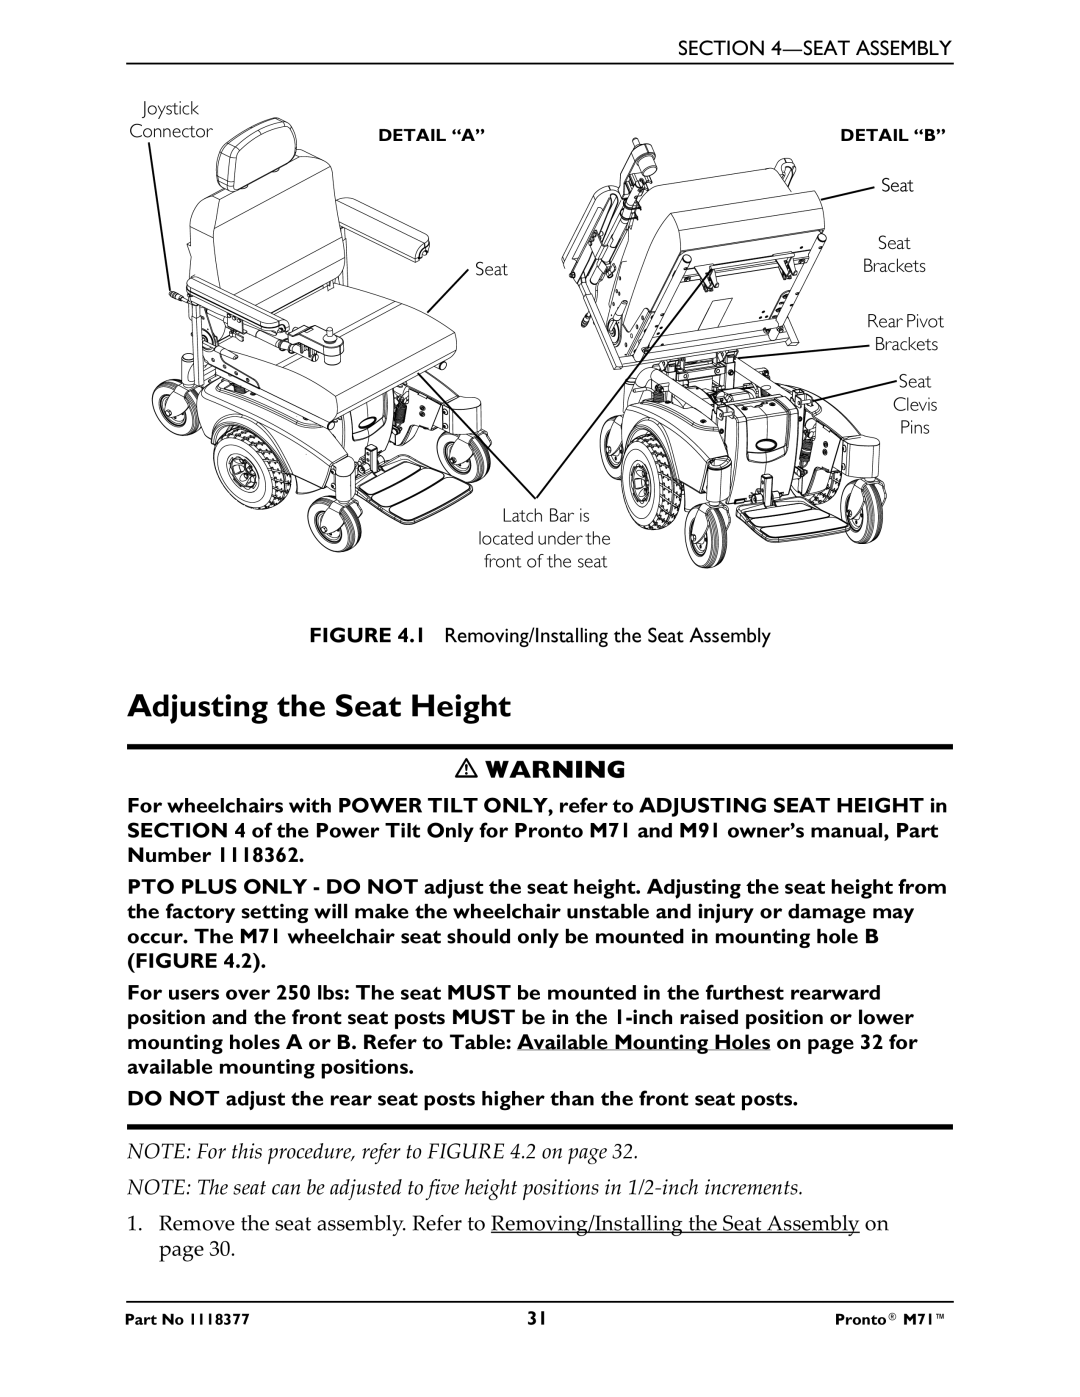
Joystick
Connector
DETAIL “A”
Seat
![]() Latch Bar is located under the front of the seat
Latch Bar is located under the front of the seat
DETAIL “B”
Seat
Seat
Brackets
Rear Pivot
Brackets
Seat
Clevis
Pins
FIGURE 4.1 Removing/Installing the Seat Assembly
Adjusting the Seat Height
WARNING
For wheelchairs with POWER TILT ONLY, refer to ADJUSTING SEAT HEIGHT in SECTION 4 of the Power Tilt Only for Pronto M71 and M91 owner’s manual, Part Number 1118362.
PTO PLUS ONLY - DO NOT adjust the seat height. Adjusting the seat height from the factory setting will make the wheelchair unstable and injury or damage may occur. The M71 wheelchair seat should only be mounted in mounting hole B (FIGURE 4.2).
For users over 250 lbs: The seat MUST be mounted in the furthest rearward position and the front seat posts MUST be in the
DO NOT adjust the rear seat posts higher than the front seat posts.
NOTE: For this procedure, refer to FIGURE 4.2 on page 32.
NOTE: The seat can be adjusted to five height positions in
1.Remove the seat assembly. Refer to Removing/Installing the Seat Assembly on page 30.
Part No 1118377 | 31 | Pronto® M71™ |