SECTION 11—CONTROLLER AND JOYSTICK
NOTE: The MKIV RII Controller Module has five cables, with connectors. These cables are for control of the Left and Right drive motors (cables are labeled), MKIV RII Joystick control, power connection for the batteries and a connection for the
NOTE: Take note of position and orientation of the controller, cables, connectors and mounting hardware for reinstallation of controller.
1.Remove the seat. Refer to Removing/Installing the Seat Assembly on page 30.
2.Remove the batteries from the wheelchair. Refer to Removing Batteries on page 89.
3.Remove the front shroud. Refer to Removing/Installing the Shrouds on page 74.
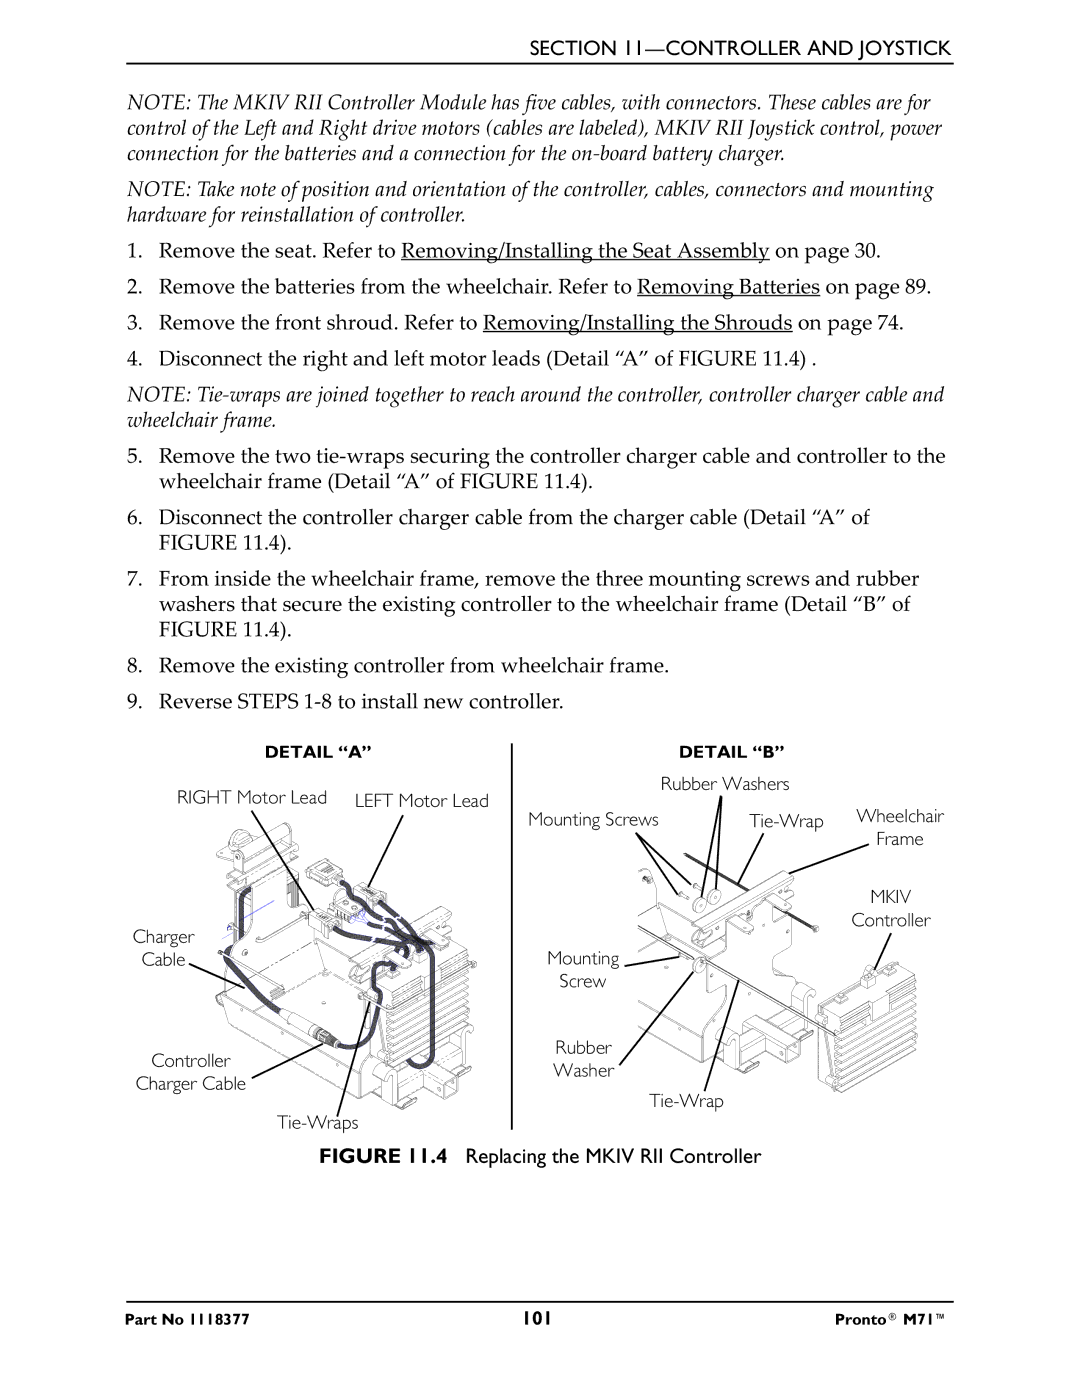
4.Disconnect the right and left motor leads (Detail “A” of FIGURE 11.4) .
NOTE:
5.Remove the two
6.Disconnect the controller charger cable from the charger cable (Detail “A” of FIGURE 11.4).
7.From inside the wheelchair frame, remove the three mounting screws and rubber washers that secure the existing controller to the wheelchair frame (Detail “B” of FIGURE 11.4).
8.Remove the existing controller from wheelchair frame.
9.Reverse STEPS
DETAIL “A”
RIGHT Motor Lead LEFT Motor Lead
Charger
Cable
Controller
Charger Cable
| DETAIL “B” |
| Rubber Washers |
Mounting Screws | |
| Frame |
| MKIV |
| Controller |
Mounting |
|
Screw |
|
Rubber
Washer
FIGURE 11.4 Replacing the MKIV RII Controller
Part No 1118377 | 101 | Pronto® M71™ |