SECTION 9—MOTORS
SECTION 9—MOTORS
WARNING
After ANY adjustments, repair or service and BEFORE use, make sure that all attaching hardware is tightened securely.
ALWAYS turn the wheelchair power OFF BEFORE repairing or servicing the wheelchair, otherwise injury or damage may occur.
Removing/Installing the Motor
NOTE: For this procedure, refer to FIGURE 9.1 on page 80.
NOTE: Reverse this procedure to install the motor.
NOTE: Removing side frame assembly from wheelchair, while not necessary, may improve access to the motor. Refer to Disassembling/Assembling the Wheelchair on page 103.
NOTE: Removing the drive wheel, while not necessary (unless replacing the motor), may improve access to the motor. Refer to Removing/Installing the Drive Wheel on page 63.
1.Remove the seat. Refer to Removing/Installing the Seat Assembly on page 30.
2.Remove the side shroud. Refer to Removing/Installing the Shrouds on page 74.
3.If side frame has not been removed from wheelchair, disconnect the motor lead.
4.If replacing the motor, remove drive wheel from drive shaft. Refer to Removing/ Installing the Drive Wheel on page 63.
5.Remove the cotter pin to disconnect the motor release lever. Refer to Removing/ Installing the Motor Release Lever on page 81.
NOTE: Long mounting screws are used on the same side of the motor as the drive shaft.
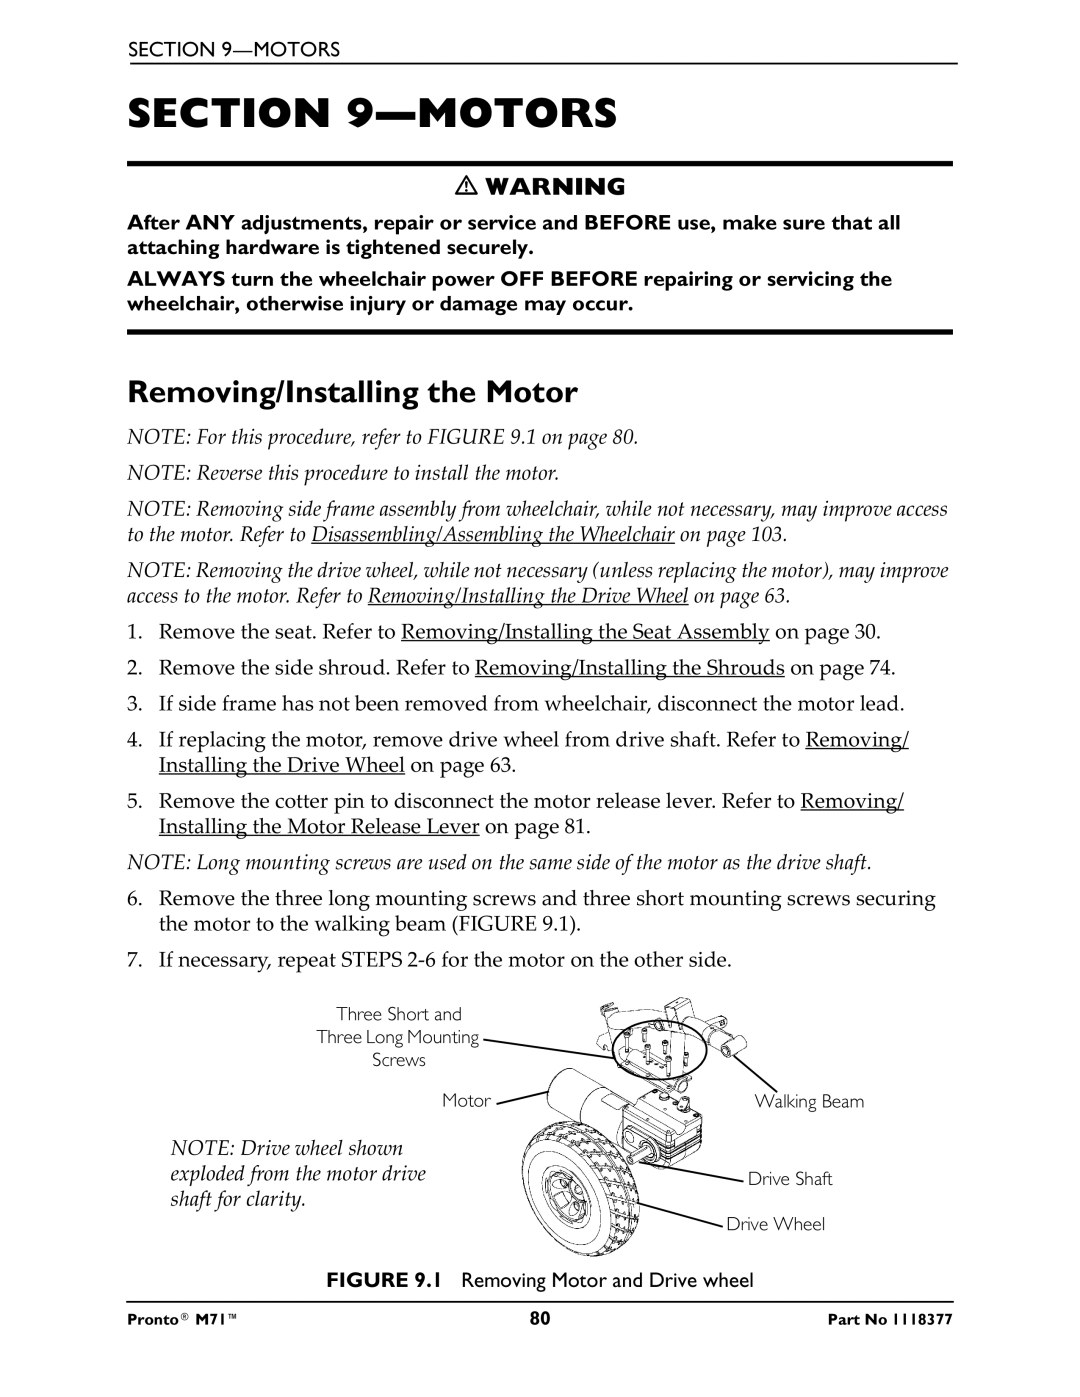
6.Remove the three long mounting screws and three short mounting screws securing the motor to the walking beam (FIGURE 9.1).
7.If necessary, repeat STEPS
Three Short and
Three Long Mounting
Screws
Motor ![]()
NOTE: Drive wheel shown exploded from the motor drive shaft for clarity.
Walking Beam
![]() Drive Shaft
Drive Shaft
![]() Drive Wheel
Drive Wheel
FIGURE 9.1 Removing Motor and Drive wheel
Pronto® M71™ | 80 | Part No 1118377 |