SECTION 4—SEAT ASSEMBLY
ASBA Seat Service Procedures
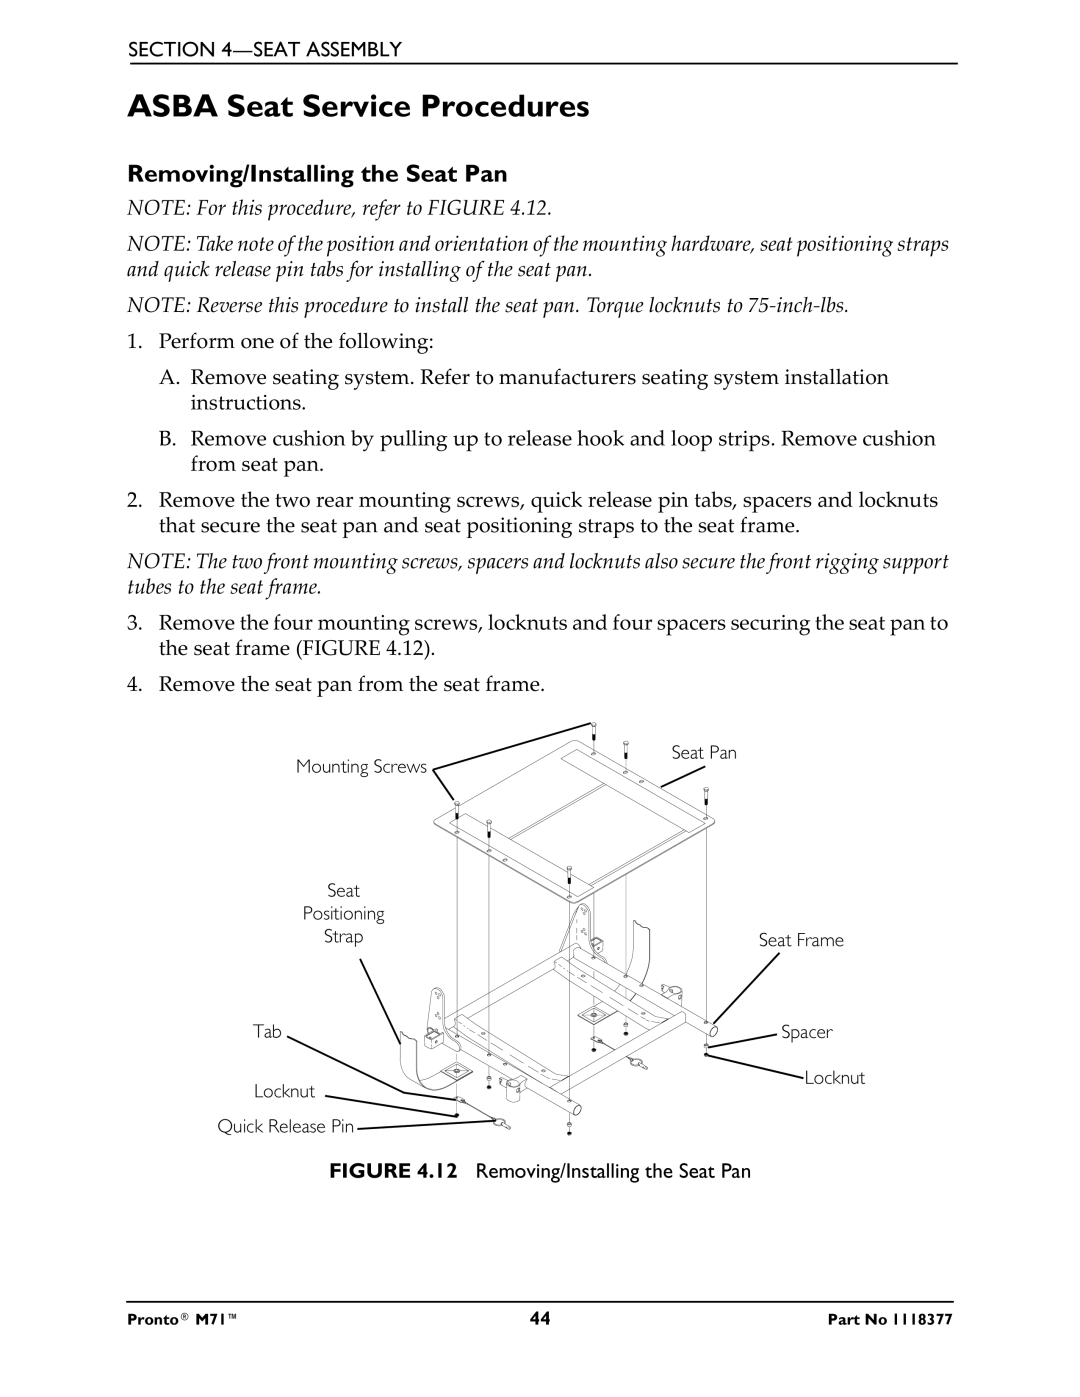
Removing/Installing the Seat Pan
NOTE: For this procedure, refer to FIGURE 4.12.
NOTE: Take note of the position and orientation of the mounting hardware, seat positioning straps and quick release pin tabs for installing of the seat pan.
NOTE: Reverse this procedure to install the seat pan. Torque locknuts to
1.Perform one of the following:
A.Remove seating system. Refer to manufacturers seating system installation instructions.
B.Remove cushion by pulling up to release hook and loop strips. Remove cushion from seat pan.
2.Remove the two rear mounting screws, quick release pin tabs, spacers and locknuts that secure the seat pan and seat positioning straps to the seat frame.
NOTE: The two front mounting screws, spacers and locknuts also secure the front rigging support tubes to the seat frame.
3.Remove the four mounting screws, locknuts and four spacers securing the seat pan to the seat frame (FIGURE 4.12).
4.Remove the seat pan from the seat frame.
Mounting Screws
Seat
Positioning
Strap
Tab
Locknut
Quick Release Pin ![]()
Seat Pan
Seat Frame
Spacer
![]() Locknut
Locknut
FIGURE 4.12 Removing/Installing the Seat Pan
Pronto® M71™ | 44 | Part No 1118377 |