SECTION 9—MOTORS
WARNING
DO NOT leave the wheelchair unattended while performing this procedure - otherwise damage to wheelchair and/or property may occur.
NOTE: This procedure must be performed with little or no load on the motor.
A. Put the wheelchair on blocks so that the drive wheels do not contact the ground.
NOTE: For steps B and D, use a rubber band to hold the driver control in the direction needed or program the chair for latched driving. Refer to the electronics manual for latched programming instructions.
B.Run the motors forward for one hour.
C.Turn motors off and allow 30 minutes for motors to cool off.
D.Run the motors in reverse for one hour.
E.When process is complete, remove wheelchair from blocks and test drive the wheel chair.
NOTE: If wheelchair still does not perform properly, call Technical Service at
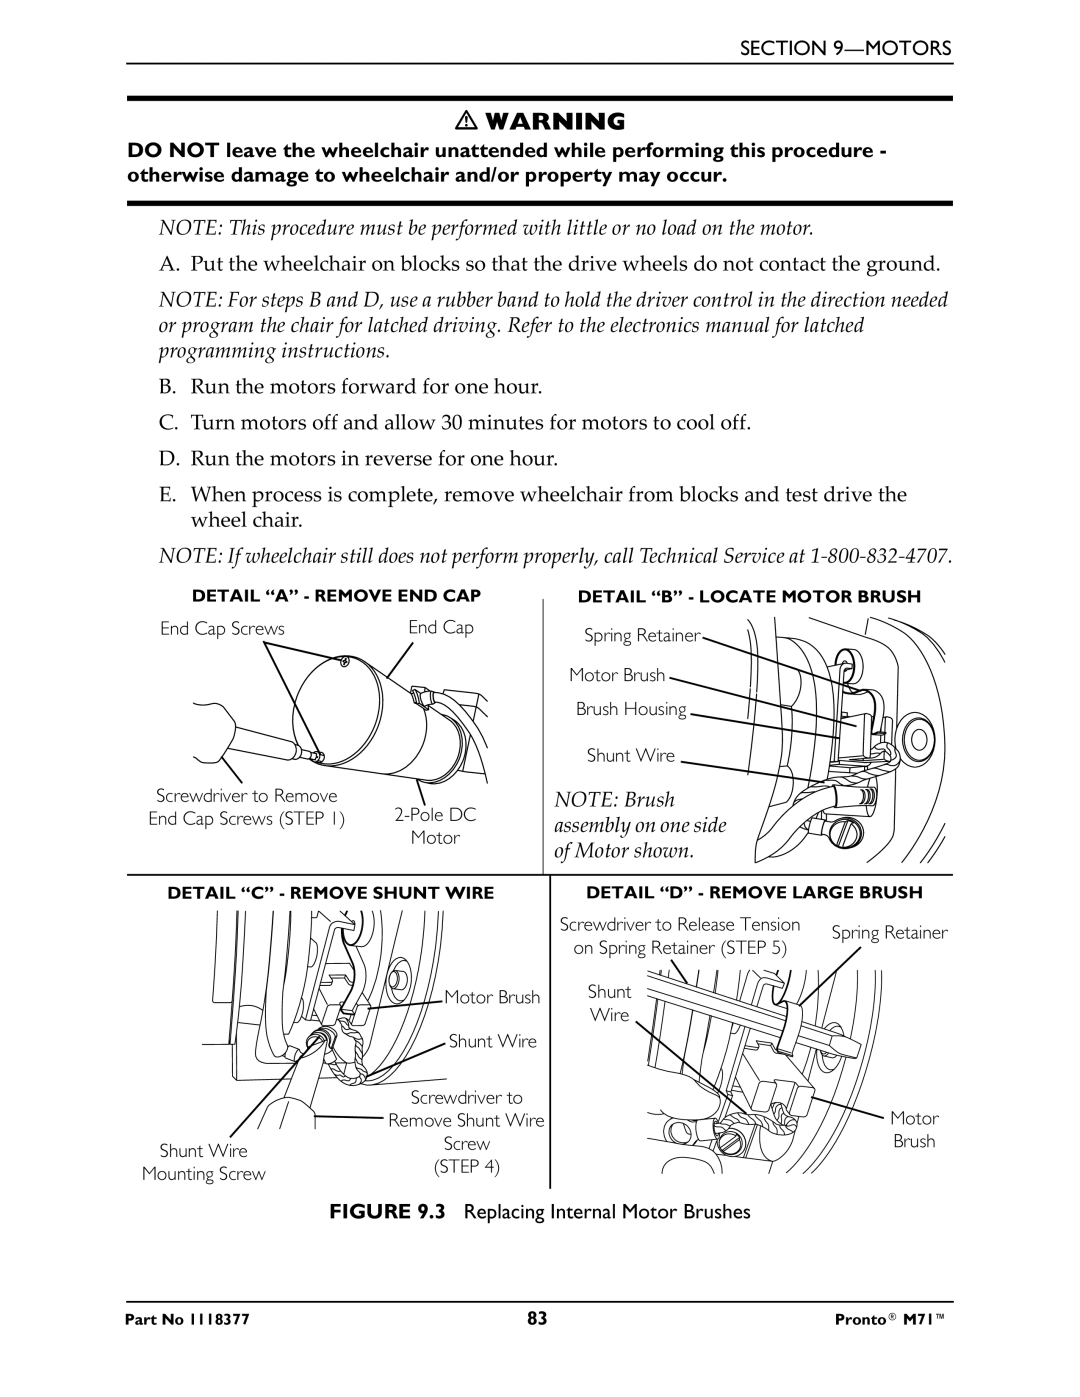
DETAIL “A” - REMOVE END CAP
End Cap Screws | End Cap |
Screwdriver to Remove
End Cap Screws (STEP 1)
DETAIL “B” - LOCATE MOTOR BRUSH
Spring Retainer
Motor Brush
Brush Housing
Shunt Wire
NOTE: Brush assembly on one side of Motor shown.
DETAIL “C” - REMOVE SHUNT WIRE
| Motor Brush | |
| Shunt Wire | |
| Screwdriver to | |
| Remove Shunt Wire | |
Shunt Wire | Screw | |
(STEP 4) | ||
Mounting Screw | ||
|
DETAIL “D” - REMOVE LARGE BRUSH
Screwdriver to Release Tension | Spring Retainer | |
on Spring Retainer (STEP 5) | ||
|
Shunt
Wire
![]() Motor
Motor
Brush
FIGURE 9.3 Replacing Internal Motor Brushes
Part No 1118377 | 83 | Pronto® M71™ |
