SECTION 11—CONTROLLER AND JOYSTICK
2.Turn the adjustment lock lever to release the joystick mounting tube from the mounting bracket.
3.Remove the joystick from the wheelchair.
4.Remove the three hex mounting screws, bushings and locknuts that secure the mounting bracket to the three mounting holes on the armrest plate.
Installing
NOTE: The mounting bracket is mounted to the inside of the armrest plate.
1.If necessary, reposition the mounting bracket on the opposite armrest plate.
2.Using the three hex mounting screws, bushings and locknuts, secure the mounting bracket to the three mounting holes of the armrest plate.
3.If necessary, perform the following to reposition the adjustment lock:
A.Slide the adjustment lock from the mounting bracket.
B.Rotate adjustment lock 180° and slide adjustment lock over the opposite end of the mounting bracket.
4.Slide joystick mounting tube through the mounting bracket to the desired position and secure adjustment lock to tube by turning lever on adjustment lock.
5.Using two
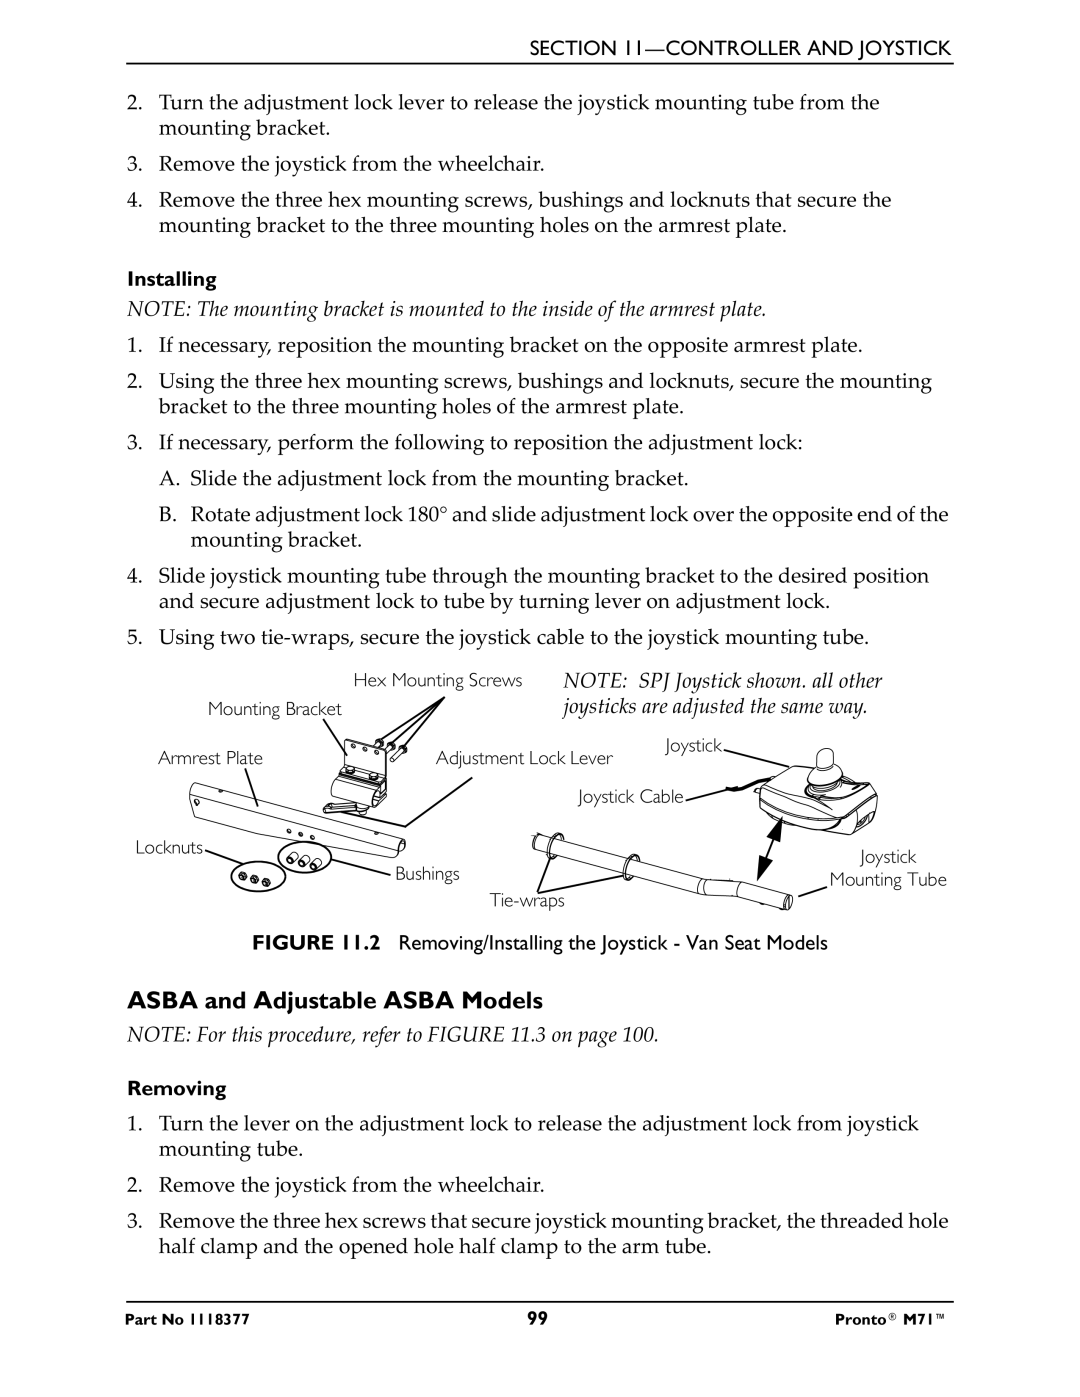
| Hex Mounting Screws | NOTE: SPJ Joystick shown. all other |
Mounting Bracket |
| joysticks are adjusted the same way. |
Armrest Plate |
| Joystick |
Adjustment Lock Lever | ||
|
|
|
|
| Joystick Cable |
Locknuts |
|
|
|
| Joystick |
|
|
|
| ||
|
|
|
| ||
|
|
|
| ||
Bushings |
|
| |||
|
|
| |||
|
|
| Mounting Tube | ||
|
|
|
|
| |
|
|
| |||
FIGURE 11.2 Removing/Installing the Joystick - Van Seat Models
ASBA and Adjustable ASBA Models
NOTE: For this procedure, refer to FIGURE 11.3 on page 100.
Removing
1.Turn the lever on the adjustment lock to release the adjustment lock from joystick mounting tube.
2.Remove the joystick from the wheelchair.
3.Remove the three hex screws that secure joystick mounting bracket, the threaded hole half clamp and the opened hole half clamp to the arm tube.
Part No 1118377 | 99 | Pronto® M71™ |