SECTION 4—SEAT ASSEMBLY
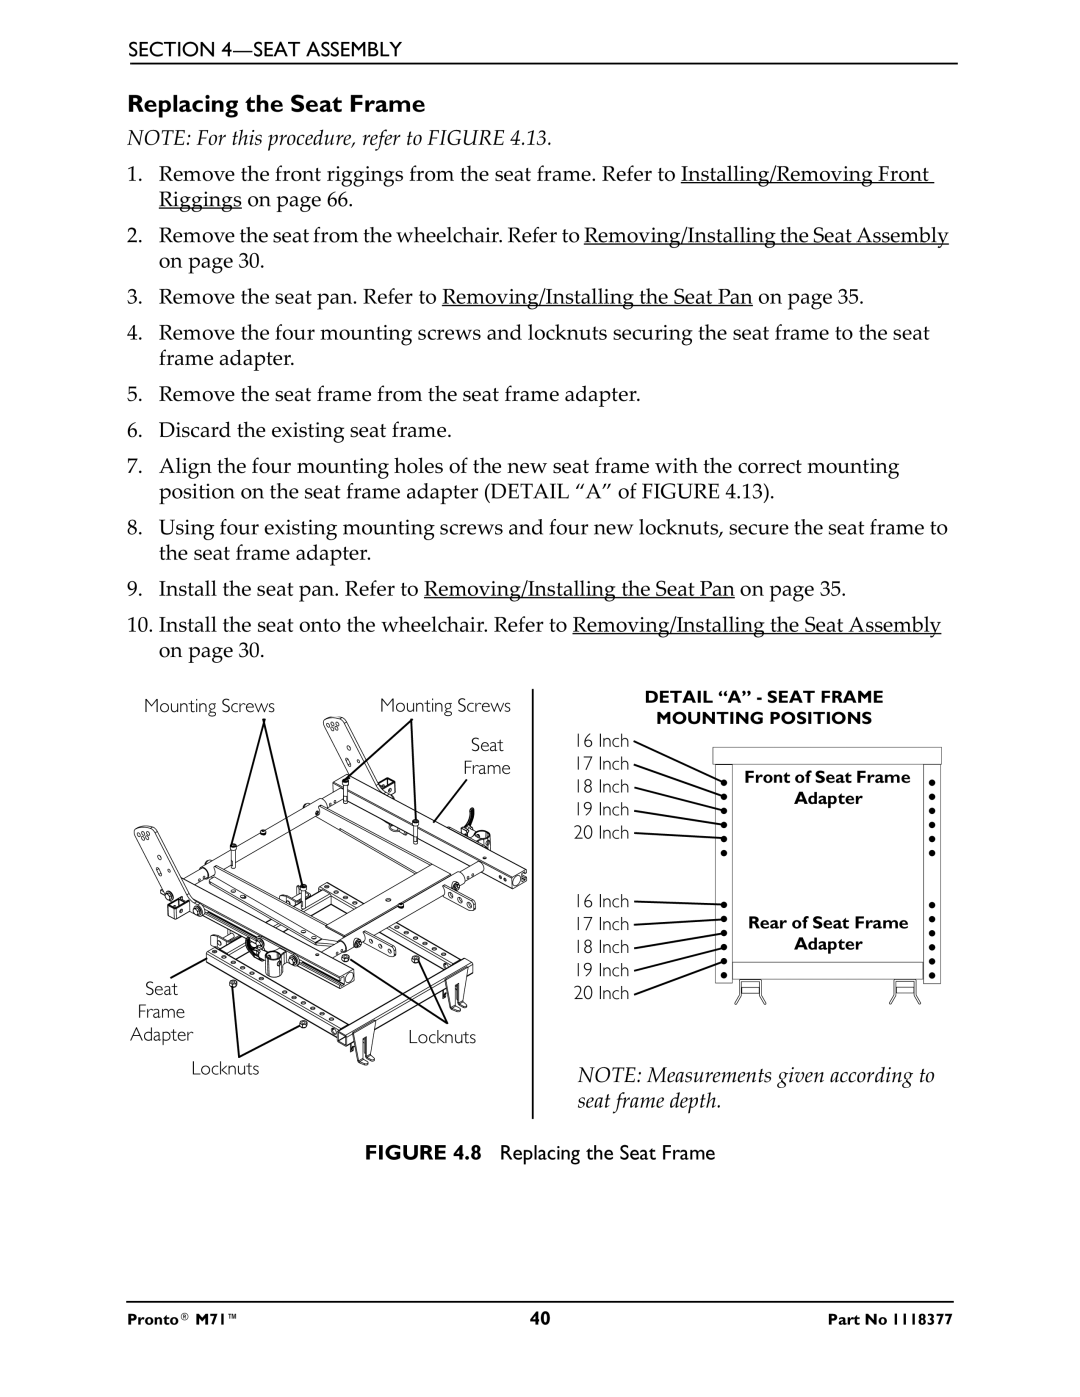
Replacing the Seat Frame
NOTE: For this procedure, refer to FIGURE 4.13.
1.Remove the front riggings from the seat frame. Refer to Installing/Removing Front Riggings on page 66.
2.Remove the seat from the wheelchair. Refer to Removing/Installing the Seat Assembly on page 30.
3.Remove the seat pan. Refer to Removing/Installing the Seat Pan on page 35.
4.Remove the four mounting screws and locknuts securing the seat frame to the seat frame adapter.
5.Remove the seat frame from the seat frame adapter.
6.Discard the existing seat frame.
7.Align the four mounting holes of the new seat frame with the correct mounting position on the seat frame adapter (DETAIL “A” of FIGURE 4.13).
8.Using four existing mounting screws and four new locknuts, secure the seat frame to the seat frame adapter.
9.Install the seat pan. Refer to Removing/Installing the Seat Pan on page 35.
10.Install the seat onto the wheelchair. Refer to Removing/Installing the Seat Assembly on page 30.
Mounting Screws | Mounting Screws |
| DETAIL “A” - SEAT FRAME |
| MOUNTING POSITIONS | ||
|
|
| |
| Seat | 16 Inch |
|
| Frame | 17 Inch | Front of Seat Frame |
|
| 18 Inch | |
|
| Adapter | |
|
| 19 Inch | |
|
|
| |
|
| 20 Inch |
|
|
| 16 Inch |
|
|
| 17 Inch | Rear of Seat Frame |
|
| 18 Inch | Adapter |
|
| 19 Inch |
|
Seat |
| 20 Inch |
|
Frame |
|
|
|
Adapter | Locknuts |
|
|
Locknuts | NOTE: Measurements given according to |
| |
| seat frame depth. |
| FIGURE 4.8 Replacing the Seat Frame |
Pronto® M71™ | 40 | Part No 1118377 |
