SECTION 5—ARMS
SECTION 5—ARMS
WARNING
After ANY adjustments, repair or service and BEFORE use, make sure all attaching hardware is tightened securely - otherwise injury or damage may result.
Before performing any maintenance, adjustment or service verify that ON/OFF switch on the joystick is in the OFF position.
Arm Service Procedures for Van Seat
Removing/Installing Van Seat Arm
NOTE: For this procedure, refer to FIGURE 5.1.
NOTE: Reverse this procedure to install the adjustable width arms.
1.If necessary, disconnect the joystick. Refer to Disconnecting/Connecting the Joystick on page 97.
2.Loosen lock knob that secures the adjustable width arm to the arm support tube.
3.Remove the adjustable width arm from the arm support tube.
4.If necessary, repeat STEPS
Adjusting Van Seat Arm Width
NOTE: For this procedure, refer to FIGURE 5.1.
1.Loosen the two lock knobs that secure the adjustable width arms to the arm support tube.
NOTE: Both adjustable width arms should be adjusted to the same distance away from the arm support tube.
NOTE: Changing the width of the adjustable width arms may also effect the overall width of the wheelchair.
2.Reposition adjustable width arms until desired width is achieved.
3.Securely tighten the two lock knobs that secure the adjustable width arms to the arm support tube.
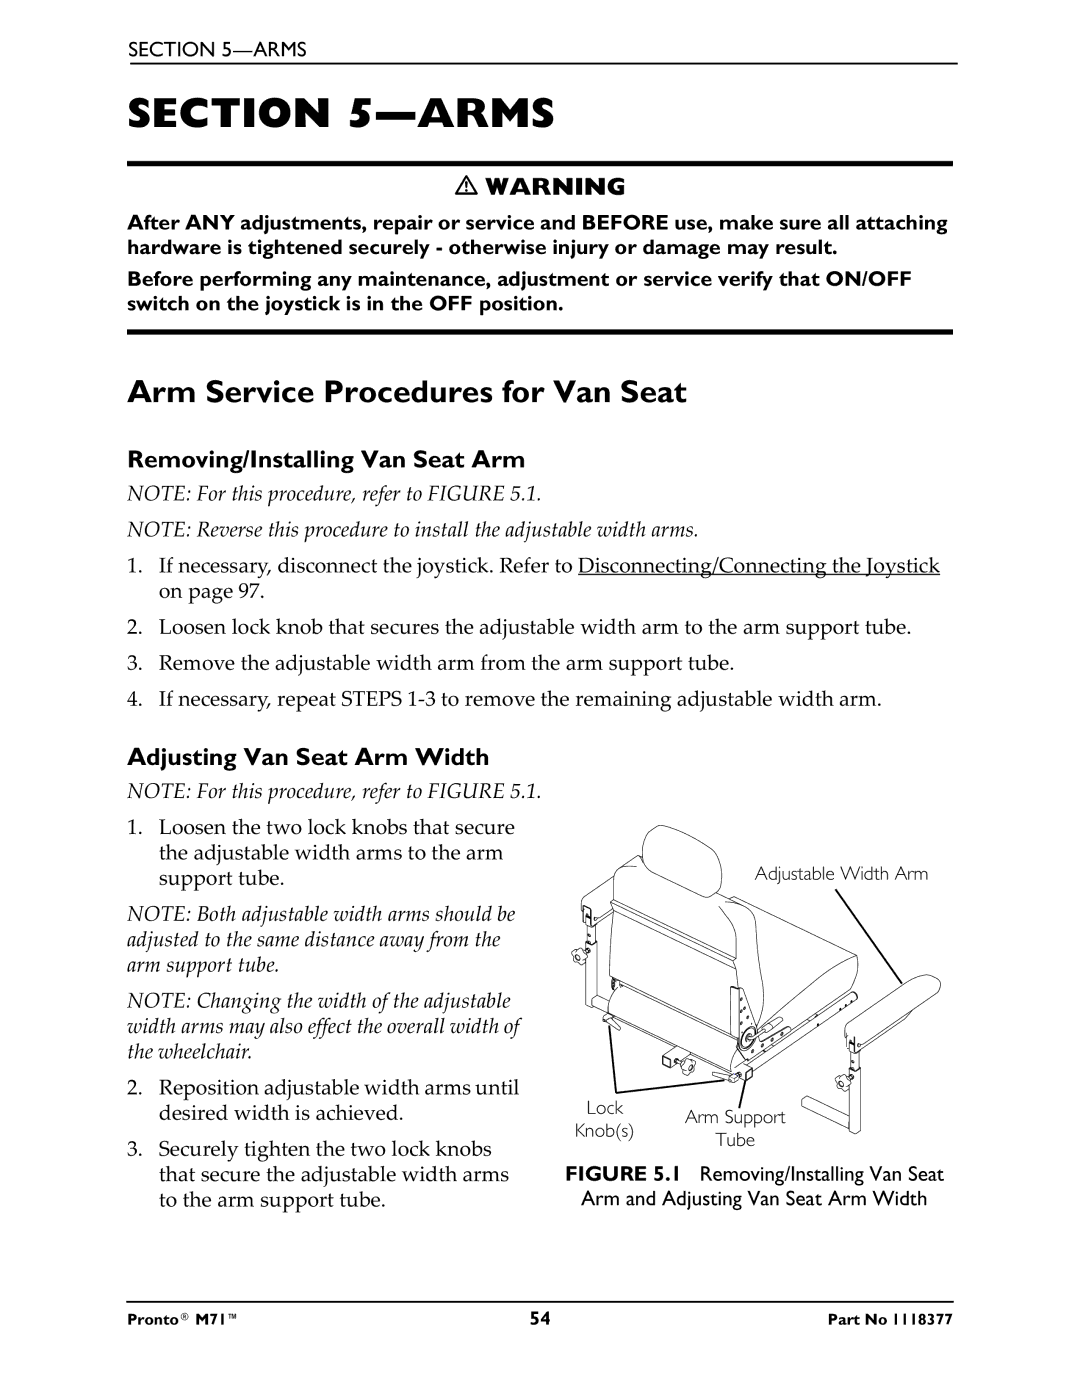
Adjustable Width Arm
Lock | Arm Support | |
Knob(s) | ||
Tube | ||
|
FIGURE 5.1 Removing/Installing Van Seat Arm and Adjusting Van Seat Arm Width
Pronto® M71™ | 54 | Part No 1118377 |