SECTION 12—DISASSEMBLING/ASSEMBLING THE M71
Final Assembly
11.Connect the right motor lead to the right motor connector. Align the RED connectors on both the lead and connector.
12.Connect the left motor lead to the left motor connector. Align the RED connectors on both the lead and connector.
13.Replace the seat by sliding the rear clevis into the rear uprights and allow the front seat latches to pivot into the front seat posts. Lift up on seat release lever to ensure seat is securely locked in place.
14.Connect the joystick cable. Refer to Disconnecting/Connecting the Joystick on page 97.
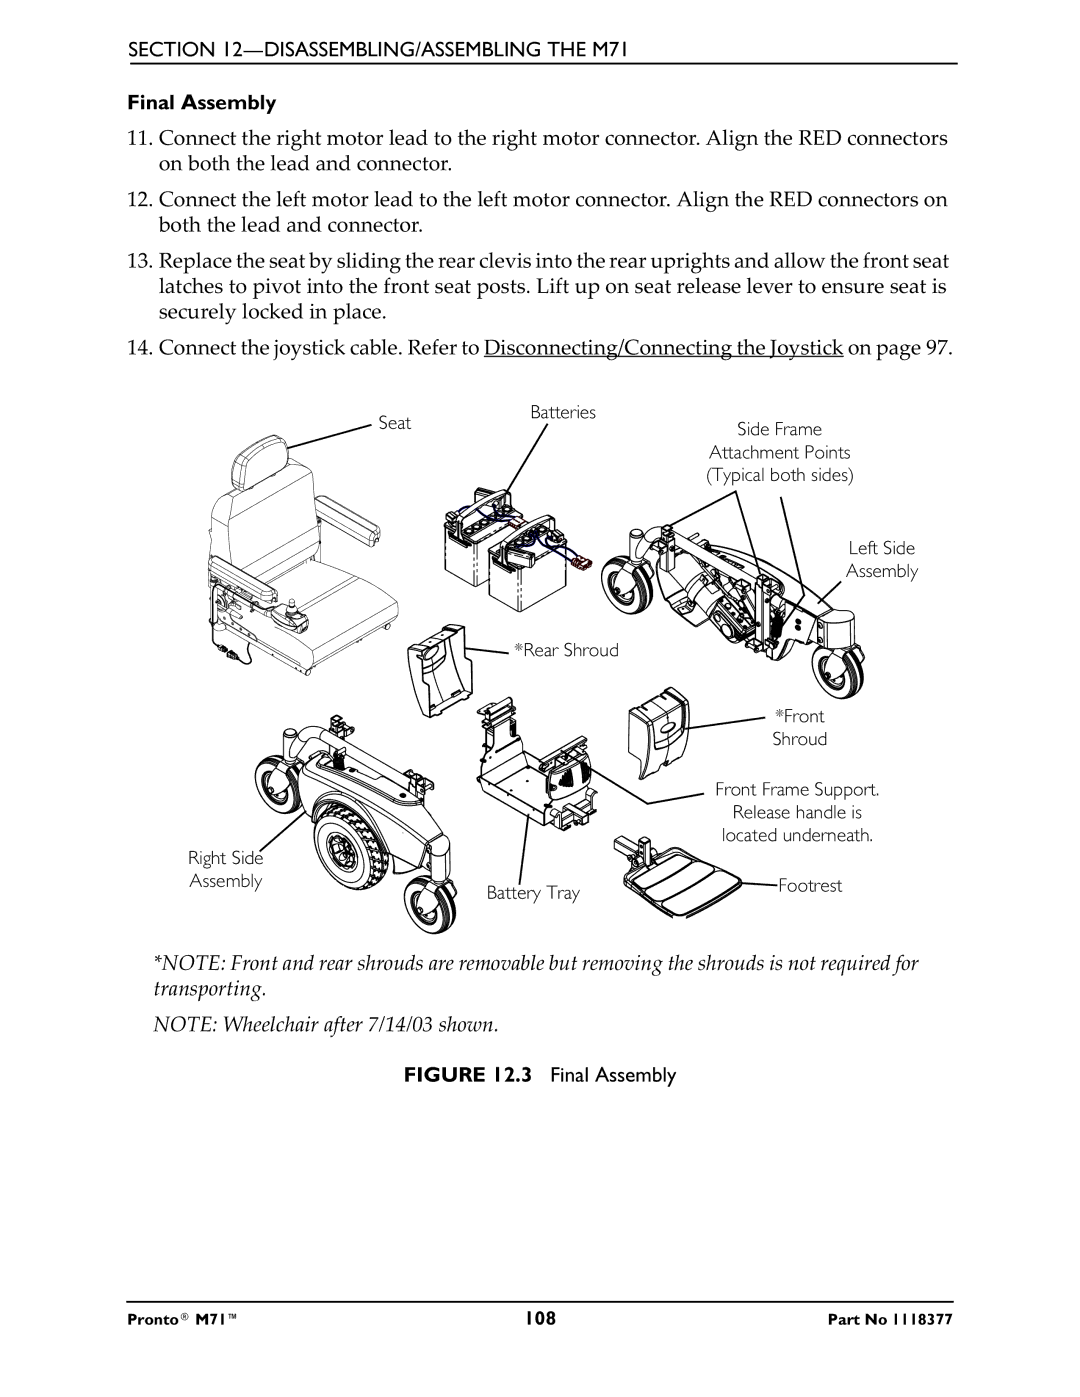
Batteries
SeatSide Frame Attachment Points (Typical both sides)
Left Side
Assembly
![]()
![]() *Rear Shroud
*Rear Shroud
*Front Shroud
Front Frame Support.
Release handle is
located underneath.
Right Side |
|
|
Assembly | Battery Tray | Footrest |
| ||
|
|
*NOTE: Front and rear shrouds are removable but removing the shrouds is not required for transporting.
NOTE: Wheelchair after 7/14/03 shown.
FIGURE 12.3 Final Assembly
Pronto® M71™ | 108 | Part No 1118377 |