SECTION 4—SEAT ASSEMBLY
Replacing the Seat Positioning Strap
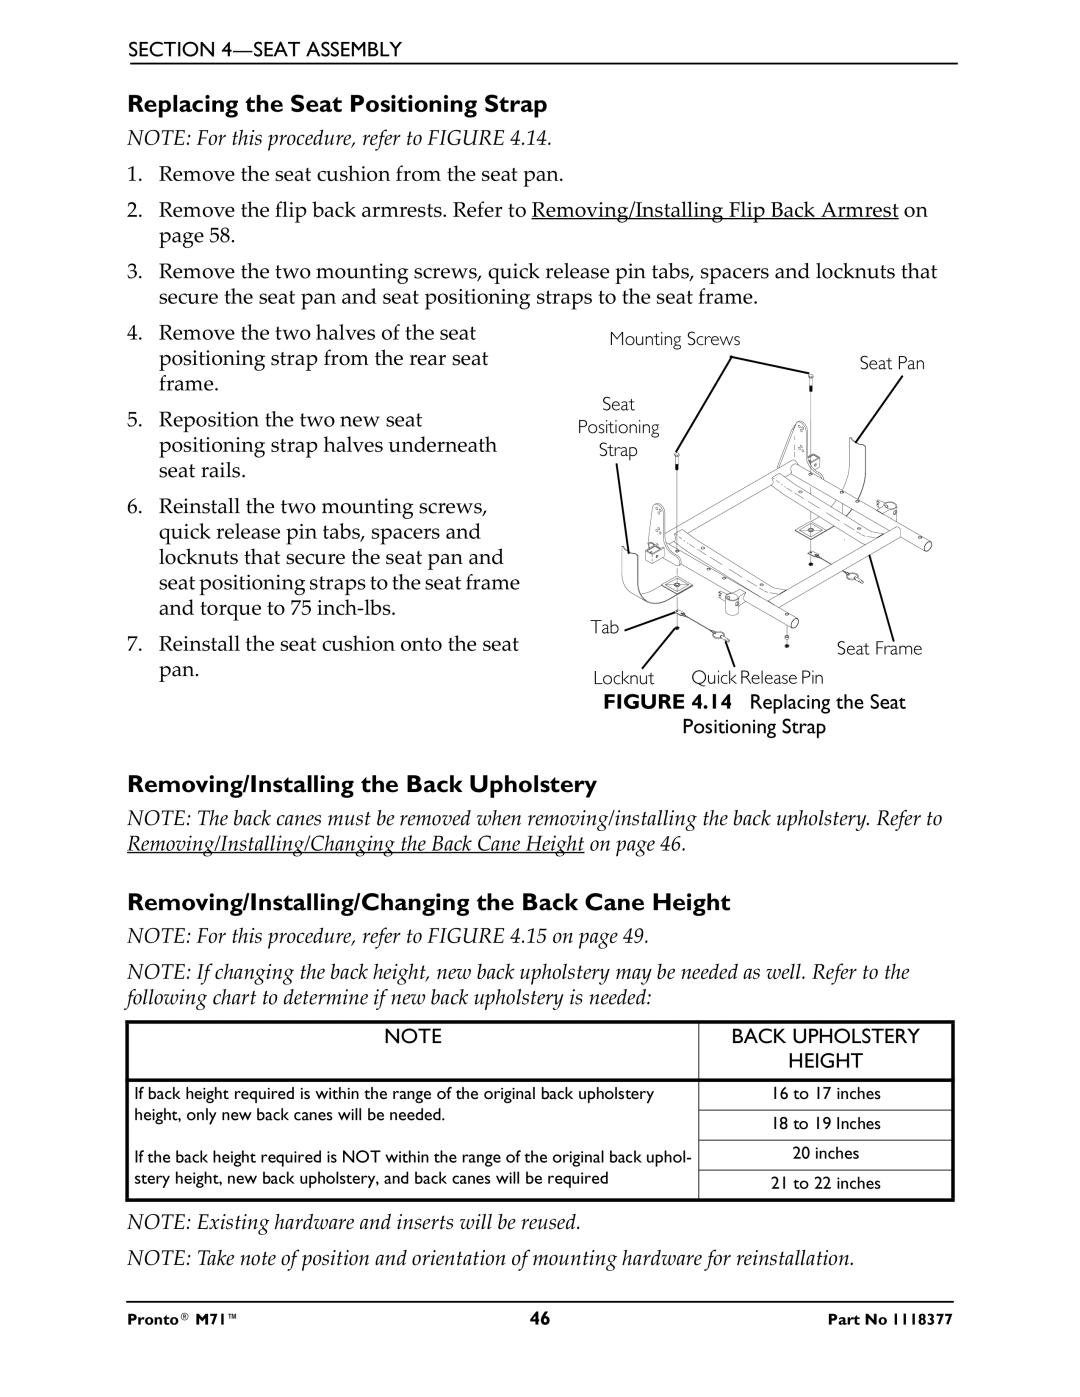
NOTE: For this procedure, refer to FIGURE 4.14.
1.Remove the seat cushion from the seat pan.
2.Remove the flip back armrests. Refer to Removing/Installing Flip Back Armrest on page 58.
3.Remove the two mounting screws, quick release pin tabs, spacers and locknuts that secure the seat pan and seat positioning straps to the seat frame.
4.Remove the two halves of the seat positioning strap from the rear seat frame.
5.Reposition the two new seat positioning strap halves underneath seat rails.
6.Reinstall the two mounting screws, quick release pin tabs, spacers and locknuts that secure the seat pan and seat positioning straps to the seat frame and torque to 75
7.Reinstall the seat cushion onto the seat pan.
Mounting Screws
Seat Pan
Seat
Positioning
Strap
Tab ![]()
![]()
Seat Frame
Locknut | Quick Release Pin |
FIGURE 4.14 Replacing the Seat
Positioning Strap
Removing/Installing the Back Upholstery
NOTE: The back canes must be removed when removing/installing the back upholstery. Refer to Removing/Installing/Changing the Back Cane Height on page 46.
Removing/Installing/Changing the Back Cane Height
NOTE: For this procedure, refer to FIGURE 4.15 on page 49.
NOTE: If changing the back height, new back upholstery may be needed as well. Refer to the following chart to determine if new back upholstery is needed:
NOTE | BACK UPHOLSTERY | |
| HEIGHT | |
|
| |
If back height required is within the range of the original back upholstery | 16 to 17 inches | |
height, only new back canes will be needed. |
| |
18 to 19 Inches | ||
| ||
|
| |
If the back height required is NOT within the range of the original back uphol- | 20 inches | |
stery height, new back upholstery, and back canes will be required |
| |
21 to 22 inches | ||
| ||
|
|
NOTE: Existing hardware and inserts will be reused.
NOTE: Take note of position and orientation of mounting hardware for reinstallation.
Pronto® M71™ | 46 | Part No 1118377 |