SECTION 7—FRONT RIGGINGS/FOOTBOARD
3.Secure the telescoping front tube to the side rail at the desired depth with the existing two cap screws, spacers and threaded blocks.
4.Repeat STEPS 1 to 3 on the opposite side if desired.
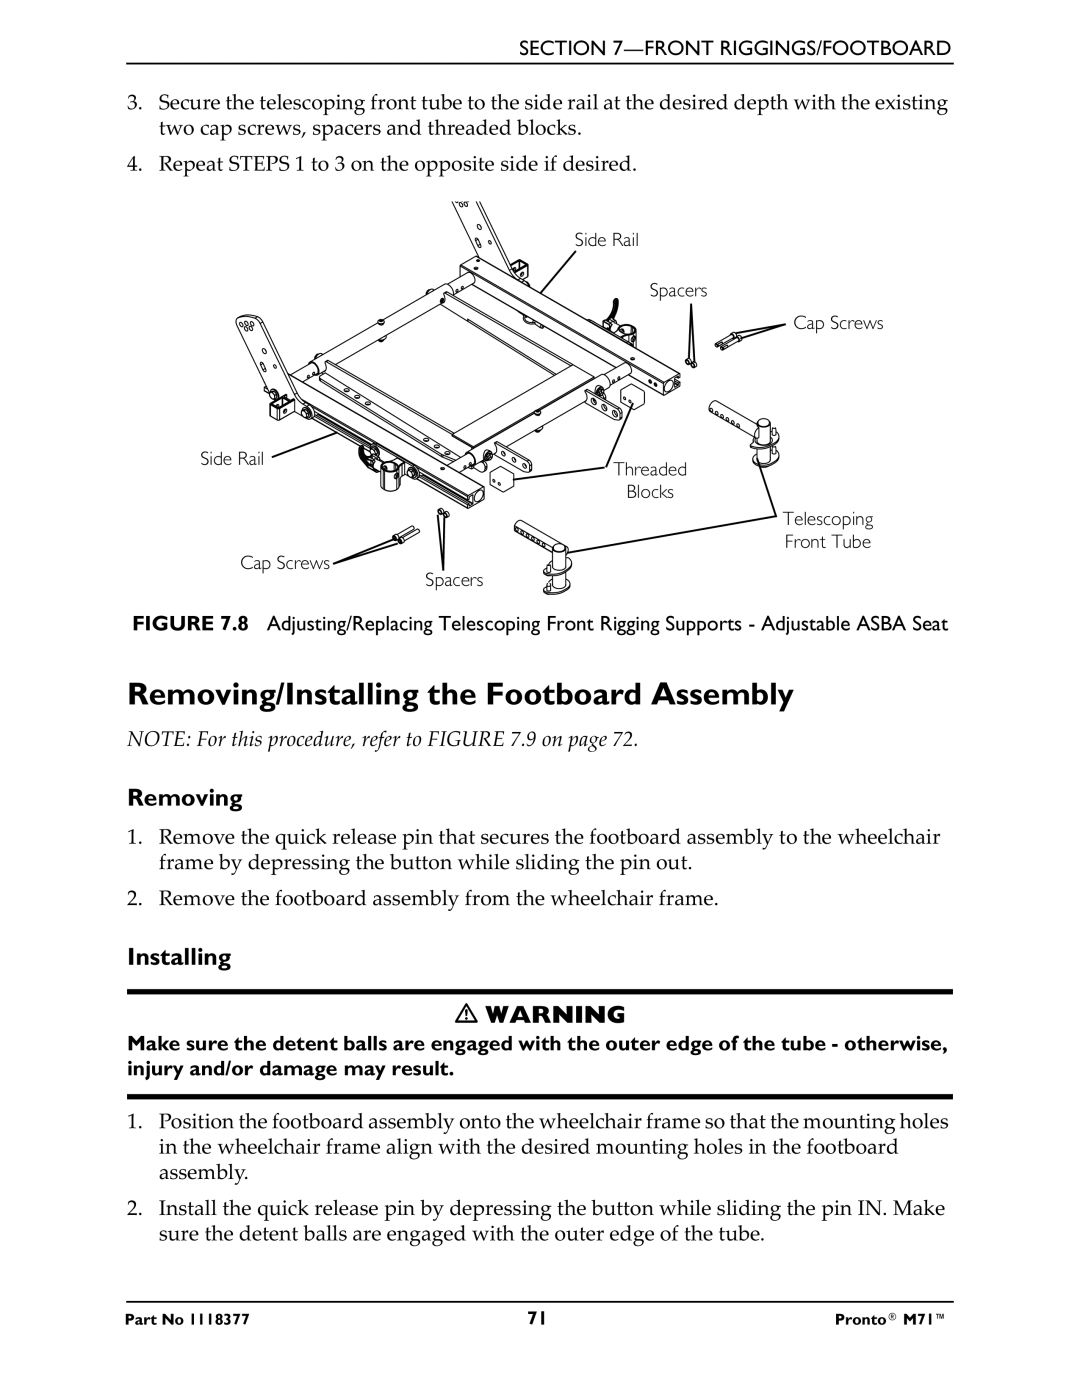
Side Rail
Spacers
Cap Screws
Side Rail | Threaded |
| |
| Blocks |
Telescoping
Front Tube
Cap Screws
Spacers
FIGURE 7.8 Adjusting/Replacing Telescoping Front Rigging Supports - Adjustable ASBA Seat
Removing/Installing the Footboard Assembly
NOTE: For this procedure, refer to FIGURE 7.9 on page 72.
Removing
1.Remove the quick release pin that secures the footboard assembly to the wheelchair frame by depressing the button while sliding the pin out.
2.Remove the footboard assembly from the wheelchair frame.
Installing
WARNING
Make sure the detent balls are engaged with the outer edge of the tube - otherwise, injury and/or damage may result.
1.Position the footboard assembly onto the wheelchair frame so that the mounting holes in the wheelchair frame align with the desired mounting holes in the footboard assembly.
2.Install the quick release pin by depressing the button while sliding the pin IN. Make sure the detent balls are engaged with the outer edge of the tube.
Part No 1118377 | 71 | Pronto® M71™ |