RWD WHEELCHAIRS | SECTION 15 | |
|
|
|
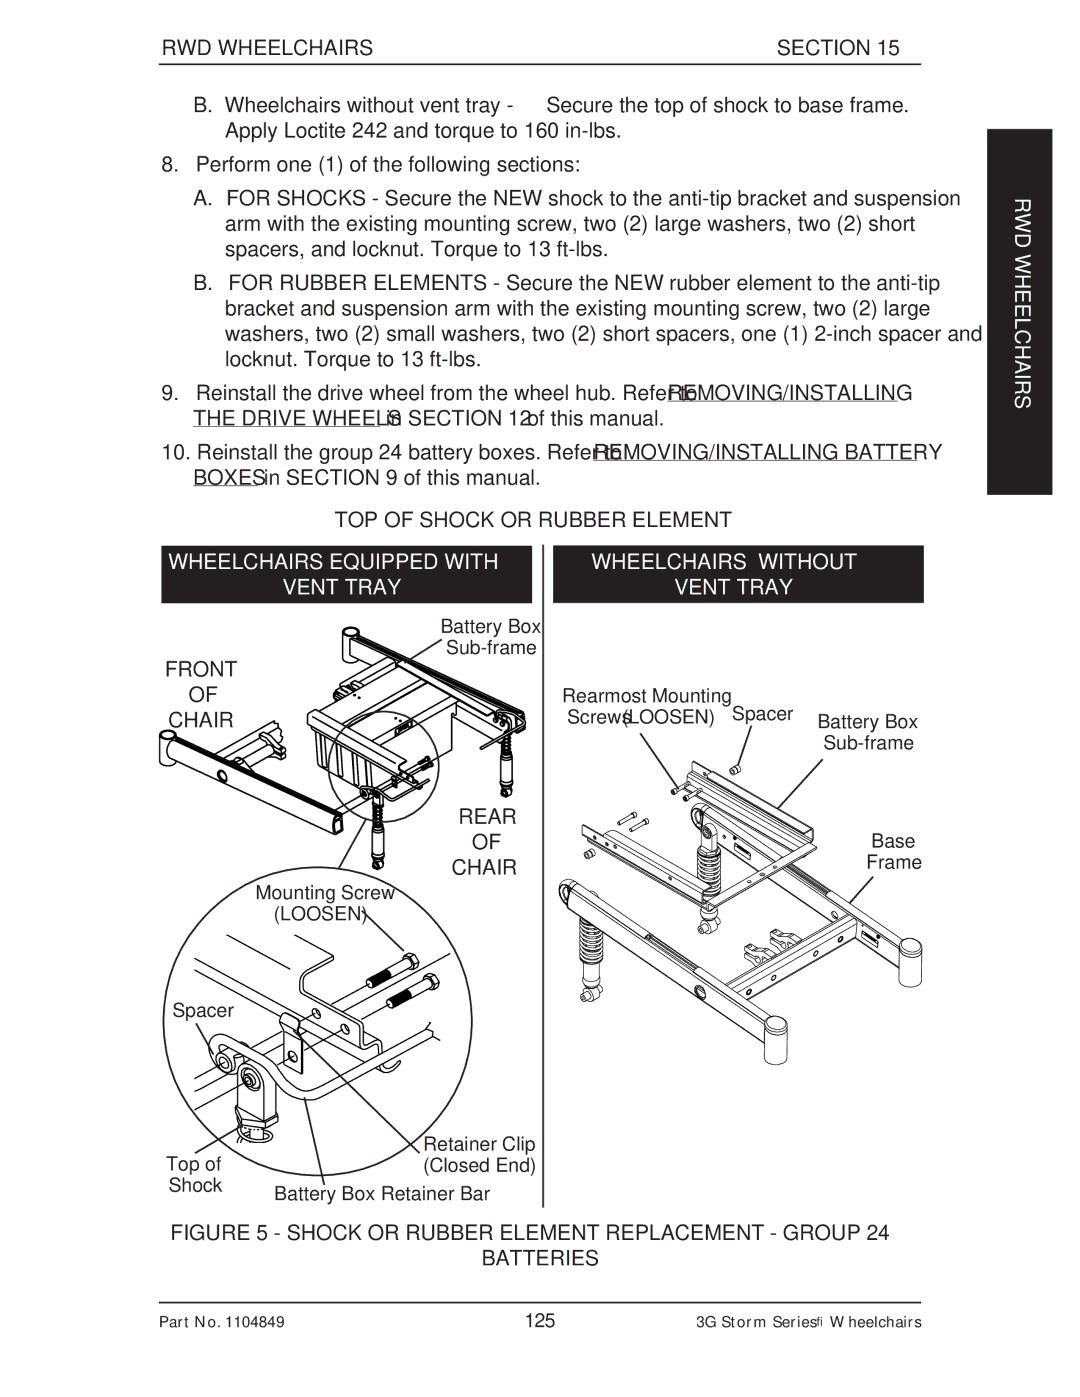
B.Wheelchairs without vent tray - Secure the top of shock to base frame. Apply Loctite 242 and torque to 160
8.Perform one (1) of the following sections:
A.FOR SHOCKS - Secure the NEW shock to the
B.FOR RUBBER ELEMENTS - Secure the NEW rubber element to the
9.Reinstall the drive wheel from the wheel hub. Refer to REMOVING/INSTALLING THE DRIVE WHEELS in SECTION 12 of this manual.
10.Reinstall the group 24 battery boxes. Refer to REMOVING/INSTALLING BATTERY BOXES in SECTION 9 of this manual.
TOP OF SHOCK OR RUBBER ELEMENT
RWD WHEELCHAIRS
WHEELCHAIRS EQUIPPED WITH
VENT TRAY
Battery Box
FRONT
OF
CHAIR
REAR
OF
CHAIR
Mounting Screw
(LOOSEN)
Spacer
| Retainer Clip |
Top of | (Closed End) |
Shock | Battery Box Retainer Bar |
|
WHEELCHAIRS WITHOUT
VENT TRAY
Rearmost Mounting |
|
|
Screws (LOOSEN) | Spacer | Battery Box |
|
| |
|
|
Base
Frame
FIGURE 5 - SHOCK OR RUBBER ELEMENT REPLACEMENT - GROUP 24
BATTERIES
Part No. 1104849 | 125 | 3G Storm Series® Wheelchairs |
