SECTION 15 | RWD WHEELCHAIRS |
BOTTOM OF SHOCK or RUBBER ELEMENT
RWD WHEELCHAIRS
| Shock or |
|
|
| Rubber Element |
| |
| Short | Locknuts |
|
| Spacer |
| |
| Suspension Arm | ||
| Long | ||
Bracket |
| for Gearless/ | |
| Spacer | ||
|
| Brushless Motors | |
|
|
| |
Large
Washer
RUBBER ELEMENT
Washers
Spacer
NOTE: Hardware is mounted inside
of the anti-tip bracket
Small
Washer
Hex Head Cap Screw
Suspension Arm for 4 Pole Motors![]()
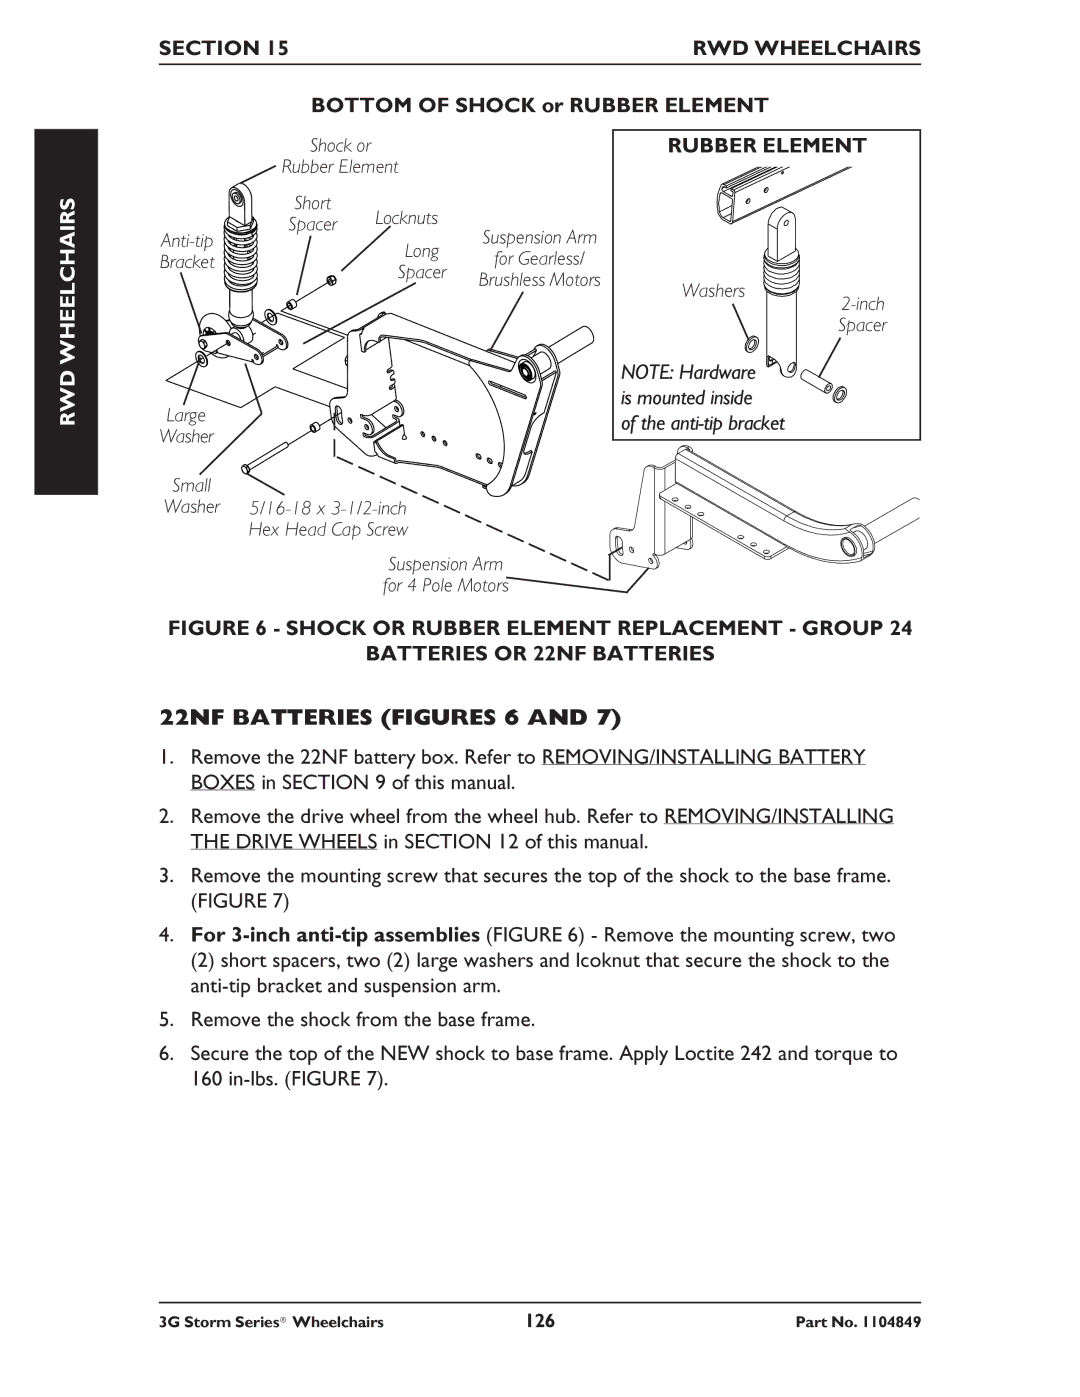
FIGURE 6 - SHOCK OR RUBBER ELEMENT REPLACEMENT - GROUP 24
BATTERIES OR 22NF BATTERIES
22NF BATTERIES (FIGURES 6 AND 7)
1.Remove the 22NF battery box. Refer to REMOVING/INSTALLING BATTERY BOXES in SECTION 9 of this manual.
2.Remove the drive wheel from the wheel hub. Refer to REMOVING/INSTALLING THE DRIVE WHEELS in SECTION 12 of this manual.
3.Remove the mounting screw that secures the top of the shock to the base frame. (FIGURE 7)
4.For
(2) short spacers, two (2) large washers and lcoknut that secure the shock to the
5.Remove the shock from the base frame.
6.Secure the top of the NEW shock to base frame. Apply Loctite 242 and torque to 160
3G Storm Series® Wheelchairs | 126 | Part No. 1104849 |
