SEAT FRAME | SECTION 6 |
|
|
WARNING
Both side frames MUST be adjusted to the same mounting hole position to maintain proper weight balance of user and seat frame. If weight is not balanced, injury to the assistant and/or user and damage to the wheelchair may result.
6.Repeat STEPS
7.Perform one (1) of the following:
A.For adjusting the seat width only, perform the instructions outlined in
PREPARATION FOR REMOVING/INSTALLING SEAT FRAME (STANDARD FRAME, ASBA, AND VAN SEAT) in this section of the manual.
NOTE: When performing the steps outlined in PREPARATION FOR REMOVING/INSTALLING SEAT FRAME (STANDARD FRAME, ASBA, AND VAN SEAT) the seat pan, seat cushion, back upholstery and spreader bar (if applicable), will need to be replaced. Spreader bars are only required on seat depths greater than
B.For all other changes regarding seat frame changes, refer back to the starting procedure to complete the desired change.
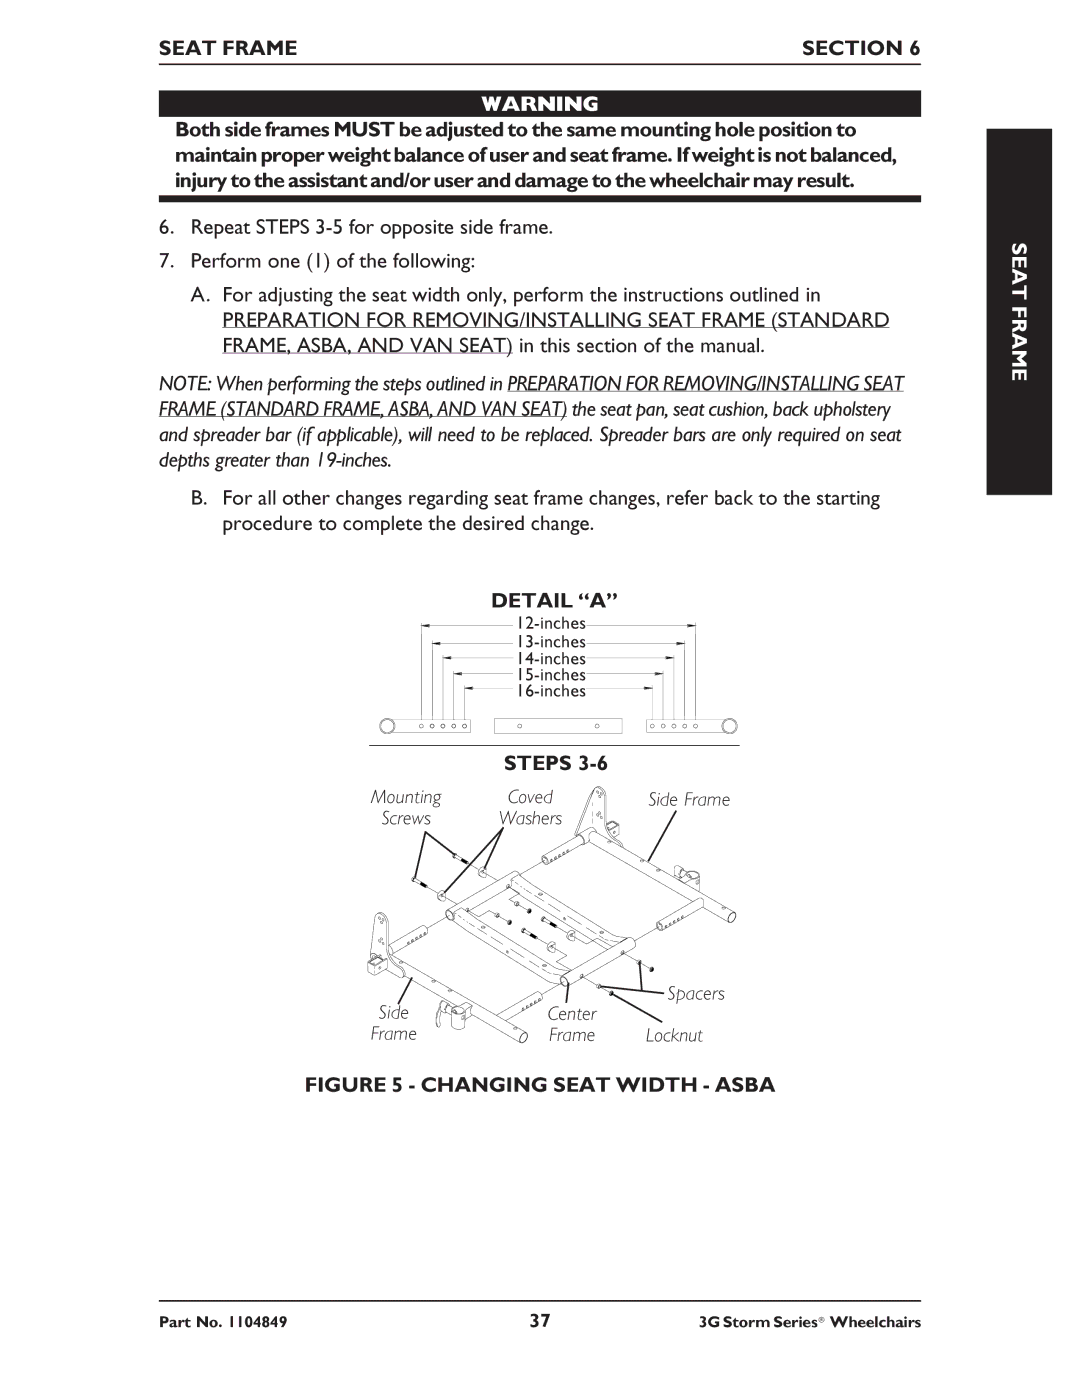
DETAIL “A”
STEPS 3-6
Mounting | Coved | Side Frame |
Screws | Washers |
|
|
| Spacers |
Side | Center |
|
Frame | Frame | Locknut |
FIGURE 5 - CHANGING SEAT WIDTH - ASBA
SEAT FRAME
Part No. 1104849 | 37 | 3G Storm Series® Wheelchairs |
