WHEELS/MOTORS | SECTION 12 |
|
|
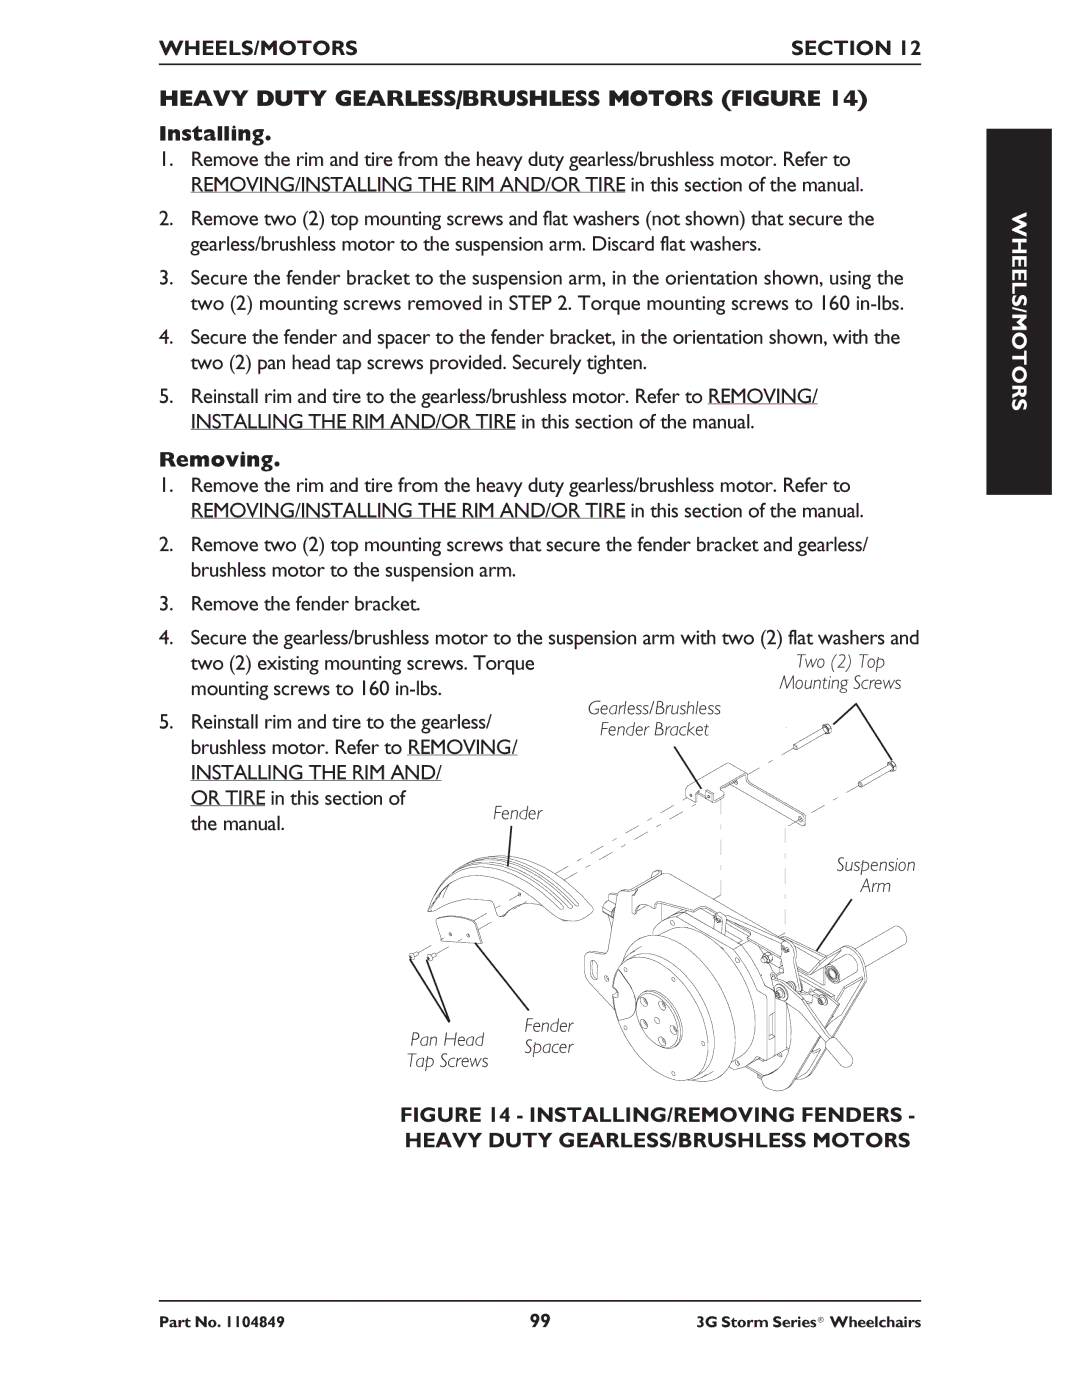
HEAVY DUTY GEARLESS/BRUSHLESS MOTORS (FIGURE 14)
Installing.
1.Remove the rim and tire from the heavy duty gearless/brushless motor. Refer to REMOVING/INSTALLING THE RIM AND/OR TIRE in this section of the manual.
2.Remove two (2) top mounting screws and flat washers (not shown) that secure the gearless/brushless motor to the suspension arm. Discard flat washers.
3.Secure the fender bracket to the suspension arm, in the orientation shown, using the two (2) mounting screws removed in STEP 2. Torque mounting screws to 160
4.Secure the fender and spacer to the fender bracket, in the orientation shown, with the two (2) pan head tap screws provided. Securely tighten.
5.Reinstall rim and tire to the gearless/brushless motor. Refer to REMOVING/ INSTALLING THE RIM AND/OR TIRE in this section of the manual.
Removing.
1.Remove the rim and tire from the heavy duty gearless/brushless motor. Refer to REMOVING/INSTALLING THE RIM AND/OR TIRE in this section of the manual.
2.Remove two (2) top mounting screws that secure the fender bracket and gearless/ brushless motor to the suspension arm.
3.Remove the fender bracket.
4.Secure the gearless/brushless motor to the suspension arm with two (2) flat washers and
two (2) existing mounting screws. Torque mounting screws to 160
WHEELS/MOTORS
5.Reinstall rim and tire to the gearless/ brushless motor. Refer to REMOVING/ INSTALLING THE RIM AND/
OR TIRE in this section of
Gearless/Brushless
Fender Bracket
the manual.
Fender
Suspension
Arm
Fender
Pan Head Spacer
Tap Screws
FIGURE 14 - INSTALLING/REMOVING FENDERS - HEAVY DUTY GEARLESS/BRUSHLESS MOTORS
Part No. 1104849 | 99 | 3G Storm Series® Wheelchairs |
