Copying
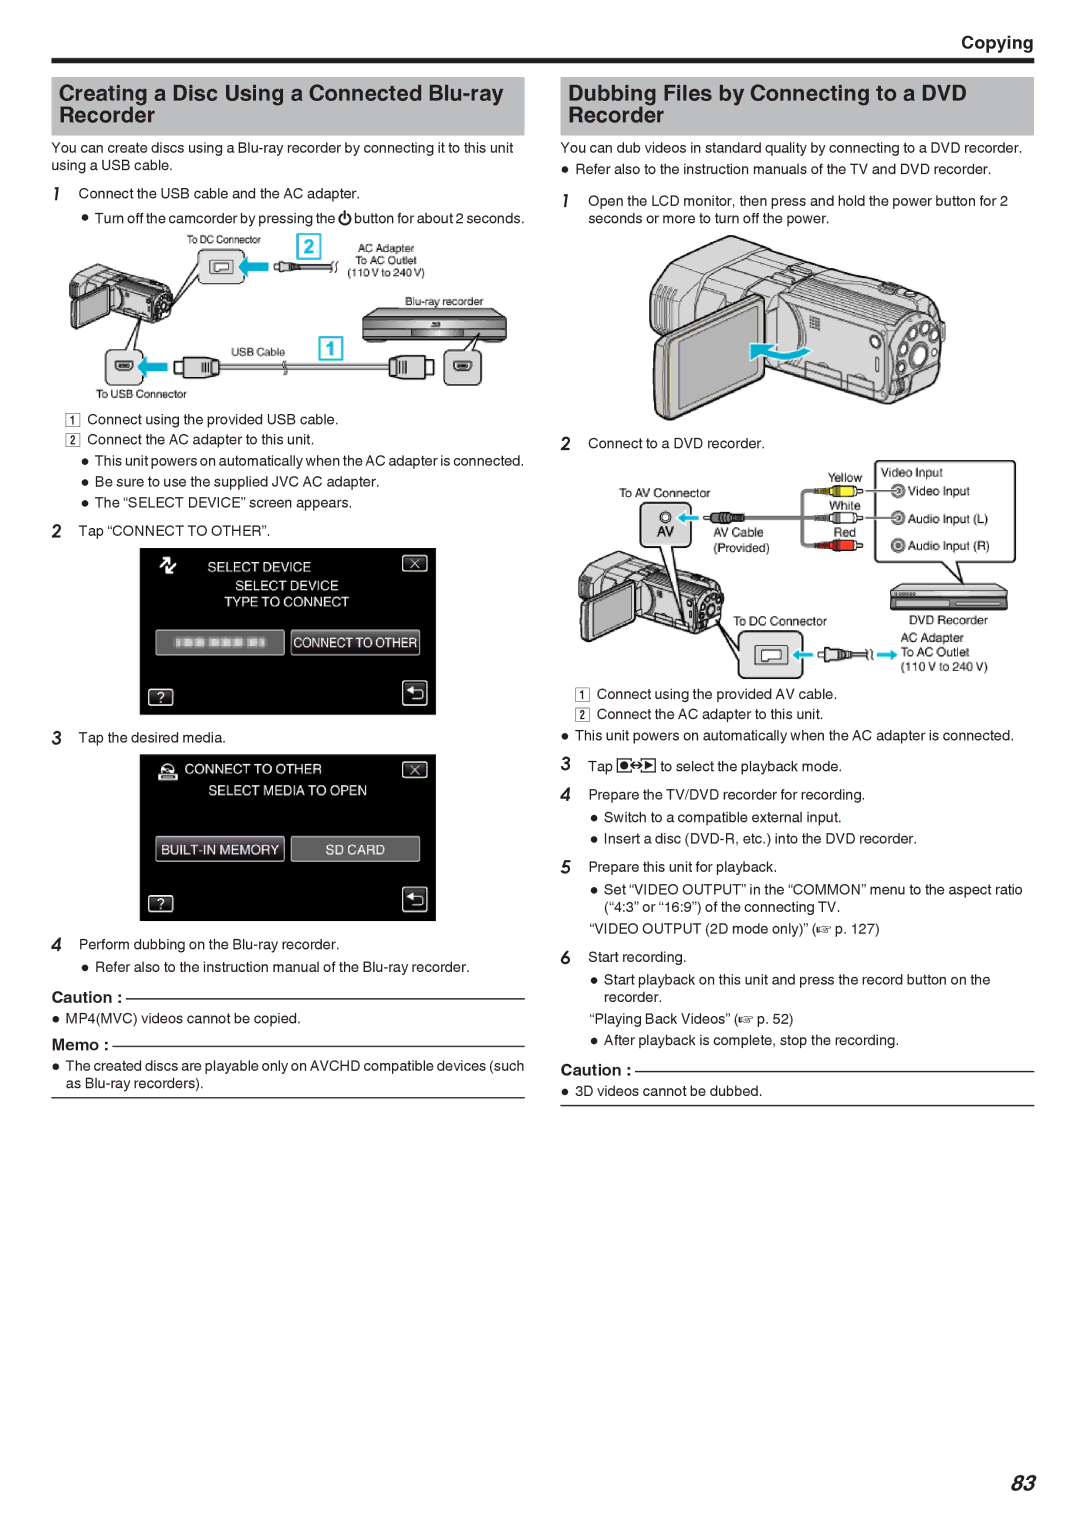
Creating a Disc Using a Connected Blu-ray Recorder
You can create discs using a
1Connect the USB cable and the AC adapter.
0 Turn off the camcorder by pressing the Mbutton for about 2 seconds.
Dubbing Files by Connecting to a DVD Recorder
You can dub videos in standard quality by connecting to a DVD recorder.
0Refer also to the instruction manuals of the TV and DVD recorder.
1Open the LCD monitor, then press and hold the power button for 2 seconds or more to turn off the power.
AConnect using the provided USB cable.
B Connect the AC adapter to this unit. | 2 Connect to a DVD recorder. | |
0 | This unit powers on automatically when the AC adapter is connected. |
|
0 | Be sure to use the supplied JVC AC adapter. |
|
0 | The “SELECT DEVICE” screen appears. |
|
2Tap “CONNECT TO OTHER”.
3Tap the desired media.
4Perform dubbing on the
0 Refer also to the instruction manual of the
Caution :
0MP4(MVC) videos cannot be copied.
Memo :
0The created discs are playable only on AVCHD compatible devices (such as
AConnect using the provided AV cable. B Connect the AC adapter to this unit.
0This unit powers on automatically when the AC adapter is connected. 3 Tap qto select the playback mode.
4Prepare the TV/DVD recorder for recording.
0 Switch to a compatible external input.
0 Insert a disc
5Prepare this unit for playback.
0 Set “VIDEO OUTPUT” in the “COMMON” menu to the aspect ratio (“4:3” or “16:9”) of the connecting TV.
“VIDEO OUTPUT (2D mode only)” (A p. 127)
6Start recording.
0 Start playback on this unit and press the record button on the recorder.
“Playing Back Videos” (A p. 52)
0 After playback is complete, stop the recording.
Caution :
03D videos cannot be dubbed.
83
