Names of Parts
|
|
|
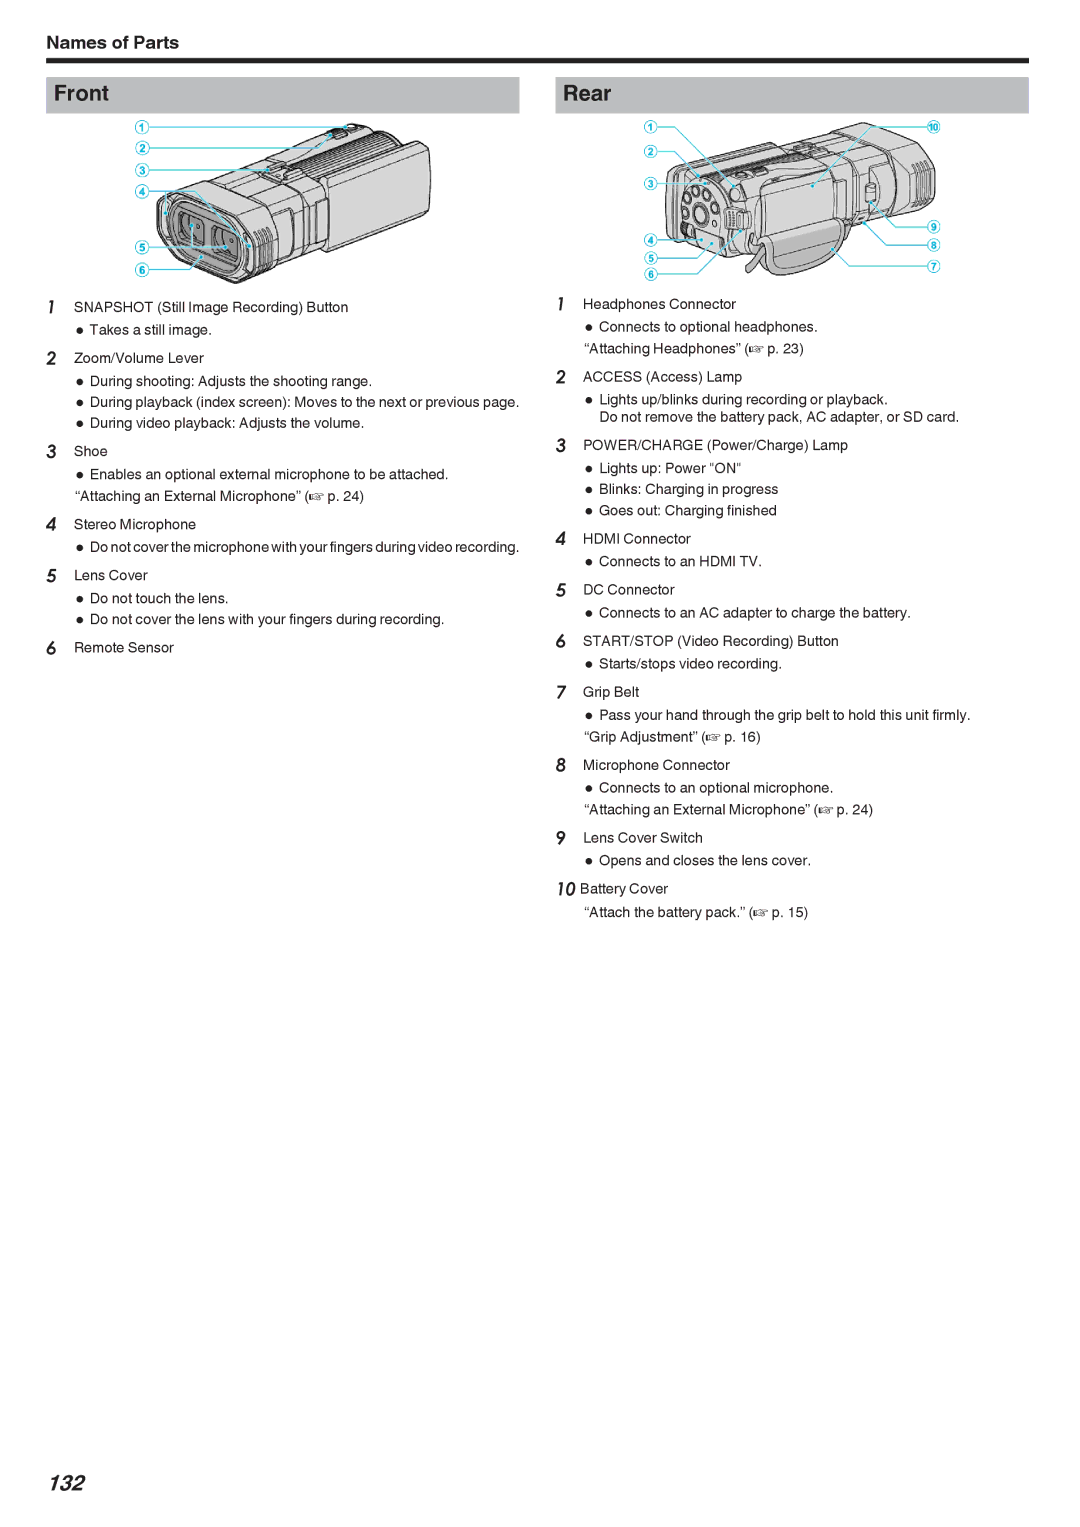
Front | Rear |
1SNAPSHOT (Still Image Recording) Button 0 Takes a still image.
2Zoom/Volume Lever
0 During shooting: Adjusts the shooting range.
0 During playback (index screen): Moves to the next or previous page.
0 During video playback: Adjusts the volume.
3Shoe
0 Enables an optional external microphone to be attached. “Attaching an External Microphone” (A p. 24)
4Stereo Microphone
0 Do not cover the microphone with your fingers during video recording.
5Lens Cover
0 Do not touch the lens.
0 Do not cover the lens with your fingers during recording.
6Remote Sensor
1Headphones Connector
0 Connects to optional headphones. “Attaching Headphones” (A p. 23)
2ACCESS (Access) Lamp
0 Lights up/blinks during recording or playback.
Do not remove the battery pack, AC adapter, or SD card.
3POWER/CHARGE (Power/Charge) Lamp 0 Lights up: Power "ON"
0 Blinks: Charging in progress
0 Goes out: Charging finished
4HDMI Connector
0 Connects to an HDMI TV.
5DC Connector
0 Connects to an AC adapter to charge the battery.
6START/STOP (Video Recording) Button 0 Starts/stops video recording.
7Grip Belt
0 Pass your hand through the grip belt to hold this unit firmly. “Grip Adjustment” (A p. 16)
8Microphone Connector
0 Connects to an optional microphone. “Attaching an External Microphone” (A p. 24)
9Lens Cover Switch
0 Opens and closes the lens cover.
10 Battery Cover
“Attach the battery pack.” (A p. 15)