FS6300 NMS User Manual | 8 • Configuring the 6511RC Card |
|
|
2.Select Enable from the Trace Monitor
3.Enter the alphanumeric name your SDH network uses for the
4.Select the message length value your SDH network uses from the Trace Message Len
5.For Trace J1 Byte, enter the value your connected SDH network uses for the J1 byte in the SDH frame. J1 only applies to
6.In the Signal Label field, enter the value your connected SDH network uses for the path signal label in the SDH frame.
7.Click Submit.
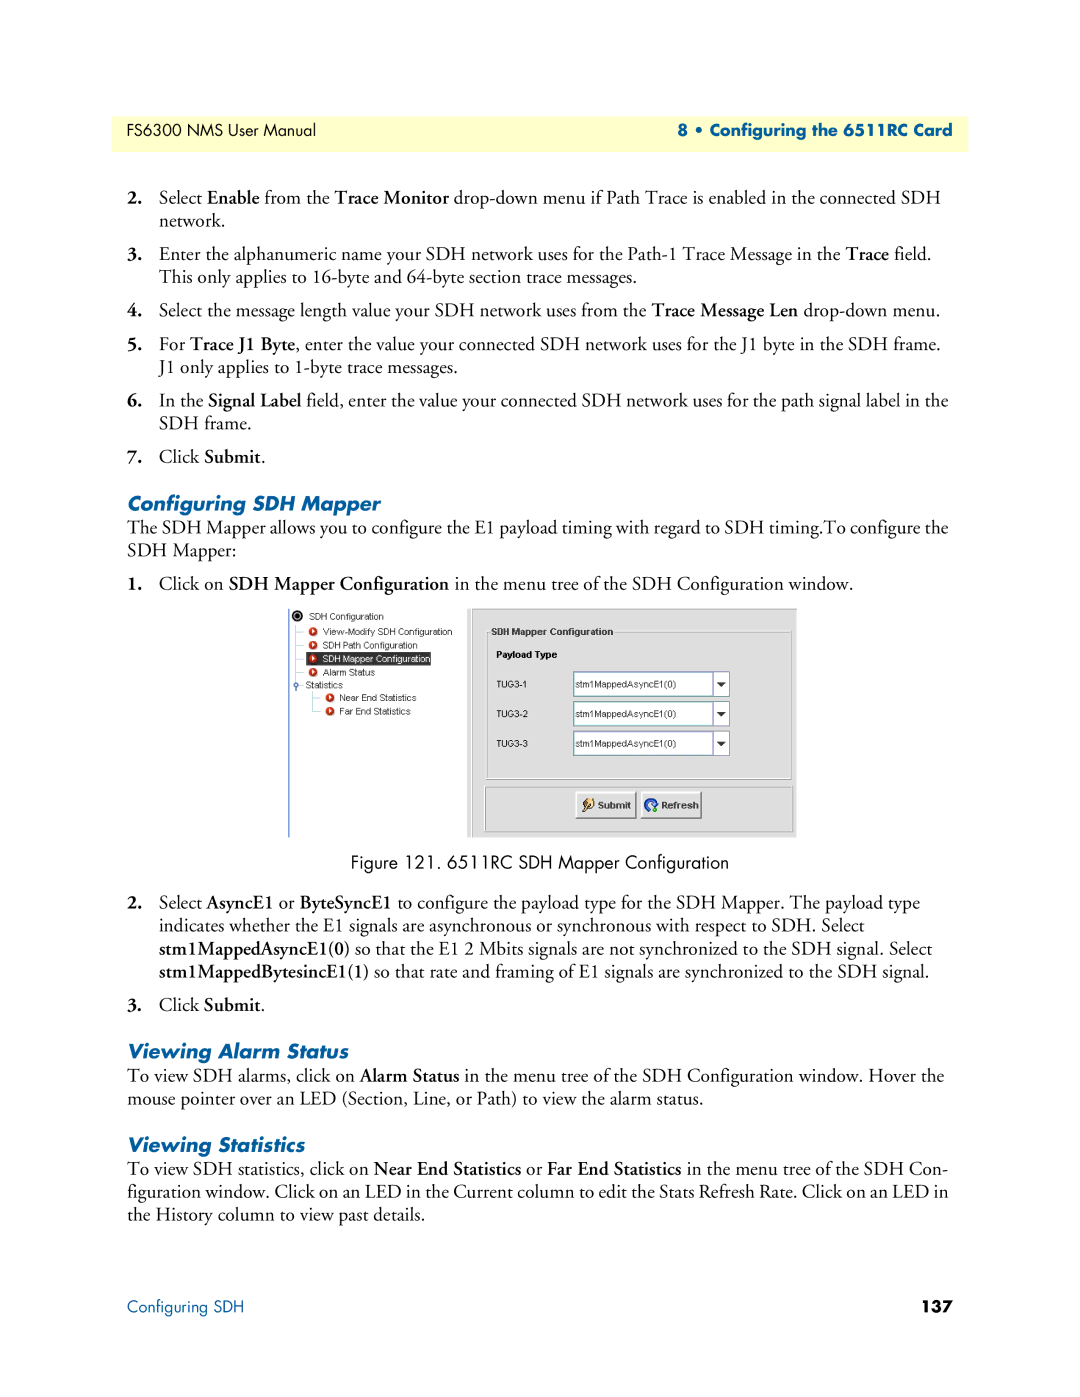
Configuring SDH Mapper
The SDH Mapper allows you to configure the E1 payload timing with regard to SDH timing.To configure the SDH Mapper:
1.Click on SDH Mapper Configuration in the menu tree of the SDH Configuration window.
Figure 121. 6511RC SDH Mapper Configuration
2.Select AsyncE1 or ByteSyncE1 to configure the payload type for the SDH Mapper. The payload type indicates whether the E1 signals are asynchronous or synchronous with respect to SDH. Select stm1MappedAsyncE1(0) so that the E1 2 Mbits signals are not synchronized to the SDH signal. Select stm1MappedBytesincE1(1) so that rate and framing of E1 signals are synchronized to the SDH signal.
3.Click Submit.
Viewing Alarm Status
To view SDH alarms, click on Alarm Status in the menu tree of the SDH Configuration window. Hover the mouse pointer over an LED (Section, Line, or Path) to view the alarm status.
Viewing Statistics
To view SDH statistics, click on Near End Statistics or Far End Statistics in the menu tree of the SDH Con- figuration window. Click on an LED in the Current column to edit the Stats Refresh Rate. Click on an LED in the History column to view past details.
Configuring SDH | 137 |