02Connections
2Use a SCART cable (not supplied) to connect the AV1
This enables you to watch discs.
3Use another SCART cable to connect the AV2 (INPUT 1/DECODER) AV connector to a SCART AV connector on your decoder box.
This enables you to record scrambled TV channels.
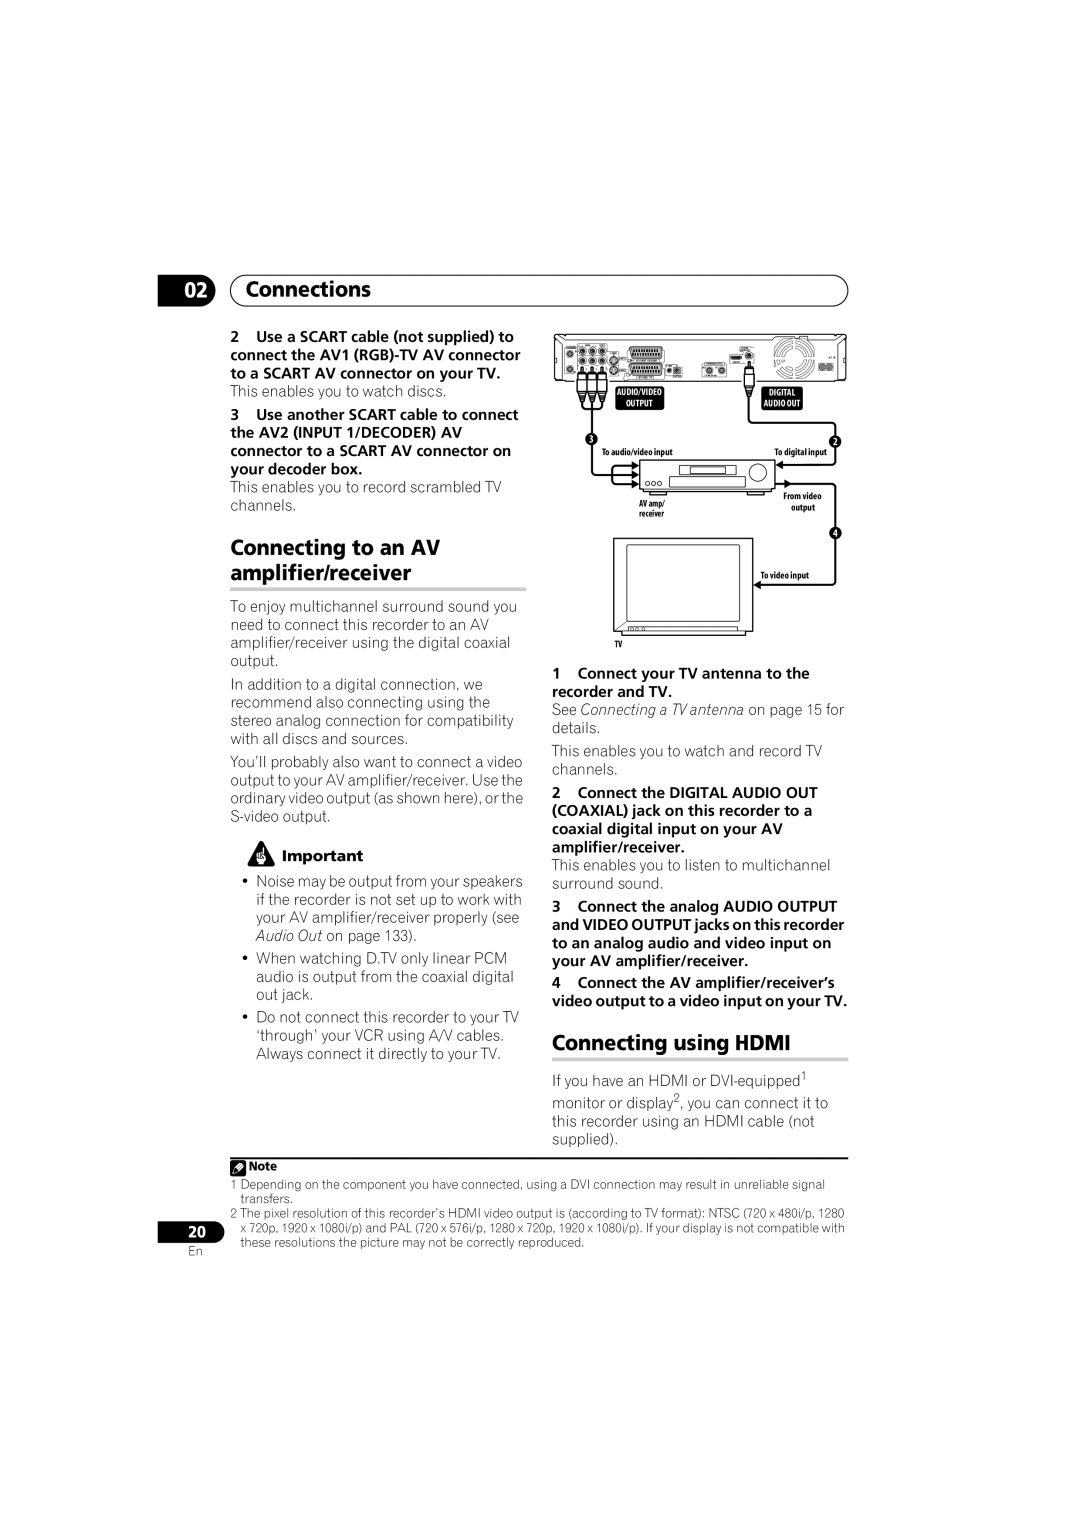
Connecting to an AV amplifier/receiver
To enjoy multichannel surround sound you need to connect this recorder to an AV amplifier/receiver using the digital coaxial output.
In addition to a digital connection, we recommend also connecting using the stereo analog connection for compatibility with all discs and sources.
You’ll probably also want to connect a video output to your AV amplifier/receiver. Use the ordinary video output (as shown here), or the
![]() Important
Important
•Noise may be output from your speakers if the recorder is not set up to work with your AV amplifier/receiver properly (see Audio Out on page 133).
•When watching D.TV only linear PCM audio is output from the coaxial digital out jack.
•Do not connect this recorder to your TV ‘through’ your VCR using A/V cables. Always connect it directly to your TV.
ANTENNA | R | AUDIO | L VIDEO |
|
|
|
|
| DIGITAL |
IN |
|
|
|
|
|
|
| AUDIO OUT | |
|
|
|
| INPUT 3 | AV 2 (INPUT 1/DECODER) |
|
|
| AC IN |
|
|
|
|
|
| ANTENNA(DIGITAL) | HDMI OUT COAXIAL | ||
|
|
|
|
|
| OUT | IN |
| |
OUT |
|
|
| OUTPUT |
|
|
|
|
|
| Y | PB | PR |
| AV 1 (RGB) – TV | CONTROL | 5 V | 30 mA |
|
| COMPONENT VIDEO OUT |
|
|
|
|
| |||
|
|
|
| AUDIO/VIDEO |
|
|
| DIGITAL | |
|
|
|
|
| OUTPUT |
|
|
| AUDIO OUT |
3 | 2 |
To audio/video input | To digital input |
AV amp/ | From video | |
output | ||
receiver | ||
| ||
| 4 | |
| To video input | |
TV |
|
1Connect your TV antenna to the recorder and TV.
See Connecting a TV antenna on page 15 for details.
This enables you to watch and record TV channels.
2Connect the DIGITAL AUDIO OUT (COAXIAL) jack on this recorder to a coaxial digital input on your AV amplifier/receiver.
This enables you to listen to multichannel surround sound.
3Connect the analog AUDIO OUTPUT and VIDEO OUTPUT jacks on this recorder to an analog audio and video input on your AV amplifier/receiver.
4Connect the AV amplifier/receiver’s video output to a video input on your TV.
Connecting using HDMI
If you have an HDMI or
monitor or display2, you can connect it to this recorder using an HDMI cable (not supplied).
20
En
![]() Note
Note
1 Depending on the component you have connected, using a DVI connection may result in unreliable signal transfers.
2 The pixel resolution of this recorder’s HDMI video output is (according to TV format): NTSC (720 x 480i/p, 1280 x 720p, 1920 x 1080i/p) and PAL (720 x 576i/p, 1280 x 720p, 1920 x 1080i/p). If your display is not compatible with these resolutions the picture may not be correctly reproduced.