preparation
BUTTON TYPE BATTERY INSTALLATION
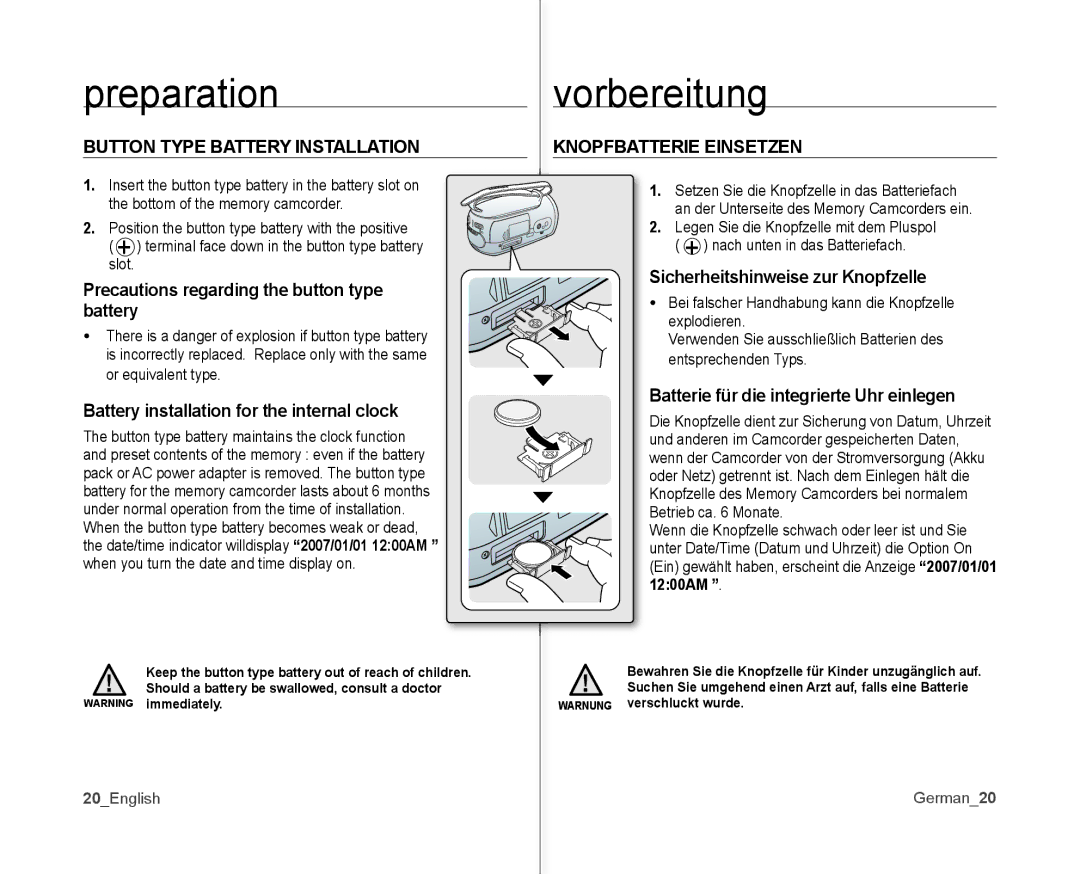
1. �nsert the button type battery in the battery slot on the bottom of the memory camcorder.
2. Position the button type battery with the positive ( + ) terminal face down in the button type battery slot.
Precautions regarding the button type battery
• There is a danger of explosion if button type battery is incorrectly replaced. �eplace only with the same or equivalent type.
Battery installation for the internal clock
The button type battery maintains the clock function and preset contents of the memory : even if the battery pack or AC power adapter is removed. The button type battery for the memory camcorder lasts about 6 months under normal operation from the time of installation. When the button type battery becomes weak or dead, the date/time indicator willdisplay “2007/01/01 12:00AM ” when you turn the date and time display on.
Keep the button type battery out of reach of children. Should a battery be swallowed, consult a doctor
WARNING immediately.
20_English
vorbereitung
KNOPFBATTERIE EINSETZEN
1.Setzen Sie die Knopfzelle in das Batteriefach an der Unterseite des Memory Camcorders ein.
2.Legen Sie die Knopfzelle mit dem Pluspol ( + ) nach unten in das Batteriefach.
Sicherheitshinweise zur Knopfzelle
•Bei falscher Handhabung kann die Knopfzelle
explodieren.
Verwenden Sie ausschließlich Batterien des entsprechenden Typs.
Batterie für die integrierte Uhr einlegen
Die Knopfzelle dient zur Sicherung von Datum, Uhrzeit und anderen im Camcorder gespeicherten Daten, wenn der Camcorder von der Stromversorgung (Akku oder Netz) getrennt ist. Nach dem Einlegen h�lt die Knopfzelle des Memory Camcorders bei normalem Betrieb ca. 6 Monate.
Wenn die Knopfzelle schwach oder leer ist und Sie unter Date/Time (Datum und Uhrzeit) die Option On (Ein) gew�hlt haben, erscheint die Anzeige “2007/01/01 12:00AM ”.
Bewahren Sie die Knopfzelle für Kinder unzugänglich auf. Suchen Sie umgehend einen Arzt auf, falls eine Batterie
WARNUNG verschluckt wurde.
�erman_20
