RECORDING IMAGES IN THE ALARM
RECORDING AREA
Monitored images | |
are recorded | are recorded |

Pre-alarm recording
1
MENU
2
![]() REC/STOP
REC/STOP
ALARM
Setting the time
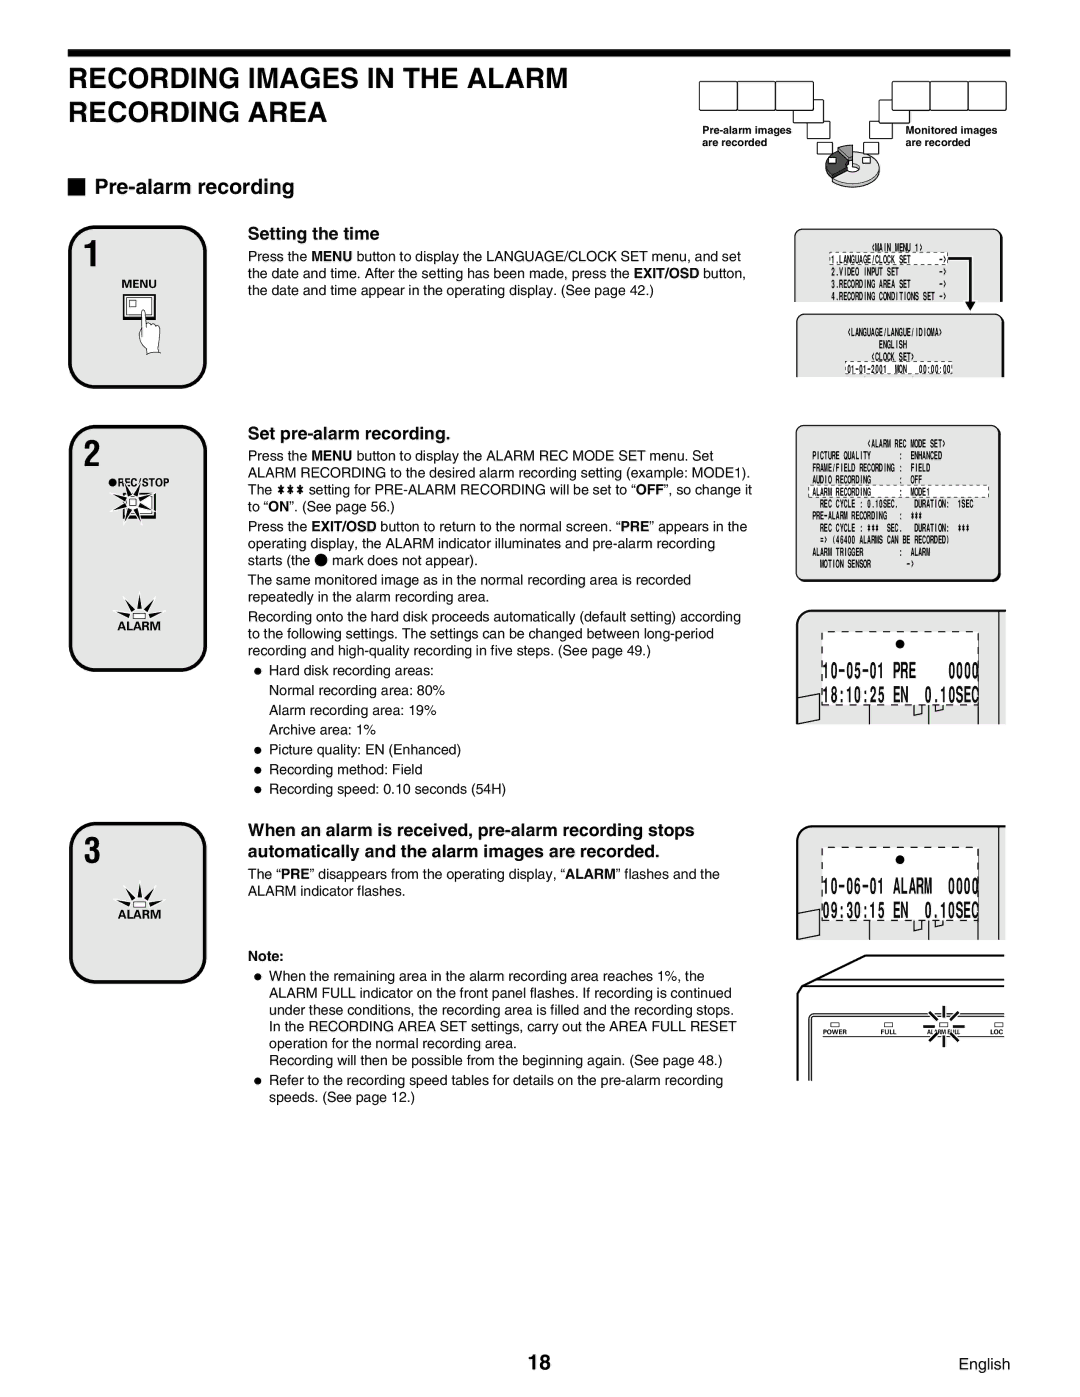
Press the MENU button to display the LANGUAGE/CLOCK SET menu, and set the date and time. After the setting has been made, press the EXIT/OSD button, the date and time appear in the operating display. (See page 42.)
Set pre-alarm recording.
Press the MENU button to display the ALARM REC MODE SET menu. Set ALARM RECORDING to the desired alarm recording setting (example: MODE1). The *** setting for
Press the EXIT/OSD button to return to the normal screen. “PRE” appears in the operating display, the ALARM indicator illuminates and
The same monitored image as in the normal recording area is recorded repeatedly in the alarm recording area.
Recording onto the hard disk proceeds automatically (default setting) according to the following settings. The settings can be changed between
•Hard disk recording areas: Normal recording area: 80% Alarm recording area: 19% Archive area: 1%
•Picture quality: EN (Enhanced)
•Recording method: Field
•Recording speed: 0.10 seconds (54H)
<MAIN MENU 1>
1.LANGUAGE/CLOCK | SET | |
2.VIDEO INPUT SET | ||
3.RECORDING AREA | SET | |
4.RECORDING CONDITIONS SET
<LANGUAGE/LANGUE/IDIOMA> ENGLISH
<CLOCK SET>
<ALARM REC | MODE SET> | |
PICTURE QUALITY | : | ENHANCED |
FRAME/FIELD RECORDING | : | FIELD |
AUDIO RECORDING | : | OFF |
ALARM RECORDING | : | MODE1 |
REC CYCLE : 0.10SEC. |
| DURATION: 1SEC |
: | ¤¤¤ | |
REC CYCLE | : ¤¤¤ | SEC. | DURATION: ¤¤¤ |
=> (46400 | ALARMS | CAN BE RECORDED) | |
ALARM TRIGGER | : | ALARM | |
MOTION SENSOR |
| ||
PRE | 0000 | |
18:10:25 | EN | 0.10SEC |
3
ALARM
When an alarm is received,
The “PRE” disappears from the operating display, “ALARM” flashes and the ALARM indicator flashes.
Note:
•When the remaining area in the alarm recording area reaches 1%, the ALARM FULL indicator on the front panel flashes. If recording is continued under these conditions, the recording area is filled and the recording stops. In the RECORDING AREA SET settings, carry out the AREA FULL RESET operation for the normal recording area.
Recording will then be possible from the beginning again. (See page 48.)
•Refer to the recording speed tables for details on the
POWER | FULL | ALARM FULL | LOC |
18 | English |
