HDD SET SETTING
Main menu 2 |
|
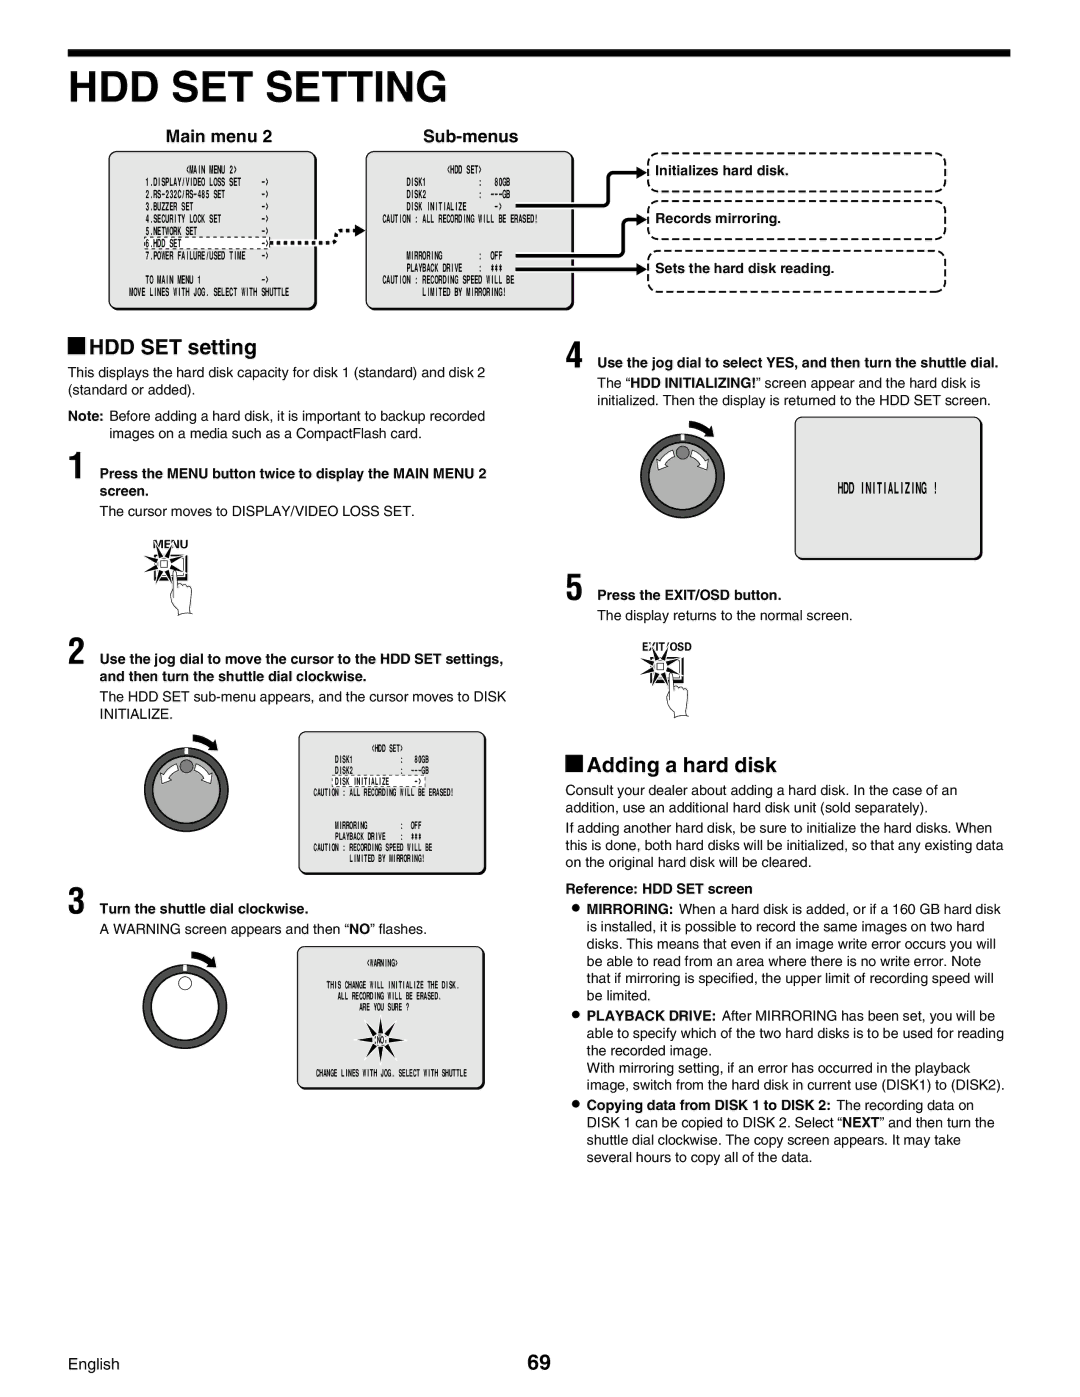
| <MAIN MENU 2> |
|
| <HDD SET> |
| |
| 1.DISPLAY/VIDEO LOSS SET |
| DISK1 | : | 80GB | |
|
| DISK2 | : | |||
| 3.BUZZER SET |
| DISK INITIALIZE |
| ||
| 4.SECURITY LOCK SET |
| CAUTION : ALL RECORDING WILL BE ERASED! | |||
| 5.NETWORK SET |
|
|
|
| |
| 6.HDD SET |
|
|
|
| |
| 7.POWER FAILURE/USED TIME |
| MIRRORING | : | OFF | |
| TO MAIN MENU 1 |
| PLAYBACK DRIVE | : | ¤¤¤ | |
|
| CAUTION : RECORDING SPEED WILL BE | ||||
MOVE LINES WITH JOG. SELECT WITH | SHUTTLE | LIMITED BY MIRRORING! | ||||
![]() Initializes hard disk.
Initializes hard disk.
![]() Records mirroring.
Records mirroring.
![]() Sets the hard disk reading.
Sets the hard disk reading.
 HDD SET setting
This displays the hard disk capacity for disk 1 (standard) and disk 2 (standard or added).
Note: Before adding a hard disk, it is important to backup recorded images on a media such as a CompactFlash card.
1 Press the MENU button twice to display the MAIN MENU 2 screen.
The cursor moves to DISPLAY/VIDEO LOSS SET.
4 Use the jog dial to select YES, and then turn the shuttle dial.
The “HDD INITIALIZING!” screen appear and the hard disk is initialized. Then the display is returned to the HDD SET screen.
HDD INITIALIZING !
MENU
2 Use the jog dial to move the cursor to the HDD SET settings, and then turn the shuttle dial clockwise.
The HDD SET
| <HDD SET> |
|
| |
| DISK1 | : | 80GB | |
| DISK2 | : | ||
| DISK INITIALIZE |
| ERASED! | |
CAUTION : ALL RECORDING | WILL BE | |||
| MIRRORING | : | OFF | |
| PLAYBACK DRIVE | : | *** |
|
CAUTION : RECORDING SPEED WILL BE
LIMITED BY MIRRORING!
3 Turn the shuttle dial clockwise.
A WARNING screen appears and then “NO” flashes.
<WARNING>
THIS CHANGE WILL INITIALIZE THE DISK.
ALL RECORDING WILL BE ERASED.
ARE YOU SURE ?
![]()
![]() NO
NO![]()
![]()
CHANGE LINES WITH JOG. SELECT WITH SHUTTLE
5 Press the EXIT/OSD button.
The display returns to the normal screen.
EXIT/OSD
 Adding a hard disk
Consult your dealer about adding a hard disk. In the case of an addition, use an additional hard disk unit (sold separately).
If adding another hard disk, be sure to initialize the hard disks. When this is done, both hard disks will be initialized, so that any existing data on the original hard disk will be cleared.
Reference: HDD SET screen
•MIRRORING: When a hard disk is added, or if a 160 GB hard disk is installed, it is possible to record the same images on two hard disks. This means that even if an image write error occurs you will be able to read from an area where there is no write error. Note that if mirroring is specified, the upper limit of recording speed will be limited.
•PLAYBACK DRIVE: After MIRRORING has been set, you will be able to specify which of the two hard disks is to be used for reading the recorded image.
With mirroring setting, if an error has occurred in the playback image, switch from the hard disk in current use (DISK1) to (DISK2).
•Copying data from DISK 1 to DISK 2: The recording data on DISK 1 can be copied to DISK 2. Select “NEXT” and then turn the shuttle dial clockwise. The copy screen appears. It may take several hours to copy all of the data.
English | 69 |