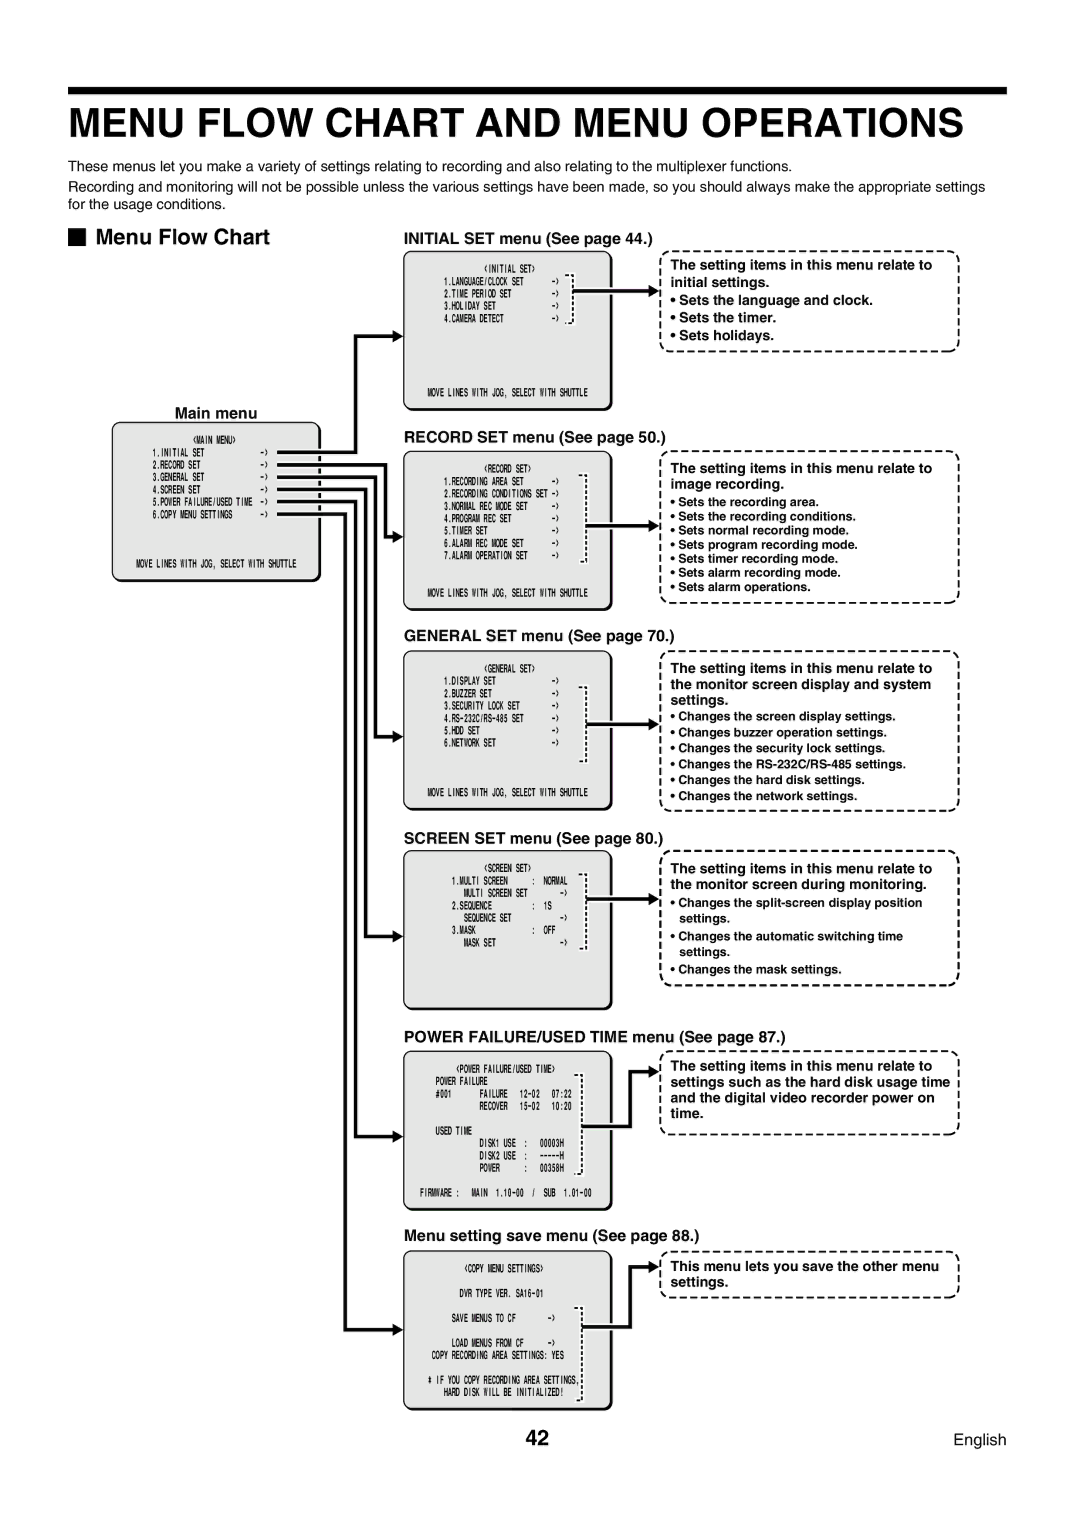
MENU FLOW CHART AND MENU OPERATIONS
These menus let you make a variety of settings relating to recording and also relating to the multiplexer functions.
Recording and monitoring will not be possible unless the various settings have been made, so you should always make the appropriate settings for the usage conditions.
 Menu Flow Chart
Main menu
<MAIN MENU> |
|
1.INITIAL SET |
INITIAL SET menu (See page 44.)
<INITIAL SET> |
|
| The setting items in this menu relate to |
1.LANGUAGE/CLOCK SET |
| initial settings. | |
2.TIME PERIOD SET |
| • Sets the language and clock. | |
3.HOLIDAY SET |
| ||
| • Sets the timer. | ||
4.CAMERA DETECT |
| ||
|
|
| • Sets holidays. |
MOVE LINES WITH JOG, SELECT WITH SHUTTLE
RECORD SET menu (See page 50.)
2.RECORD SET | |
3.GENERAL SET | |
4.SCREEN SET | |
5.POWER FAILURE/USED TIME | |
6.COPY MENU SETTINGS |
MOVE LINES WITH JOG, SELECT WITH SHUTTLE
<RECORD | SET> |
|
1.RECORDING AREA SET | ||
2.RECORDING CONDITIONS SET | ||
3.NORMAL REC MODE SET | ||
4.PROGRAM REC SET |
| |
5.TIMER SET |
| |
6.ALARM REC MODE SET | ||
7.ALARM OPERATION SET | ||
MOVE LINES WITH JOG, SELECT WITH SHUTTLE
The setting items in this menu relate to image recording.
•Sets the recording area.
•Sets the recording conditions.
•Sets normal recording mode.
•Sets program recording mode.
•Sets timer recording mode.
•Sets alarm recording mode.
•Sets alarm operations.
GENERAL SET menu (See page 70.)
<GENERAL SET> |
|
1.DISPLAY SET | |
2.BUZZER SET | |
3.SECURITY LOCK SET | |
5.HDD SET | |
6.NETWORK SET |
MOVE LINES WITH JOG, SELECT WITH SHUTTLE
The setting items in this menu relate to the monitor screen display and system settings.
•Changes the screen display settings.
•Changes buzzer operation settings.
•Changes the security lock settings.
•Changes the
•Changes the hard disk settings.
•Changes the network settings.
SCREEN SET menu (See page 80.)
<SCREEN SET> |
|
|
| The setting items in this menu relate to |
1.MULTI SCREEN | : | NORMAL |
| the monitor screen during monitoring. |
MULTI SCREEN SET |
|
| • Changes the | |
2.SEQUENCE | : | 1S |
| |
SEQUENCE SET |
|
| settings. | |
3.MASK | : | OFF |
| • Changes the automatic switching time |
MASK SET |
|
| ||
|
| settings. | ||
|
|
|
| |
|
|
|
| • Changes the mask settings. |
POWER FAILURE/USED TIME menu (See page 87.)
<POWER FAILURE/USED TIME> |
| ||||
POWER FAILURE |
|
|
|
| |
#001 | FAILURE | 07:22 |
|
| |
| RECOVER |
| |||
USED TIME |
|
|
|
|
|
DISK1 USE | : | 00003H |
| ||
|
| ||||
| DISK2 USE | : |
| ||
| POWER | : | 00358H |
| |
FIRMWARE : | MAIN | SUB |
| ||
The setting items in this menu relate to settings such as the hard disk usage time and the digital video recorder power on time.
Menu setting save menu (See page 88.)
<COPY MENU SETTINGS> |
| |
DVR TYPE VER. |
| |
SAVE | MENUS TO CF | |
LOAD | MENUS FROM CF | |
COPY RECORDING AREA SETTINGS: YES
*IF YOU COPY RECORDING AREA SETTINGS, HARD DISK WILL BE INITIALIZED!
This menu lets you save the other menu settings.
42 | English |