SEARCHING FOR RECORDED IMAGES
4 Use the jog dial to select the area to search (example: NORMAL), and then turn the shuttle dial clockwise.
The cursor moves to CHANNEL.
<MOTION | DETECTION SEARCH> | ||
SEARCH FROM | : | NORMAL | |
START | : | ||
END | : | ||
|
|
|
|
CHANNEL | : |
| |
START PREVIEW |
| ||
MOVE:JOG |
|
| SELECT:SHUTTLE |
Note: If the setting for MULTIPLEXER in the VIDEO INPUT SET menu is set to “NO USE”, the cursor will move to START PREVIEW.
Examples of recording area selection:
•ALARM: Only images in the alarm recording area are searched.
•NORMAL: Only images in the normal recording area are searched.
•ALARM & NORMAL: Images in both the alarm recording area and the normal recording area are searched.
5 Turn the shuttle dial clockwise, use the jog dial to select the camera number (example: 4), and then turn the shuttle dial clockwise.
The cursor moves to START PREVIEW.
<MOTION | DETECTION SEARCH> | ||
SEARCH FROM | : | NORMAL | |
START | : | ||
END | : | ||
CHANNEL | : | 4 |
|
|
|
|
|
START PREVIEW |
|
| |
MOVE:JOG |
| SELECT:SHUTTLE | |
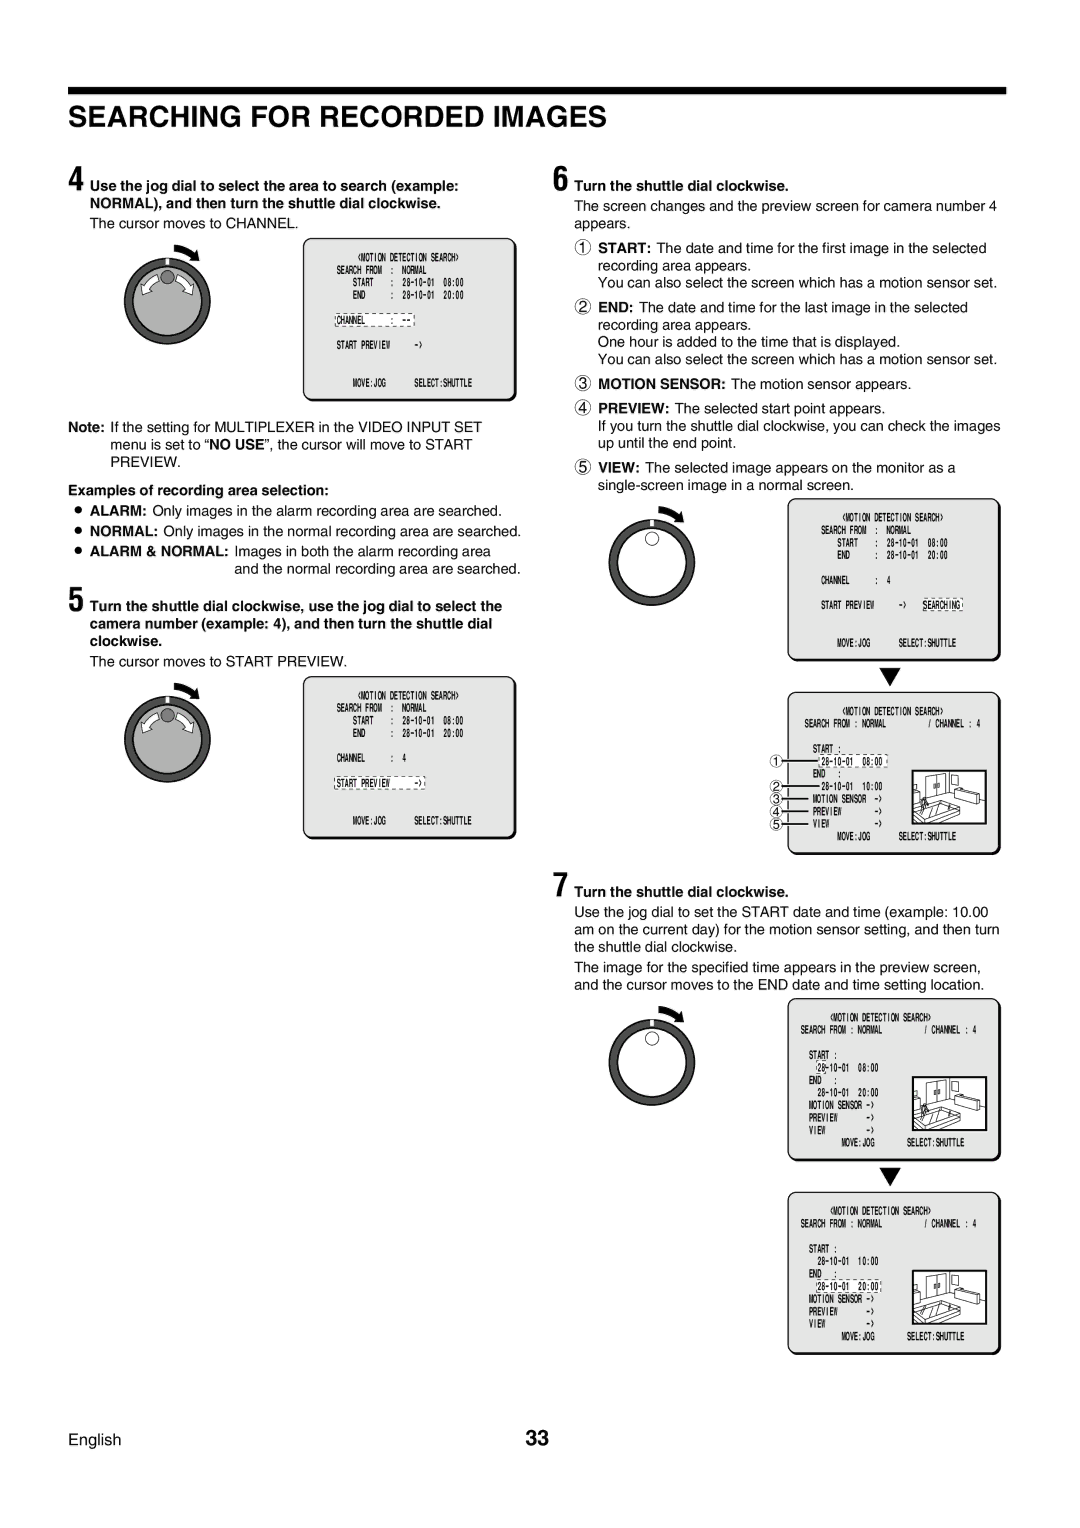
6 Turn the shuttle dial clockwise.
The screen changes and the preview screen for camera number 4 appears.
1START: The date and time for the first image in the selected recording area appears.
You can also select the screen which has a motion sensor set.
2END: The date and time for the last image in the selected recording area appears.
One hour is added to the time that is displayed.
You can also select the screen which has a motion sensor set.
3MOTION SENSOR: The motion sensor appears.
4PREVIEW: The selected start point appears.
If you turn the shuttle dial clockwise, you can check the images up until the end point.
5VIEW: The selected image appears on the monitor as a
<MOTION | DETECTION SEARCH> | ||||
SEARCH FROM | : | NORMAL |
|
|
|
START | : |
| |||
END | : | 20:00 |
| ||
CHANNEL | : | 4 |
|
|
|
|
|
|
| ||
START PREVIEW |
|
| SEARCHING |
| |
MOVE:JOG |
| SELECT:SHUTTLE | |||
<MOTION DETECTION SEARCH> | |||||
SEARCH FROM : NORMAL |
|
| / CHANNEL : 4 | ||
| START : |
| |
1 | |||
| END | : |
|
2 | |||
3 | MOTION SENSOR | ||
4 | PREVIEW | ||
5 | VIEW |
| |
|
| MOVE:JOG | SELECT:SHUTTLE |
7 Turn the shuttle dial clockwise.
Use the jog dial to set the START date and time (example: 10.00 am on the current day) for the motion sensor setting, and then turn the shuttle dial clockwise.
The image for the specified time appears in the preview screen, and the cursor moves to the END date and time setting location.
<MOTION DETECTION SEARCH>
SEARCH FROM : NORMAL | / CHANNEL : 4 |
START :
MOTION SENSOR
VIEW
MOVE:JOG
SELECT:SHUTTLE |
<MOTION DETECTION SEARCH>
SEARCH FROM : NORMAL | / CHANNEL : 4 |
START :
MOTION SENSOR
VIEW
MOVE:JOG
SELECT:SHUTTLE |
English | 33 |