MENU FLOW CHART AND MENU OPERATIONS
 Basic menu screen operations
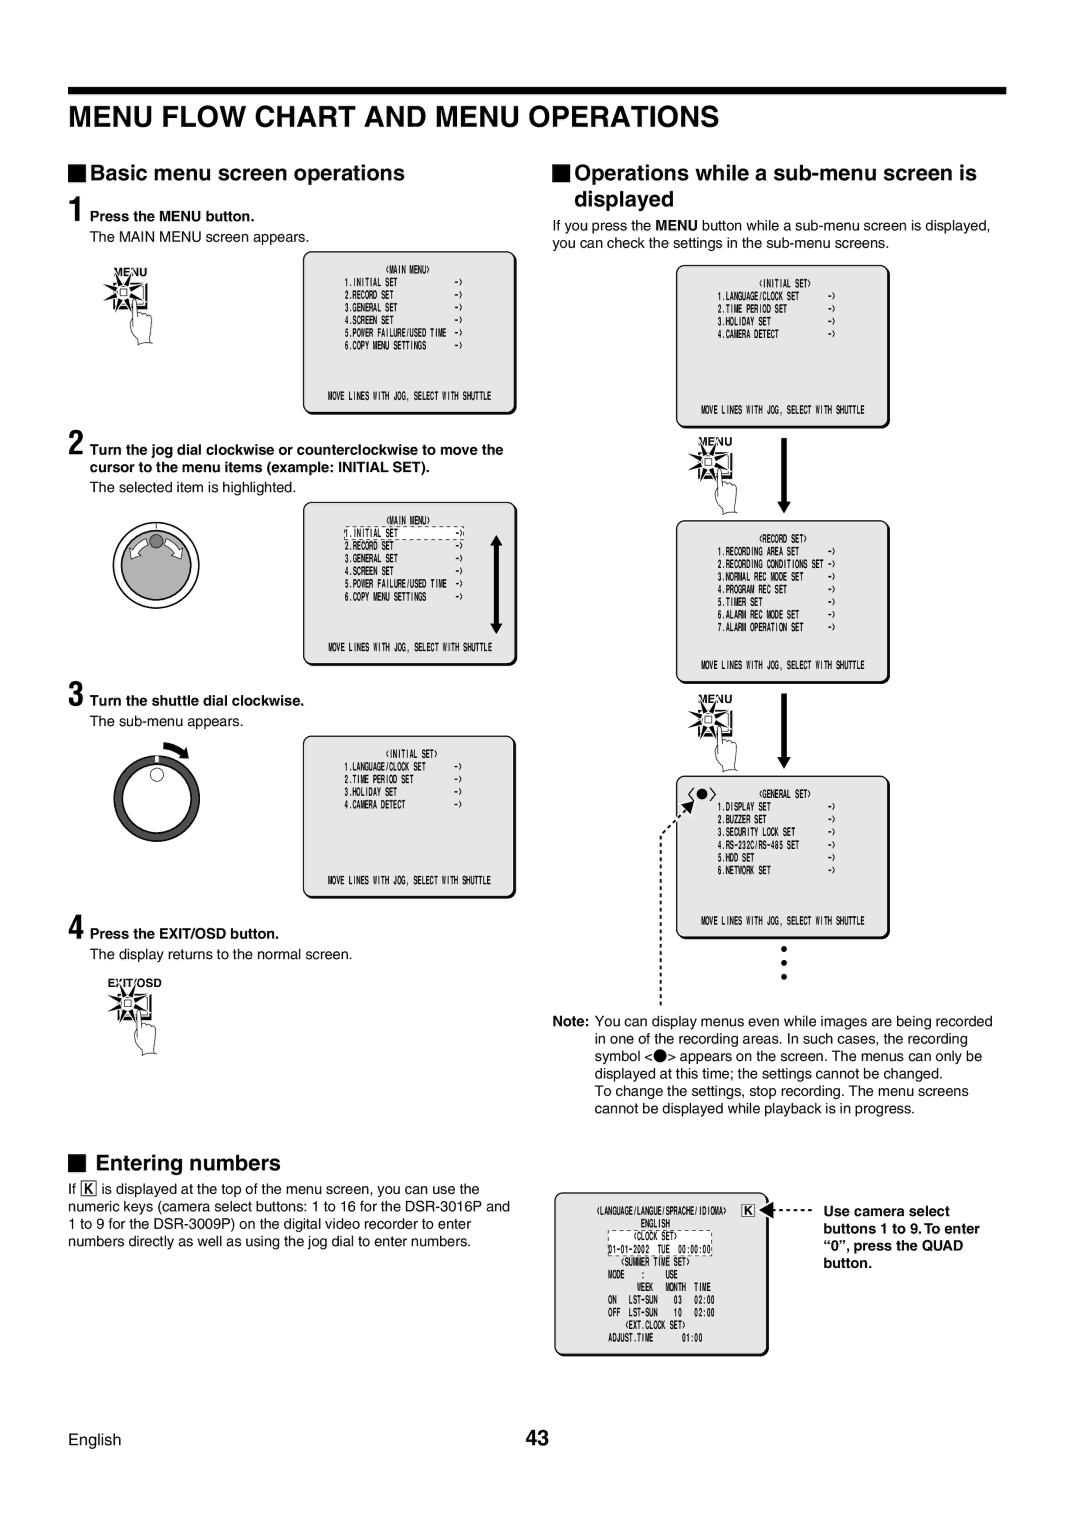
1 Press the MENU button.
The MAIN MENU screen appears.
MENU | <MAIN MENU> |
| ||
|
|
| 1.INITIAL SET | |
|
|
| 2.RECORD SET | |
|
|
| 3.GENERAL SET | |
|
|
| ||
|
|
| 4.SCREEN SET | |
|
|
| 5.POWER FAILURE/USED TIME | |
|
|
| 6.COPY MENU SETTINGS | |
MOVE LINES WITH JOG, SELECT WITH SHUTTLE
2 Turn the jog dial clockwise or counterclockwise to move the cursor to the menu items (example: INITIAL SET).
The selected item is highlighted.
<MAIN MENU>
1.INITIAL SET | |
2.RECORD SET | |
3.GENERAL SET | |
4.SCREEN SET | |
5.POWER FAILURE/USED TIME | |
6.COPY MENU SETTINGS |
MOVE LINES WITH JOG, SELECT WITH SHUTTLE
 Operations while a
 sub-menu screen is displayed
If you press the MENU button while a
<INITIAL SET> |
|
1.LANGUAGE/CLOCK SET | |
2.TIME PERIOD SET | |
3.HOLIDAY SET | |
4.CAMERA DETECT |
MOVE LINES WITH JOG, SELECT WITH SHUTTLE
MENU
<RECORD | SET> |
|
1.RECORDING AREA SET | ||
2.RECORDING CONDITIONS SET | ||
3.NORMAL REC MODE | SET | |
4.PROGRAM REC SET |
| |
5.TIMER SET |
| |
6.ALARM REC MODE SET | ||
7.ALARM OPERATION | SET | |
MOVE LINES WITH JOG, SELECT WITH SHUTTLE
3 Turn the shuttle dial clockwise.
The sub-menu appears.
<INITIAL SET> |
|
1.LANGUAGE/CLOCK SET | |
2.TIME PERIOD SET | |
3.HOLIDAY SET | |
4.CAMERA DETECT |
MOVE LINES WITH JOG, SELECT WITH SHUTTLE
4 Press the EXIT/OSD button.
The display returns to the normal screen.
EXIT/OSD
MENU
<GENERAL SET> |
|
1.DISPLAY SET | |
2.BUZZER SET | |
3.SECURITY LOCK SET | |
5.HDD SET | |
6.NETWORK SET |
MOVE LINES WITH JOG, SELECT WITH SHUTTLE
Note: You can display menus even while images are being recorded in one of the recording areas. In such cases, the recording symbol <a> appears on the screen. The menus can only be displayed at this time; the settings cannot be changed.
To change the settings, stop recording. The menu screens cannot be displayed while playback is in progress.
 Entering numbers
If K is displayed at the top of the menu screen, you can use the numeric keys (camera select buttons: 1 to 16 for the
<LANGUAGE/LANGUE/SPRACHE/IDIOMA> ENGLISH
<CLOCK SET> | ||
TUE | 00:00:00 | |
<SUMMER | TIME | SET> |
MODE | : | USE |
|
| WEEK | MONTH | TIME |
ON | 03 | 02:00 | |
OFF | 10 | 02:00 | |
| <EXT.CLOCK SET> |
| |
ADJUST.TIME | 01:00 | ||
K ![]()
![]() Use camera select buttons 1 to 9. To enter “0” , press the QUAD button.
Use camera select buttons 1 to 9. To enter “0” , press the QUAD button.
English | 43 |