Clock Setting
POWER | TIMER | DISC | OPEN/ |
| ON/OFF | TIMER | CLOSE |
ANGLE | AUDIO | CH |
|
SETUP/ |
|
|
|
FUNCTION DNR | ZOOM | INPUT | |
TITLE |
|
| MENU |
SET/
RETURNENTER
|
|
| VCR PLUS+ |
|
| TIMER PROG. | |
|
|
| REC MODE |
AM/PM |
| ERASE PROGRAM | |
100 |
|
|
|
REV |
|
| FWD |
| PLAY |
| |
REC |
|
| STILL/PAUSE |
| STOP |
| |
SKIP | F.ADV | SLOW | |
SEARCH | SKIP | ||
DISPLAY | ON | ORIGINAL/ | EDIT |
SCREEN | PLAY LIST | ||
POWER | INPUT | VOL | |
CH
TV CONTROL
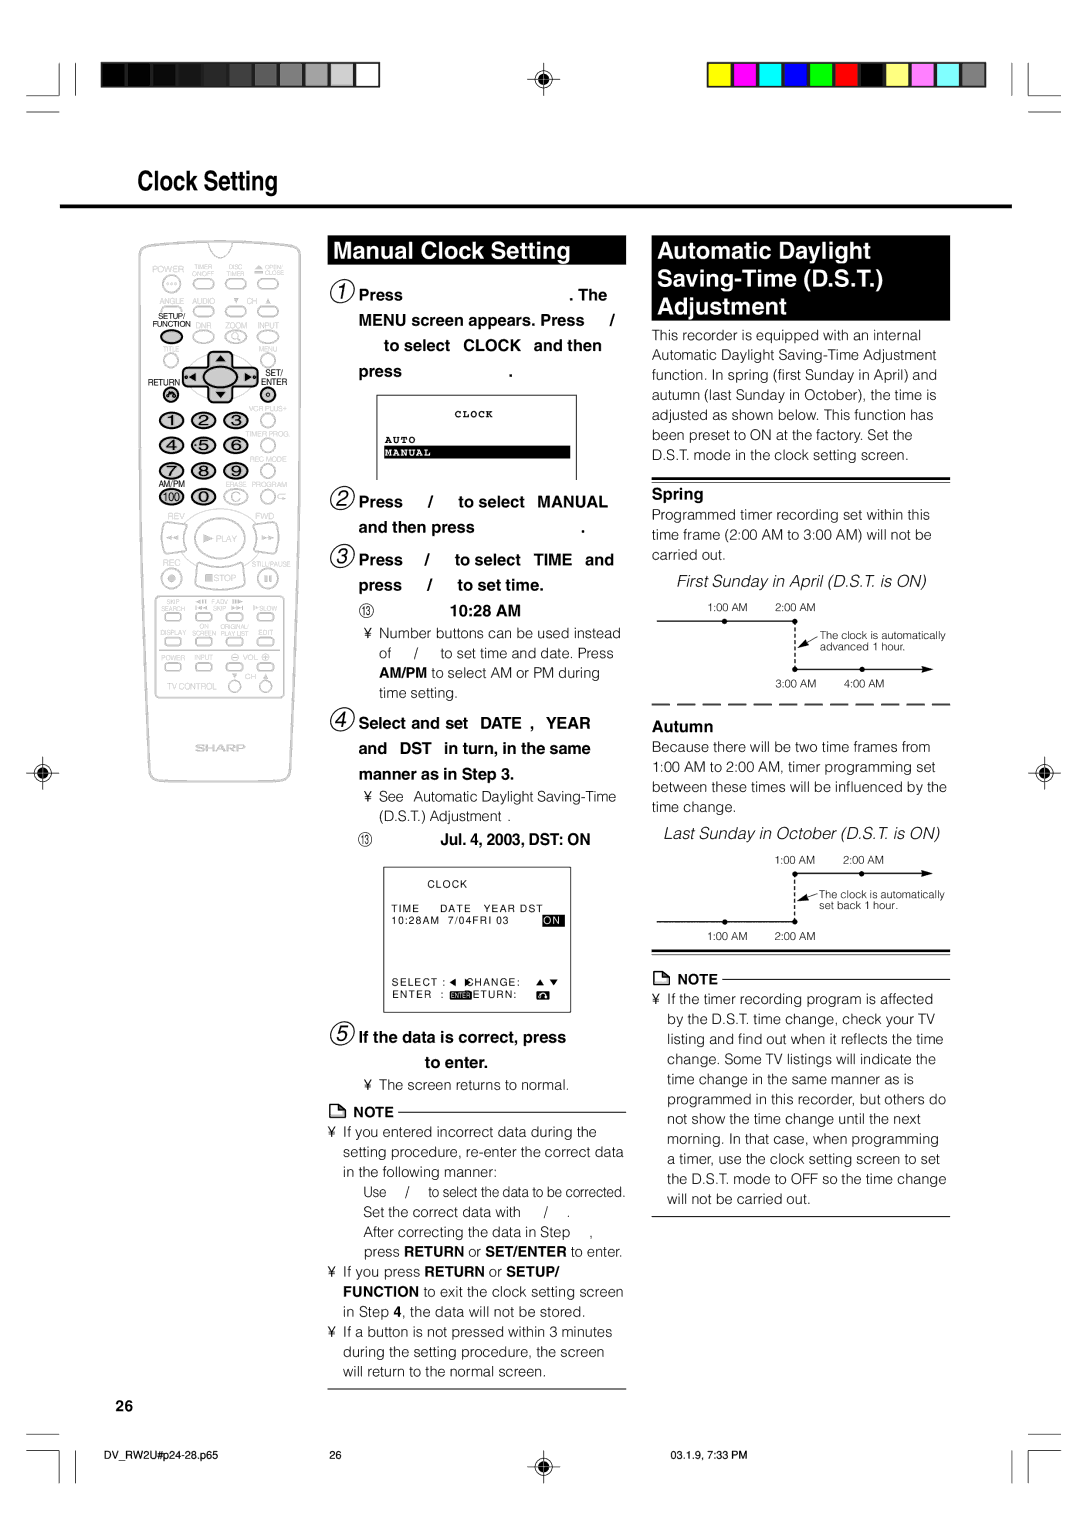
Manual Clock Setting
1 Press SETUP/FUNCTION. The
MENU screen appears. Press ' /
"to select “CLOCK” and then press SET/ENTER.
CLOCK
AUTO
MANUAL
2 Press ' / " to select “MANUAL”
and then press SET/ENTER.
3 Press \ / to select “TIME” and press ' / " to set time.
Example: 10:28 AM
•Number buttons can be used instead of ' / " to set time and date. Press AM/PM to select AM or PM during time setting.
4 Select and set “DATE”, “YEAR” and “DST” in turn, in the same manner as in Step 3.
•See “Automatic Daylight
Automatic Daylight
Saving-Time (D.S.T.)
Adjustment
This recorder is equipped with an internal Automatic Daylight
Spring
Programmed timer recording set within this time frame (2:00 AM to 3:00 AM) will not be carried out.
First Sunday in April (D.S.T. is ON)
1:00 AM | 2:00 AM |
|
|
| The clock is automatically |
|
| advanced 1 hour. |
| 3:00 AM | 4:00 AM |
Autumn
Because there will be two time frames from 1:00 AM to 2:00 AM, timer programming set between these times will be influenced by the time change.
Example: Jul. 4, 2003, DST: ON
| CLOCK |
|
|
TIME | DATE | YEAR | DST |
10:28AM | 7/04FRI | 03 | ON |
SELECT :![]()
![]() CHANGE:
CHANGE:![]()
![]()
ENTER : ENTER RETURN:![]()
5 If the data is correct, press SET/
ENTER to enter.
•The screen returns to normal.
![]() NOTE
NOTE
•If you entered incorrect data during the setting procedure,
1 Use \ / to select the data to be corrected. 2 Set the correct data with ' / ".
3 After correcting the data in Step 2, press RETURN or SET/ENTER to enter.
•If you press RETURN or SETUP/ FUNCTION to exit the clock setting screen in Step 4, the data will not be stored.
•If a button is not pressed within 3 minutes during the setting procedure, the screen will return to the normal screen.
26
Last Sunday in October (D.S.T. is ON)
1:00 AM | 2:00 AM | |
|
|
|
| The clock is automatically |
| set back 1 hour. |
1:00 AM | 2:00 AM |
![]() NOTE
NOTE
•If the timer recording program is affected by the D.S.T. time change, check your TV listing and find out when it reflects the time change. Some TV listings will indicate the time change in the same manner as is programmed in this recorder, but others do not show the time change until the next morning. In that case, when programming a timer, use the clock setting screen to set the D.S.T. mode to OFF so the time change will not be carried out.
26 | 03.1.9, 7:33 PM |