Connecting to Audio Equipment
Recording Using an
Analog Connection with a
Digital Camcorder
DVD RW |
| DVD RW |
| DVD R |
VR MODE |
| VIDEO MODE |
| |
Material from a digital camcorder can be recorded with this recorder using an analog connection between this recorder and the digital camcorder.
![]() NOTE
NOTE
•It is recommended to use the DV IN/OUT terminal when connecting a digital camcorder equipped with a DV terminal. (Refer to the section on “Recording by Connect- ing with a Digital Camcorder Using i.LINK” (page 95).)
•More vivid images can be viewed by connecting the S- VIDEO IN jack on this recorder with the
•Some camcorders may be required to be connected using a special cable.
•Refer to the operation manual provided with the camcorder for further information on the procedure for connecting the camcorder.
Recording with this Recorder
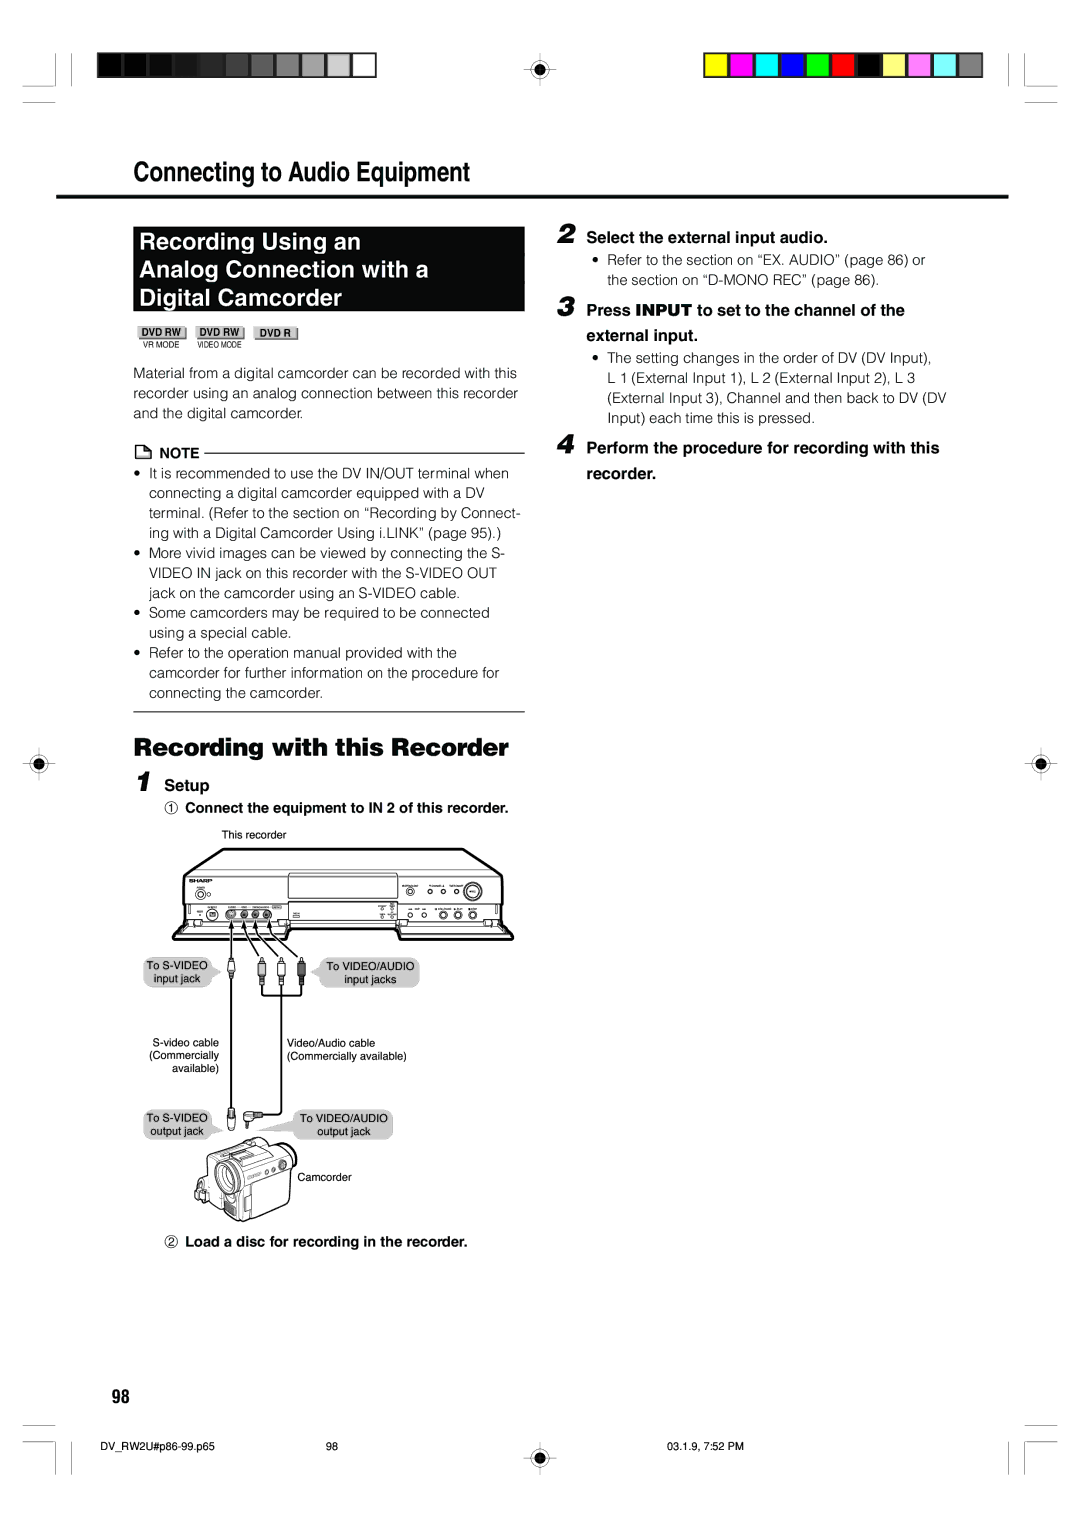
1 Setup
1ConnectThisrecorderthe equipment to IN 2 of this recorder.
PWER |
|
|
| PEN/CLOSE | CHANNEL TIMERON/OFF | REC | ||
RESET DVIN/OUT | DISCIN | STNDBY | TIMERDISCAV |
| SKIP | STILL/PAUSE PLAY | STOP | |
| TIMER | TOREC |
|
|
|
| ||
|
| ToVIDEO/AUDIO |
|
|
| |||
| Video/Audioinputcablejacks |
|
|
|
| |||
(Commercially |
| (Commerciallyavailable) |
|
|
|
| ||
available) |
|
| ToVIDEO/AUDIO |
|
|
|
|
|
|
|
|
|
|
|
| ||
outputjack |
|
| outputjack |
|
|
|
|
|
|
| Camcorder |
|
|
|
|
| |
2Load a disc for recording in the recorder.
2 Select the external input audio.
•Refer to the section on “EX. AUDIO” (page 86) or the section on
3 Press INPUT to set to the channel of the
external input.
•The setting changes in the order of DV (DV Input), L 1 (External Input 1), L 2 (External Input 2), L 3 (External Input 3), Channel and then back to DV (DV Input) each time this is pressed.
4 Perform the procedure for recording with this
recorder.
98
98 | 03.1.9, 7:52 PM |