Model SB1016/SB1036 | O P E R A T I O N | For Machines Mfg. Since 7/09 |
4-Way Tool Post
The
Tool Needed | Qty |
Tool Post | ............................................... 1 |
To load the tool post:
1.Choose the desired cutting tool.
2.Loosen the tool post bolts so that the cutting tool can fit underneath them.
Note: If necessary, place one steel shim of the required thickness underneath the cutting tool, so the cutting tip is properly aligned with the workpiece. The shim should be as long and as wide as the cutting tool
to properly support it, a set of standard automotive feeler gauges work well for this.
3.Firmly secure the cutting tool with at least two tool post bolts shown in Figure 79.
Tool Post Bolts
Top
H![]()
![]() andle
andle
Aligning Cutting Tool with Spindle Centerline
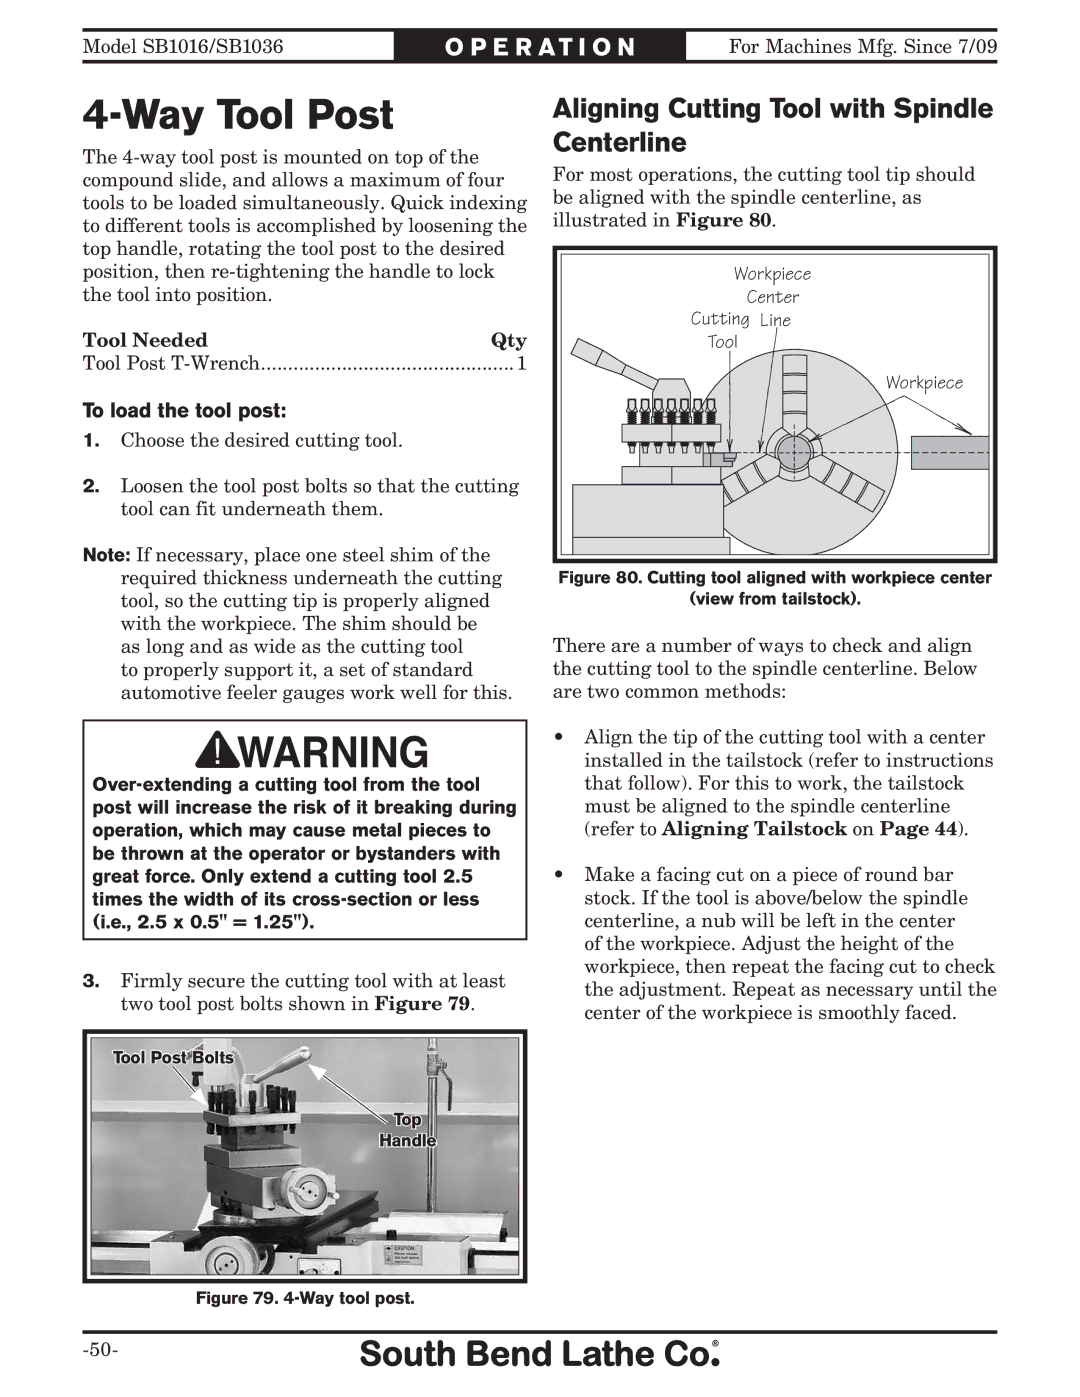
For most operations, the cutting tool tip should be aligned with the spindle centerline, as illustrated in Figure 80.
Workpiece |
Center |
Cutting Line |
Tool |
Workpiece |
Figure 80. Cutting tool aligned with workpiece center
(view from tailstock).
There are a number of ways to check and align the cutting tool to the spindle centerline. Below are two common methods:
ssAlign the tip of the cutting tool with a center installed in the tailstock (refer to instructions that follow). For this to work, the tailstock must be aligned to the spindle centerline (refer to Aligning Tailstock on Page 44).
ssMake a facing cut on a piece of round bar stock. If the tool is above/below the spindle centerline, a nub will be left in the center of the workpiece. Adjust the height of the workpiece, then repeat the facing cut to check the adjustment. Repeat as necessary until the center of the workpiece is smoothly faced.
